Roles and permissions
Roles are a critical part of ensuring the safety of the data stored in a CMS, creating efficient workflows, building independent teams. Each role has specific permissions which determine what the user is allowed to perform and view in the CMS.
With some roles in Hygraph, you do not see the developer functionality, which declutters the interface and makes sure you only see what is relevant to your role.
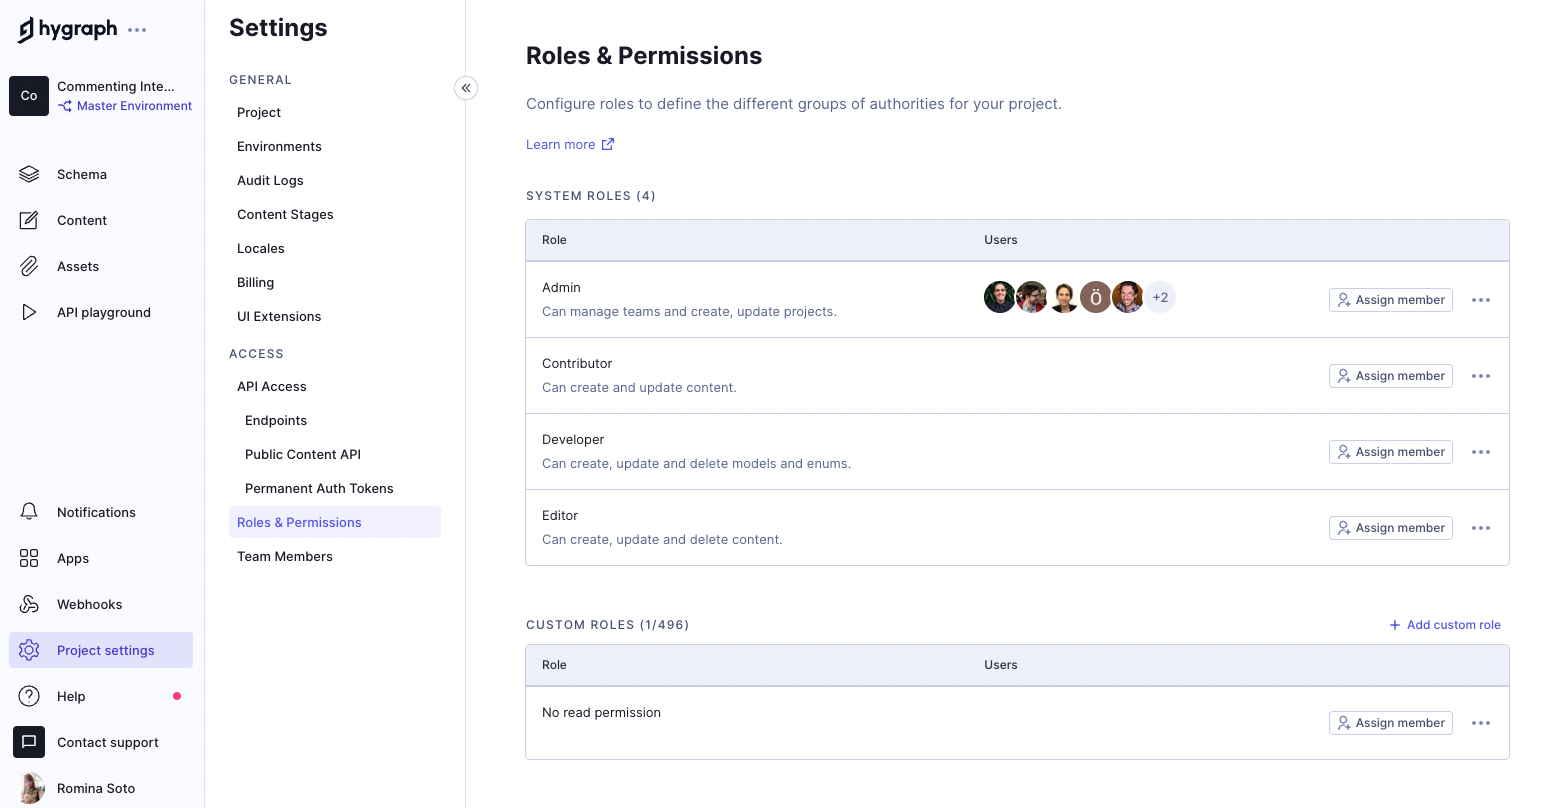 Roles and Permissions overview
Content permissions are environment specific. This means their configuration is applied per environment. Take this into consideration if you're working with a project using more than one environment.
Management API permissions are global. This means their configuration is applied per project. For instance, if a role gets a management permission to read models, people assigned to that role will be able to do so on all environments for that project.
#System roles
System roles are the default roles in Hygraph, and cannot be edited or deleted.
There are five standard system roles in Hygraph. As part of the content team, the Owner, Editor, and Contributor roles are relevant to you.
Each role has its own set of pre-defined permissions, as follows:
| Role | Rights |
|---|---|
| Owner | Admin + Ability to change billing and to delete projects |
| Admin | Developer + Ability to manage teams and create, update projects. |
| Developer | Editor + Ability to create, update and delete models and enums. |
| Editor | Contributor + Ability to delete content. |
| Contributor | Ability to create and update content. |
Since every team is different and sometimes people wear more than one hat in the company, it is possible to create custom roles.
Only Admins or Owners can view the permissions granted to each role, or assign team members to roles.
#Custom roles
Custom Roles will let you create roles that match the functionality that they need, without having to see features they don't need. Custom roles can only be created by Project Admins and Owners. These roles are fully adjustable to provide maximum flexibility in permissions for each user working on the project.
When creating custom roles, it is important to remember to select all of the Read permissions - read and read versions - in order for the user to have the required basic functionality. If Read permissions are not selected, the user won't be able to open a content entry.
Custom roles are only supported in enterprise plans.
You can find roles and permissions under settings. Click here to read more about custom roles permissions.
#Add custom role
 Add custom role
To add a custom role, click on the + Add custom role button, located at the top right corner of the custom roles form. The Add a role screen will pop up as a result.
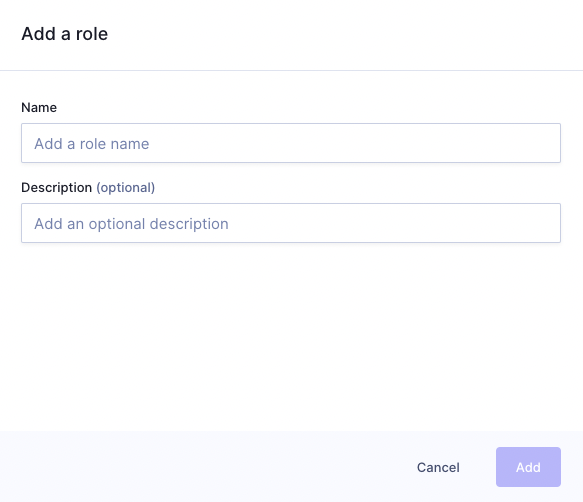 Add a role screen
Add the name of the role in the Name field, and optionally add a description in the Description field. Once you've completed this, click on the Add button to add the new custom role to the form.
When first created, custom roles are assigned basic Read permissions by default. Use the View permissions option to customize the permissions that you wish to grant the new role.
Now that you've added the custom role to your project, you can select the following options in the context menu:
#Edit custom role permissions
To edit custom role permissions, click on the View Permissions option from the context menu. The permissions screen for that role will display as a result.
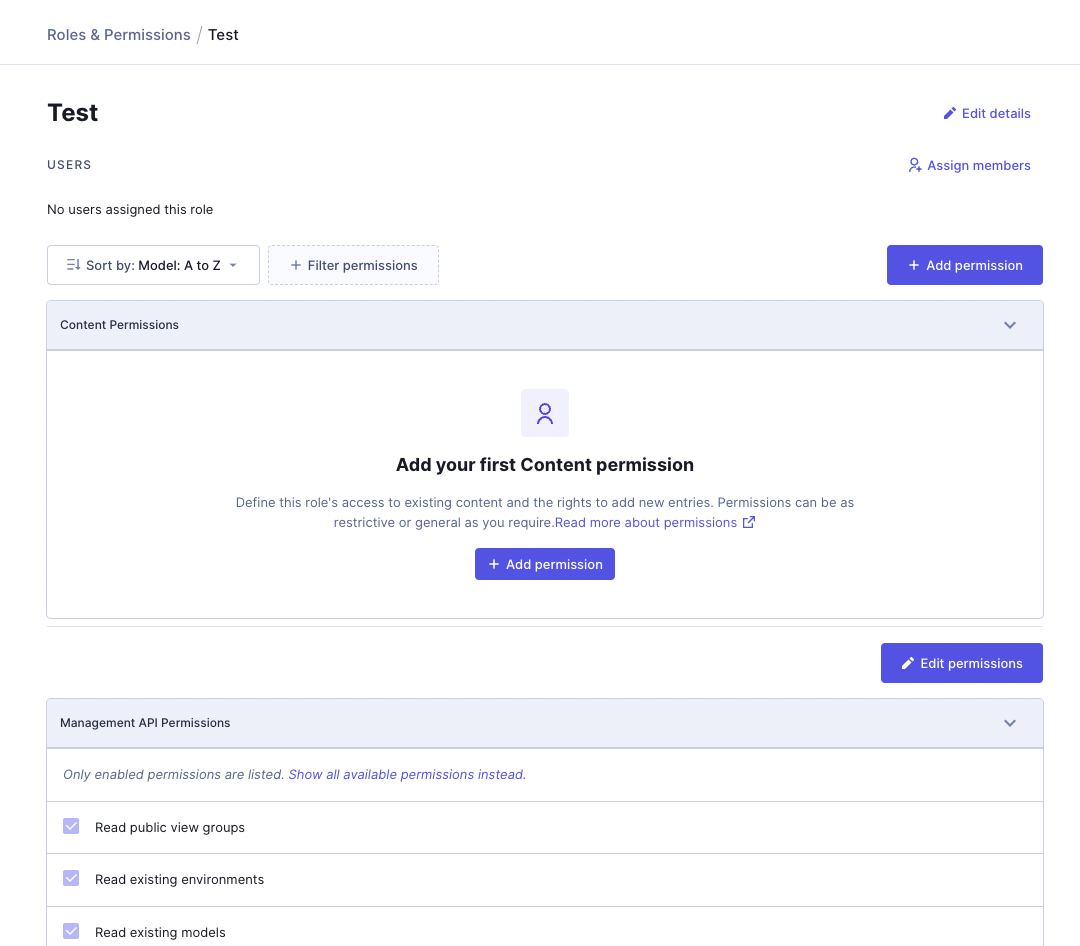 Edit custom role permissions
In addition to the actions already described for the View Permissions screen, you can add Content Permissions, and edit Management API Permissions.
Add Content Permissions
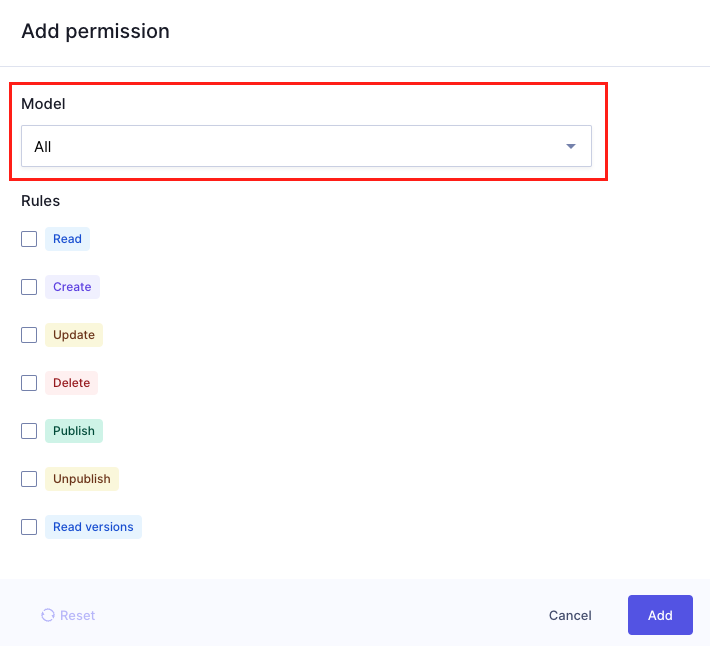
To add Content Permissions, click on the + Add permission button. The Add permission screen will pop up as a result:
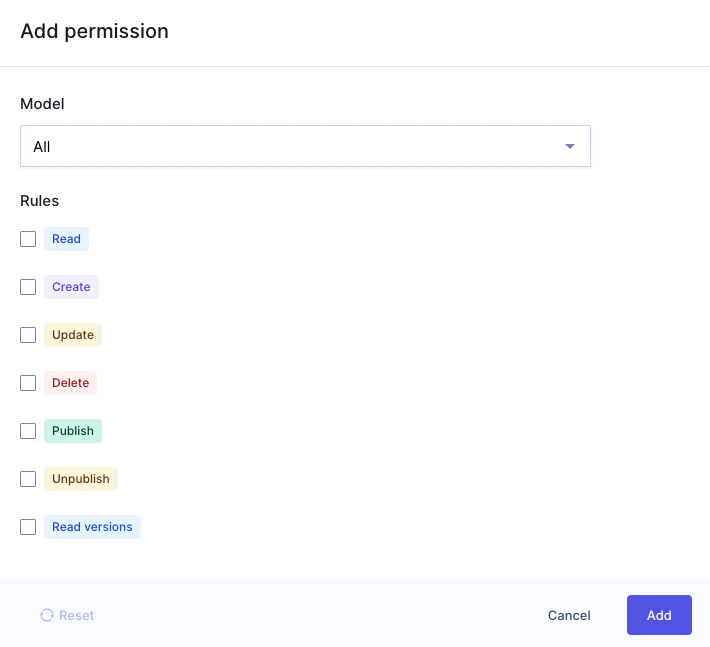 Add Content permissions
Use the Model dropdown to select the model that permissions will be applied to. By default, the action rules will be applied to all the models in your project. However, you can choose to restrict the permissions to only one model.
Next, use the checkboxes to select which content permissions should be assigned to the custom role. When you select a checkbox, additional options might display, such as dropdowns to select Locales and Stages. This will help you customize your roles further, as the configuration is extremely granular.
| Name | Permissions |
|---|---|
| Read | Minimum permission required to be able to view content entries. |
| Create | Permission to create new content entries and save it. |
| Update | Permission to make some changes to already existing content entries and save the changes. |
| Delete | Permission to delete a content entry. |
| Publish | Permission to publish content. |
| Unpublish | Permission to unpublish content. |
| Read versions | Permission to view versions of content. |
You have the option to use the Reset button located at the bottom left corner of the screen to reset the permissions to their default state.
Once you have set the permissions for the role, click on Add to finalize the process.
Edit Management API Permissions
To edit Management API Permissions, click on the Edit permissions button. The Update role screen will pop up as a result:
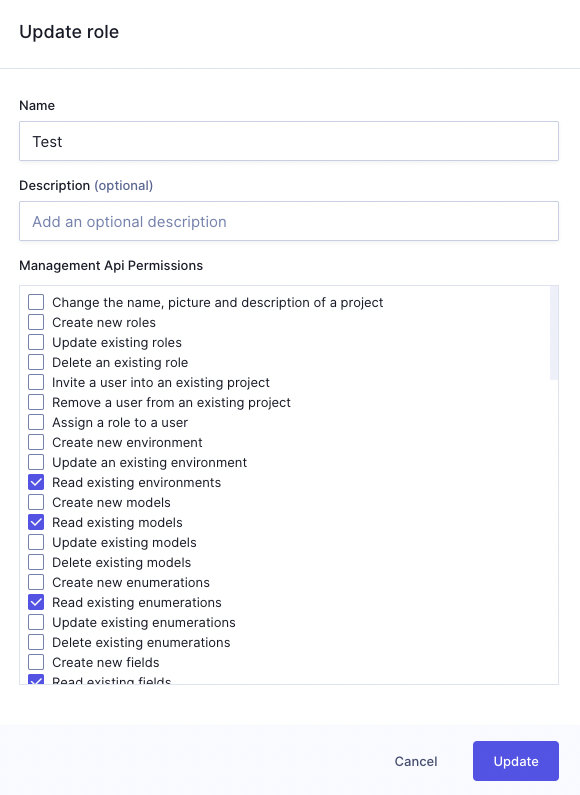 Edit Management API permissions
Here you can edit the Name and Description you previously set for your role. Under these fields, there is a list of Management API permissions, that you can select using the checkboxes.
Basic Read permissions are selected by default, as they are necessary for the user to have the required basic functionality. You can edit this - if needed - and select other permissions as well.
Once you have selected the permissions for the role, click on Update to finalize the process.
In case of a read-only role, you won't have to select any further permissions, as they are selected by default.
If you are setting up a publisher role, then you should allow additional Update and Publish permissions.
#Delete a custom role
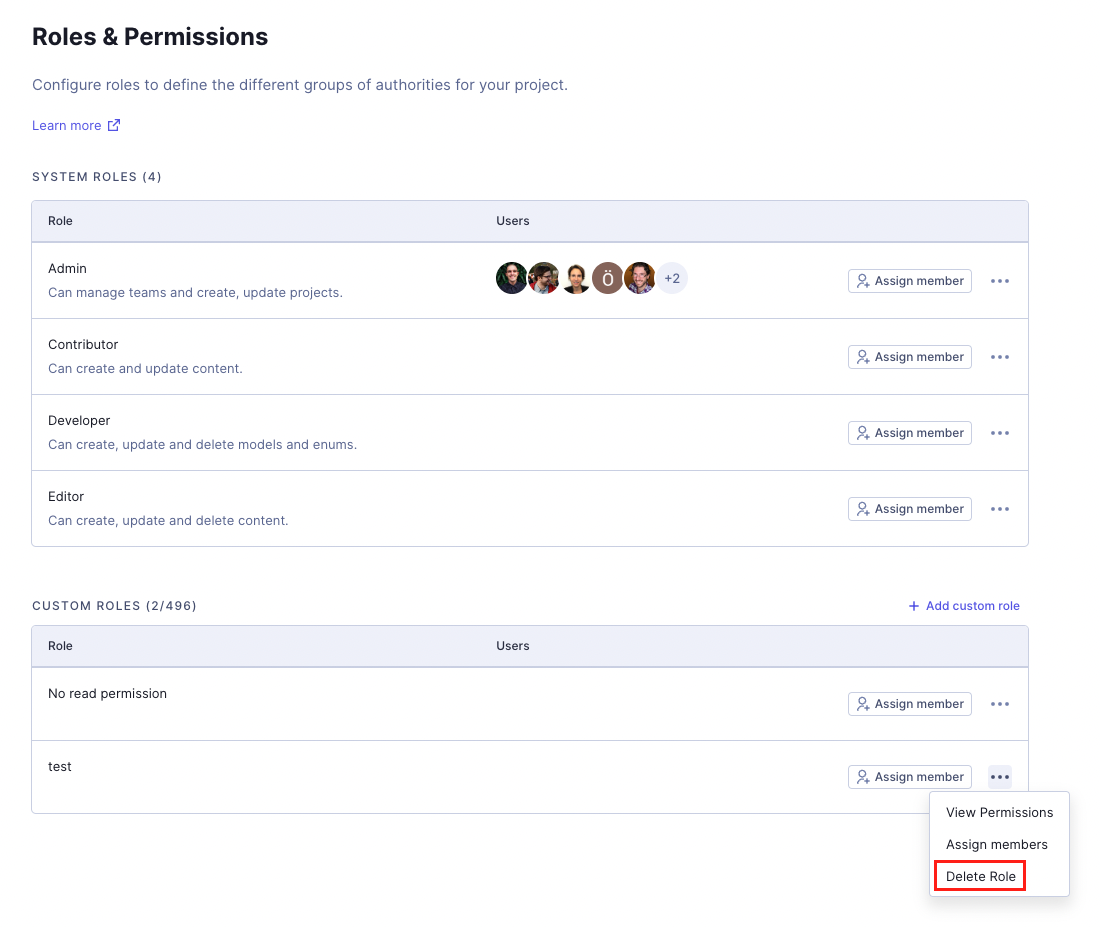
While system roles cannot be deleted, custom roles can. To delete a custom role, select the Delete role option from the context menu.
 Delete a custom role
As this action cannot be reverted, a confirmation screen will pop up.
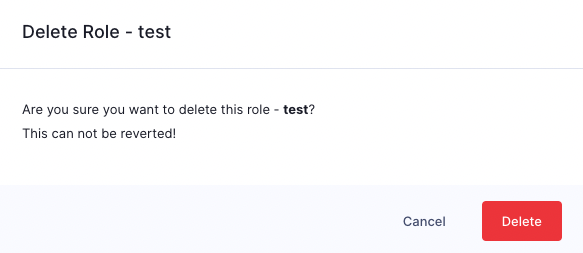 Delete a custom role - confirmation
Click on the Delete button to confirm.
#Assign members
Follow these instructions to assign a team member to a role:
- Click on the context menu corresponding to the role you wish to assign a team member to.
- Click on the
Assign membersmenu option. - Select one or more team members using the checkboxes.
- Click on
Assign.
If all team members associated to the project have already been added to a role and you attempt to follow this process, a popup will let you know. You can click on the + Add team members button on that popup to invite new people to the project.
If the person you wish to assign to the role has not yet been invited to be a team member in the current project, you can do as follows:
- Click on the
Assign memberbutton corresponding to the role. Alternatively, you can click on the+ Add team memberslink located at the bottom of theAssign members to rolescreen previously shown. - The
Add team members to your projectpopup will display. All you have to do here is follow our standard team member invitation process.
Users will have 14 days to accept the invite.
Only Admins or Owners can invite users to a project.
#View permissions
To view all the Content & Management API permissions associated to a role, select the View Permissions option from the context menu. A screen will display listing all the granted permissions for that role.
You can sort the permissions alphabetically by model or action, and you can filter them by actions, models, locales, and stages.
You also have the option to assign new members to the current role from this screen, by clicking on the Assign members button located at the top right corner of the screen. Clicking on this button triggers the Assign member flow that we described in the previous section.
Permissions for system roles are read only, but you can edit the permissions granted to custom roles.
#Removing a user
To remove a user from a specific role, Navigate to Project settings > Access > Team Members, locate the user on the list, and select the Change role option from the context menu.
 Remove a user from a role
The list of roles for that user will become editable. Simply click on <name-of-the-role> X to remove it, then click on the Update button to finalize the process.
 Remove a user from a role
#Examples
This document section provides some examples for different setups.
-
Check out our documentation on approval workflows to learn how to set up approval workflows using 2 or 3 content stages.
-
If you need further assistance with your setup, please contact our Support team.
#Read-only user
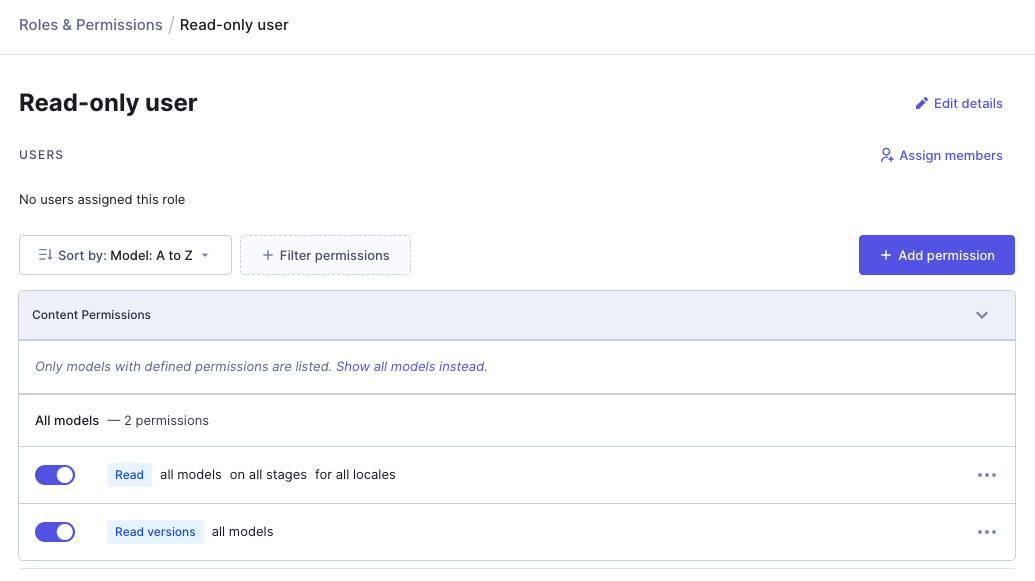
This example shows the setup of a read-only permission on all models, on all locales and stages.
 Read-only user
Content API permissions:
Model dropdown:Select all.Read:Select this rule for all locales and all stages.Read versions:Select this rule.
For this type of read-only permission set up, the Management API Permissions will have already been pre-selected - by default - and you do not have any further setup to do.
#Read and publish setup
For a Read and Publish permissions setup, you must first set up the Content API permissions.
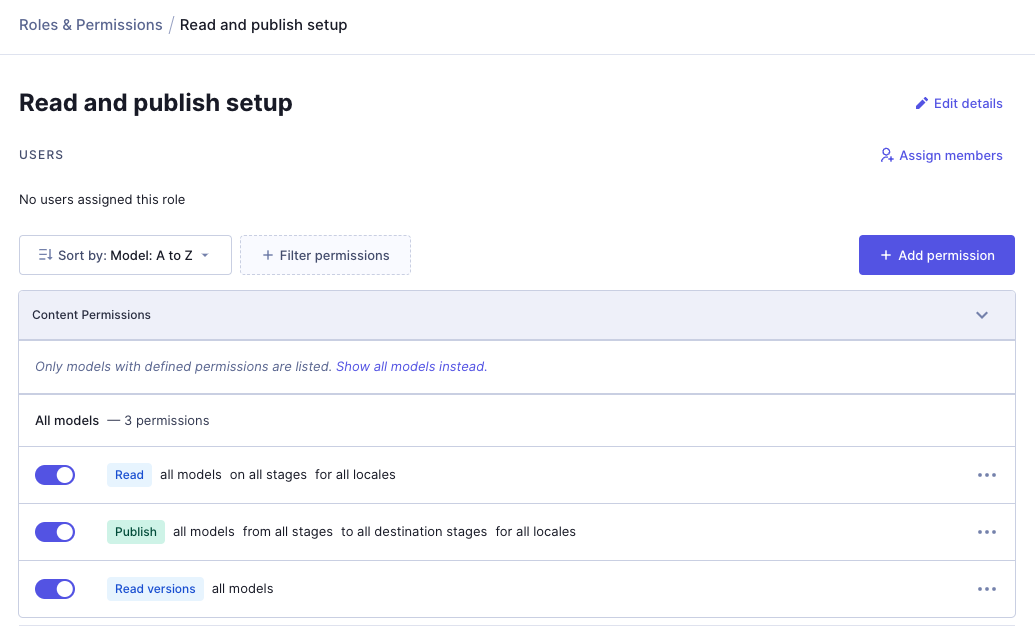 Read and publish setup
Content API permissions:
Model dropdown:Select all.Read:Select this rule for all locales and all stages.Publish:Select this rule from all stages, to all destination stages, with all locales.Read versions:Select this rule.
Once the Content API permissions are set, use the checkboxes below to select the following Management API Permissions:
- Update published entries
- Create new entries
- Publish non published entries
- Update existing non published entries
- Delete existing entries
As the list of Management API Permissions is very long, we suggest you use the key command for find (Ctrl+F or command+F) to display where these permissions are mentioned on the page.
#Setup by models
You can choose to restrict the permissions to access only one model.
To do that you should click on the Model dropdown menu, and select the model desired for this custom role.
 Setup by models
Selecting multiple models at once is not supported, unless that selection is All. If you want to create the same permissions on two models, you need to set up custom roles for each model.
In order to allow a role to Read/Create/Update/Delete/publish/unpublish a model that references other models, you need to provide the minimum set of permissions for all the referenced models used in the parent model. This means adding Read and Update to sub-models (referenced models).
#Setup by locales
If your project has several locales, then you can set up the permissions on all locales, only one, or several ones.
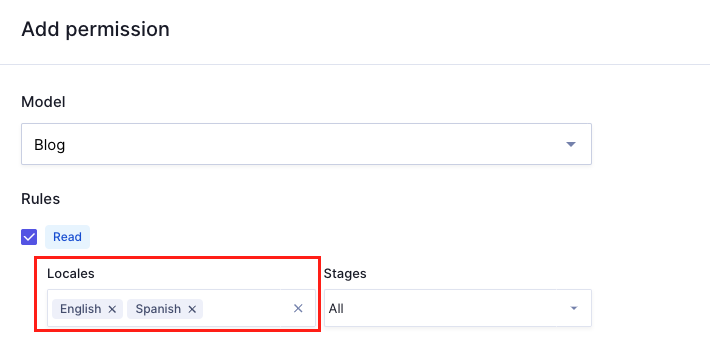 Setup by locales
When selecting a rule, simply select the locale or locales you wish to grant access to from the dropdown menu.
At the moment, it is necessary to grant permissions to your team members for the default locale too.
#Setup by content stage
Your project is created with two content stages by default (DRAFT and PUBLISHED). You can, for example, choose to restrict the permissions to DRAFT stage, or only allow a role to publish from the DRAFT stage to an intermediate QA stage before publishing.
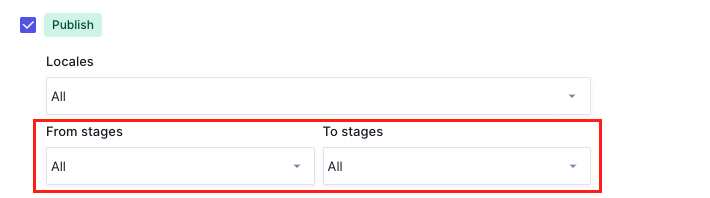 Setup by content stage
Simply use the dropdown menus to select From stages and To stages.
#Setup by environment
Every Hygraph project has its main environment, or master environment. By default, when creating a content based permission, the role will be created on all your environments at the same time, in an identical way.
However, you can set up different permissions per environment. For instance, you can set up a role that allows users to publish on a secondary environment and has read-only permissions on the master environment.
Please note that Management API Permissions apply to the overall project, but Content Permissions apply to each environment.
This document explains how to switch environments.
To set up the use case described above, follow these steps:
- Go to your master environment
- Set up a role on the master environment as a
read-onlyrole, as described here. - Go to your second environment.
- Go to the custom role you have just created, and select
View Permissionsfrom the context menu, so you can edit them. - Edit the Content API Permissions: To the
Readpermissions, you will add thePublishingandUnpublishingpermissions. - Edit the Management API Permissions: At the moment only
Readpermissions are selected, so you will have to add thePublishingpermissions, as described here.
#Conditions
You can use conditions to grant some users less access than others. For the following example, imagine you want to set up the role permission for one model only and, additionally, you want users in this role to have access to only one content entry of this model and fields related to it.
You can do this by using content conditions. You can use fields like id for certain content entries to grant users in this role the ability to create/update/delete/publish a specified entry. The setup would be then similar to this example:
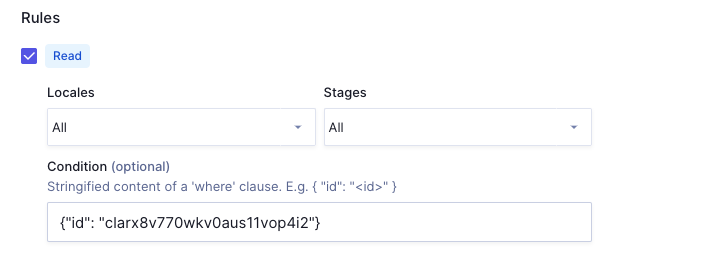 Conditions
The condition shown above would grant the user permission to read the content entry with this particular id.
Please note that you need some GraphQL knowledge to be able to set up conditions. This document offers further information on permission conditions.
#Resources
You might find the following documents useful:
- Permissions: This document contains information on permissions, how they work, and their limits.
- Authorization: This document contains information on public API permissions, permanent auth tokens, and API endpoints.
- API access: This document covers the API access section of the Hygraph app as well as its subsections: Endpoints, Public content API, and Permanent auth tokens.