Content microservices are a specialized form of microservices in software architecture that focus on content management tasks like storage, transformation, and delivery. They let you decouple content management from your application’s core logic, ensuring efficient content distribution across various platforms and channels.
This tutorial explores content microservices and how they work behind the scenes. You’ll also learn how to leverage the Hygraph remote source feature to create content microservices instead of building one from the ground up, as well as how to retrieve such content in a Remix application.
#Content microservice with Hygraph and Remix
Setting up a content management microservice from scratch is no small feat. Leveraging Hygraph can significantly streamline the process of creating content microservices using its Content Federation feature. It allows you to integrate content from multiple remote sources seamlessly, providing a unified API to fetch, manage, and deliver content across applications.
To try things out, we’ll create and configure a Hygraph application to retrieve external eCommerce data from the Platzi Fake Store GraphQL API alongside the data provided by Hygraph's commerce shop template. We’ll then render them in a Remix application.
#Content Federation with Hygraph
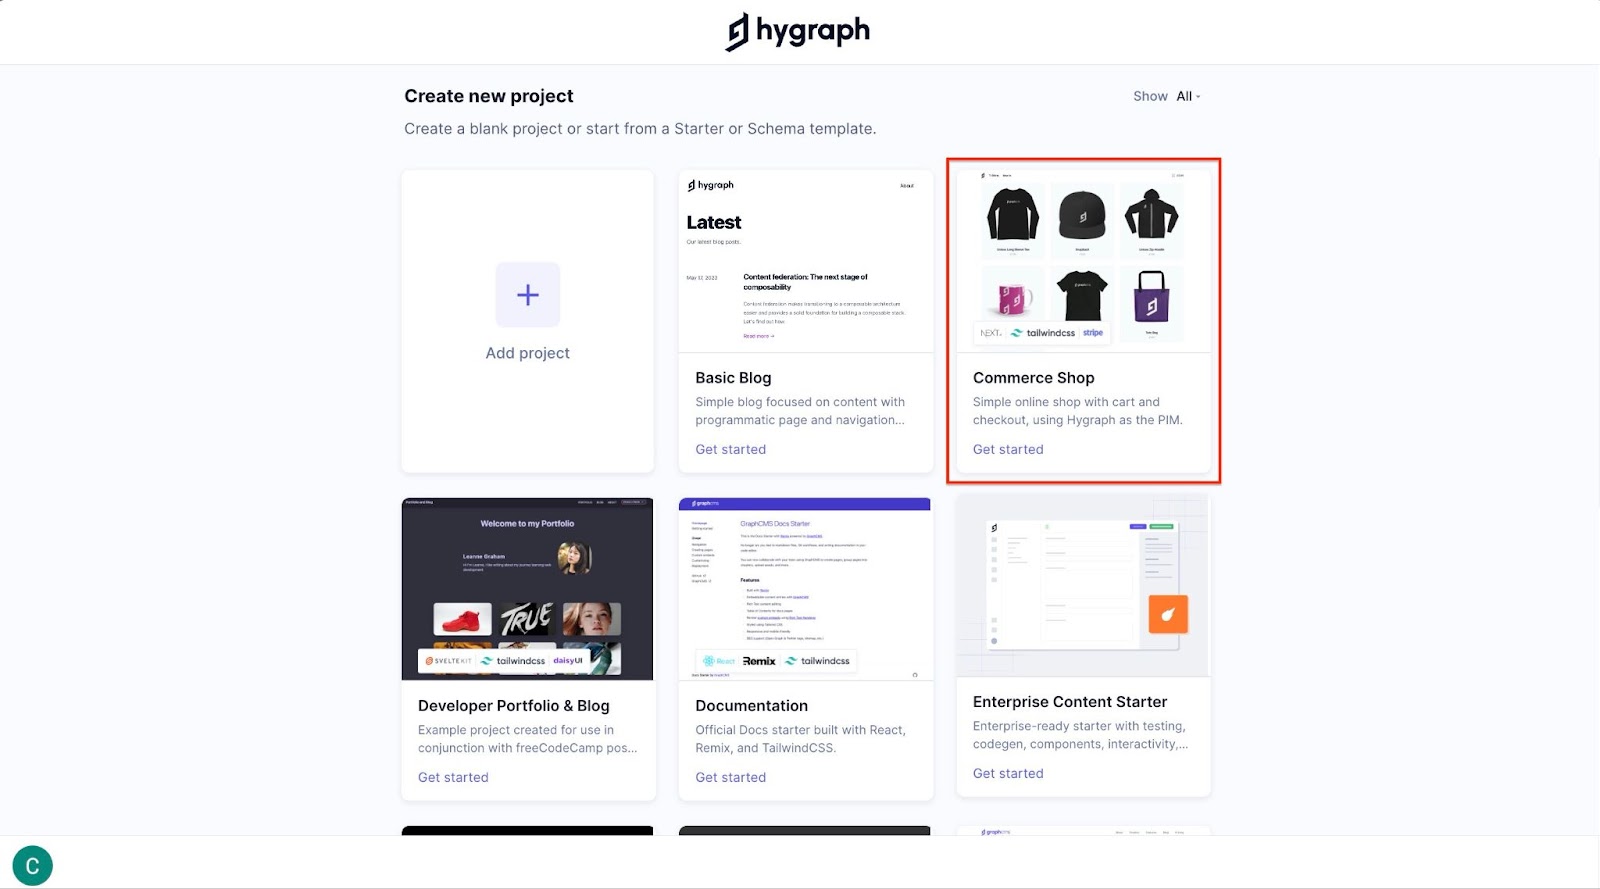
Let’s proceed with setting up our content microservice on the Hygraph platform. If you haven’t already, create a free-forever account, navigate to the new project page, and select the Commerce Shop template, as shown in the image below.
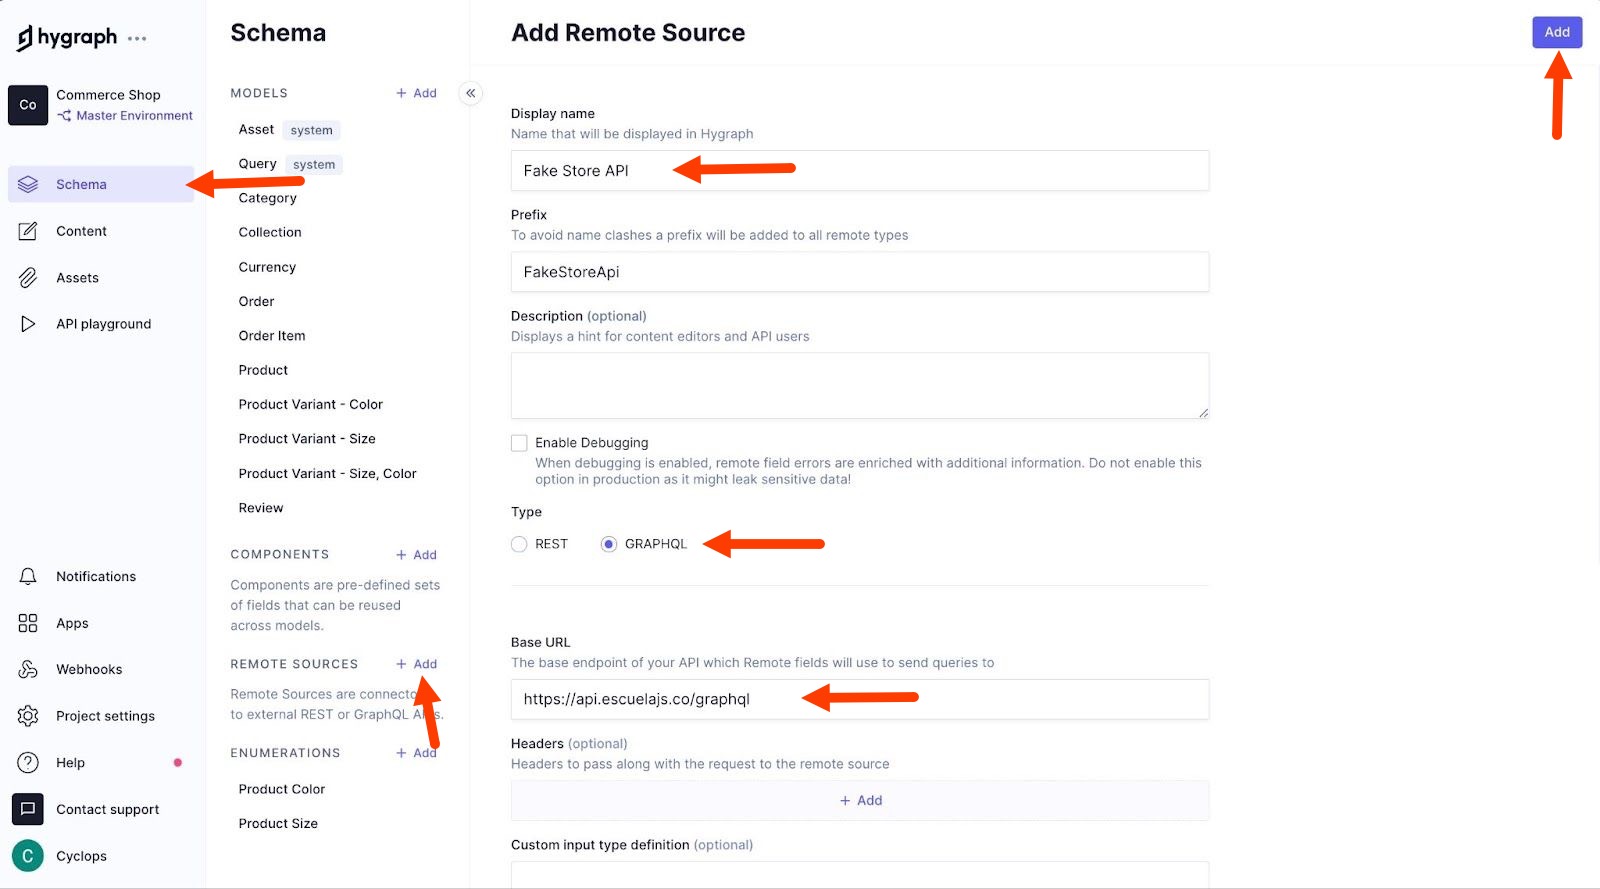
Configure the project details as preferred and click the + Add project button to continue. Next, navigate to the Schema builder on the left sidebar of your Hygraph dashboard, locate Remote Sources, and then click the Add button next to it.
Fill in the details for the new remote source and set its type to GRAPHQL, as shown in the image below.
The data is also shown below for enhanced accessibility:
- Display name: Fake Store API
- Prefix is automatically generated
- Base URL: https://fakeapi.platzi.com/
Hygraph provides additional options for users to pass headers, including API keys and other authentication parameters, ensuring secure communication with the remote source URL. Additionally, you can define the structure of your remote source data using GraphQL schema definition language (SDL), allowing for custom type definitions and tailoring the integration to your specific requirements.
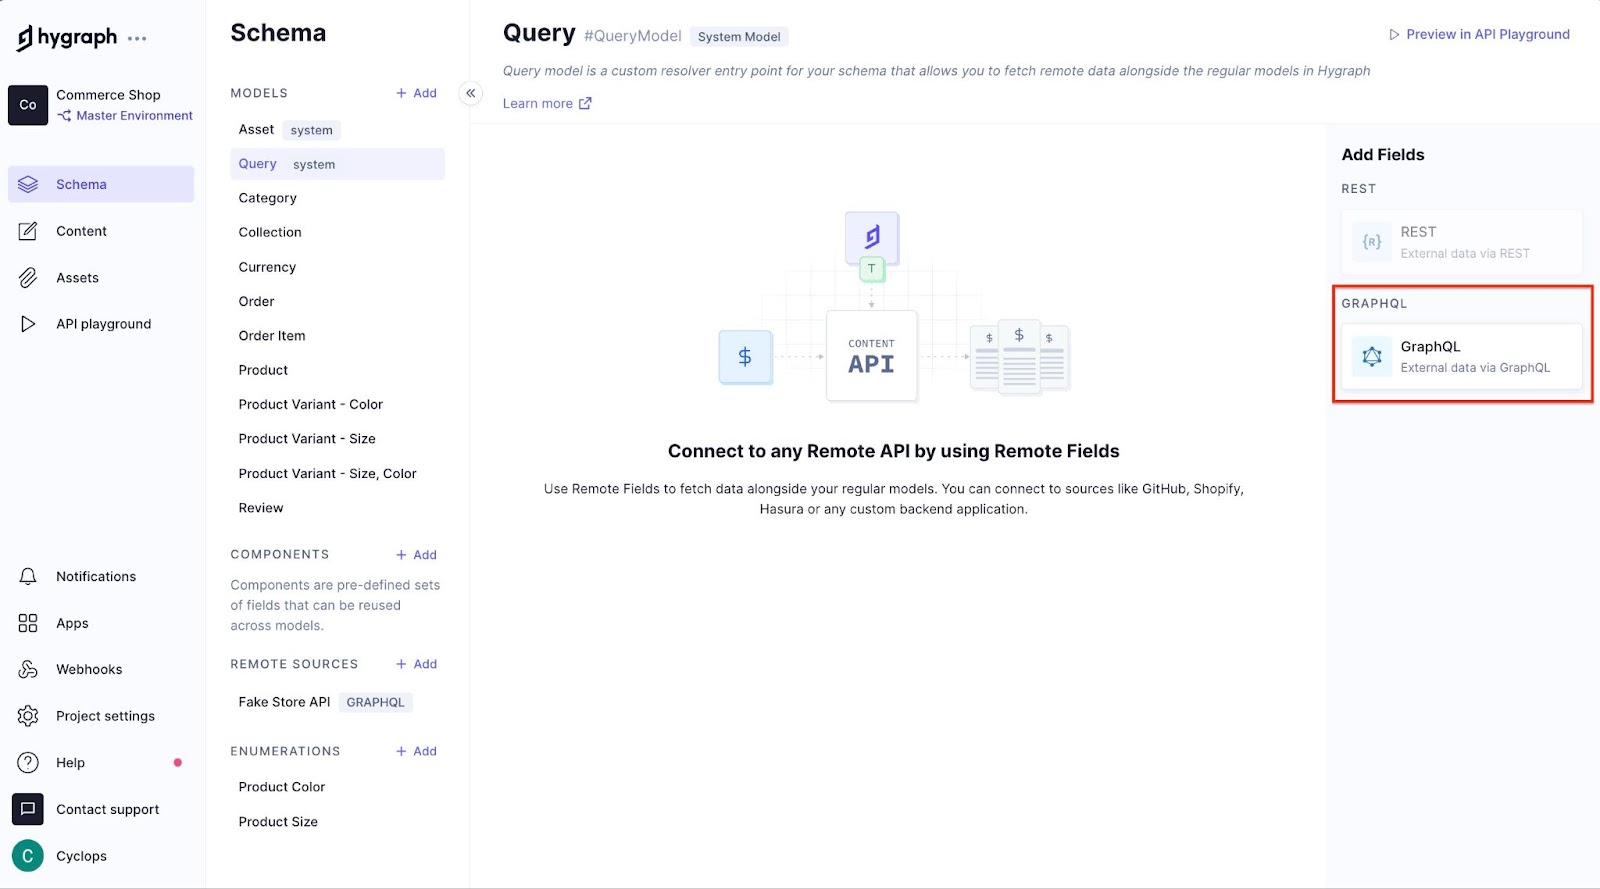
Next, you’ll need to add a new data field for our remote source to fetch data alongside the regular models in Hygraph. Navigate to the Schema > Query tab and click the GraphQL section, as shown below.
Next, set the display name for this new data field and ensure the remote source is the same as you created earlier. Additionally, under the Query field, select Product since we’re trying to set up a query to access the products from the Platzi API. The API ID is generated automatically, and you can set the other configuration options to your taste.
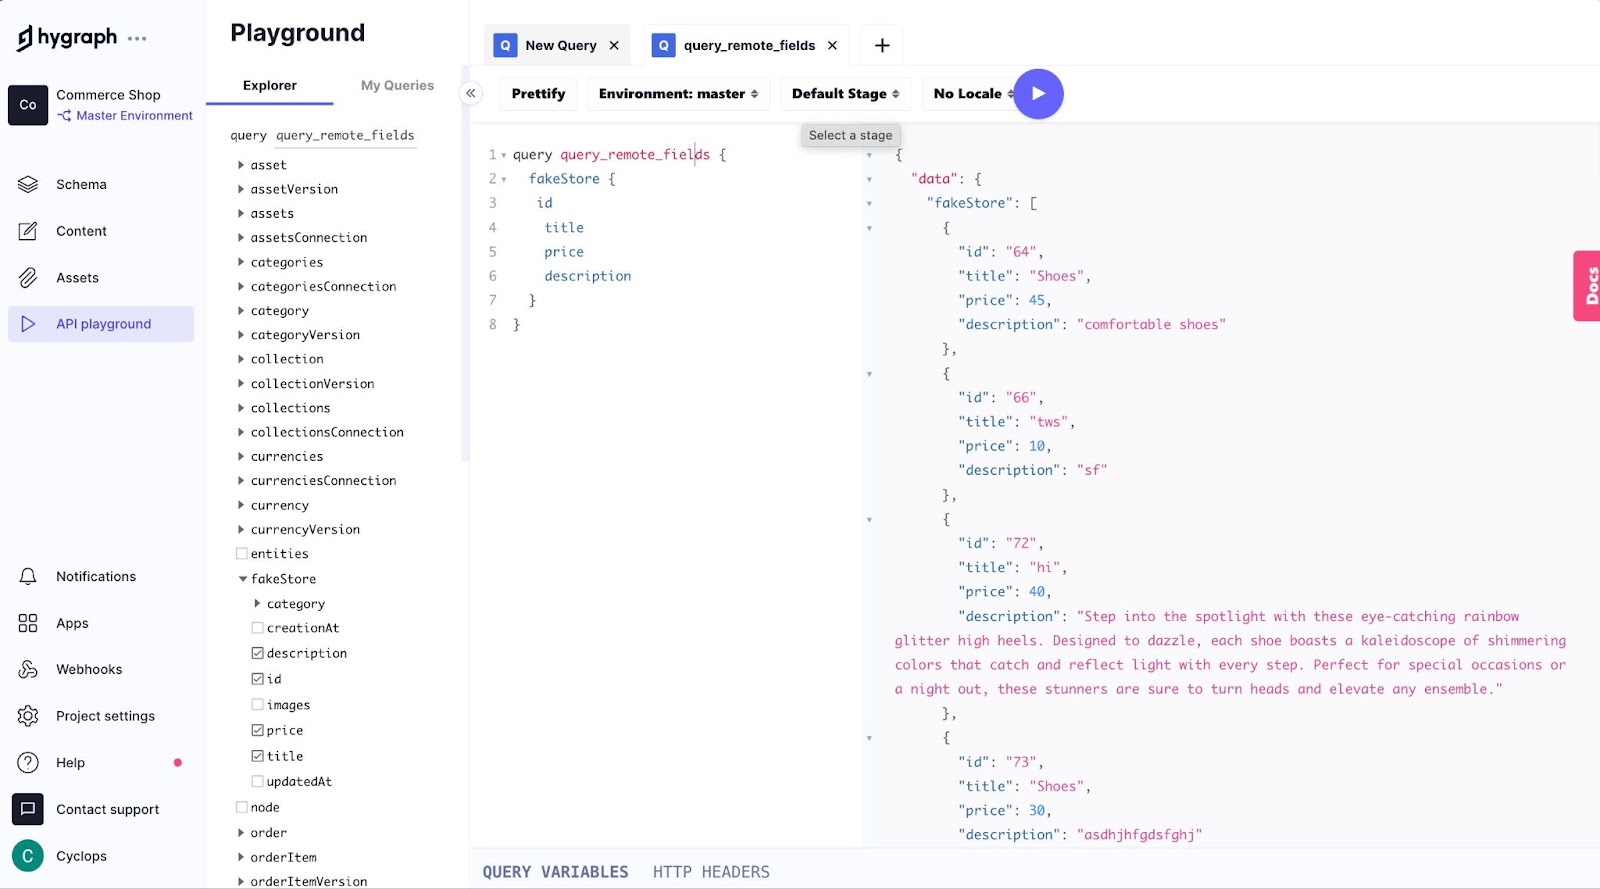
To proceed, click the Add button, and we’re done integrating our basic content microservice! You can already navigate to the Hygraph API playground and start interacting with the data from our remote source, as shown in the image below.
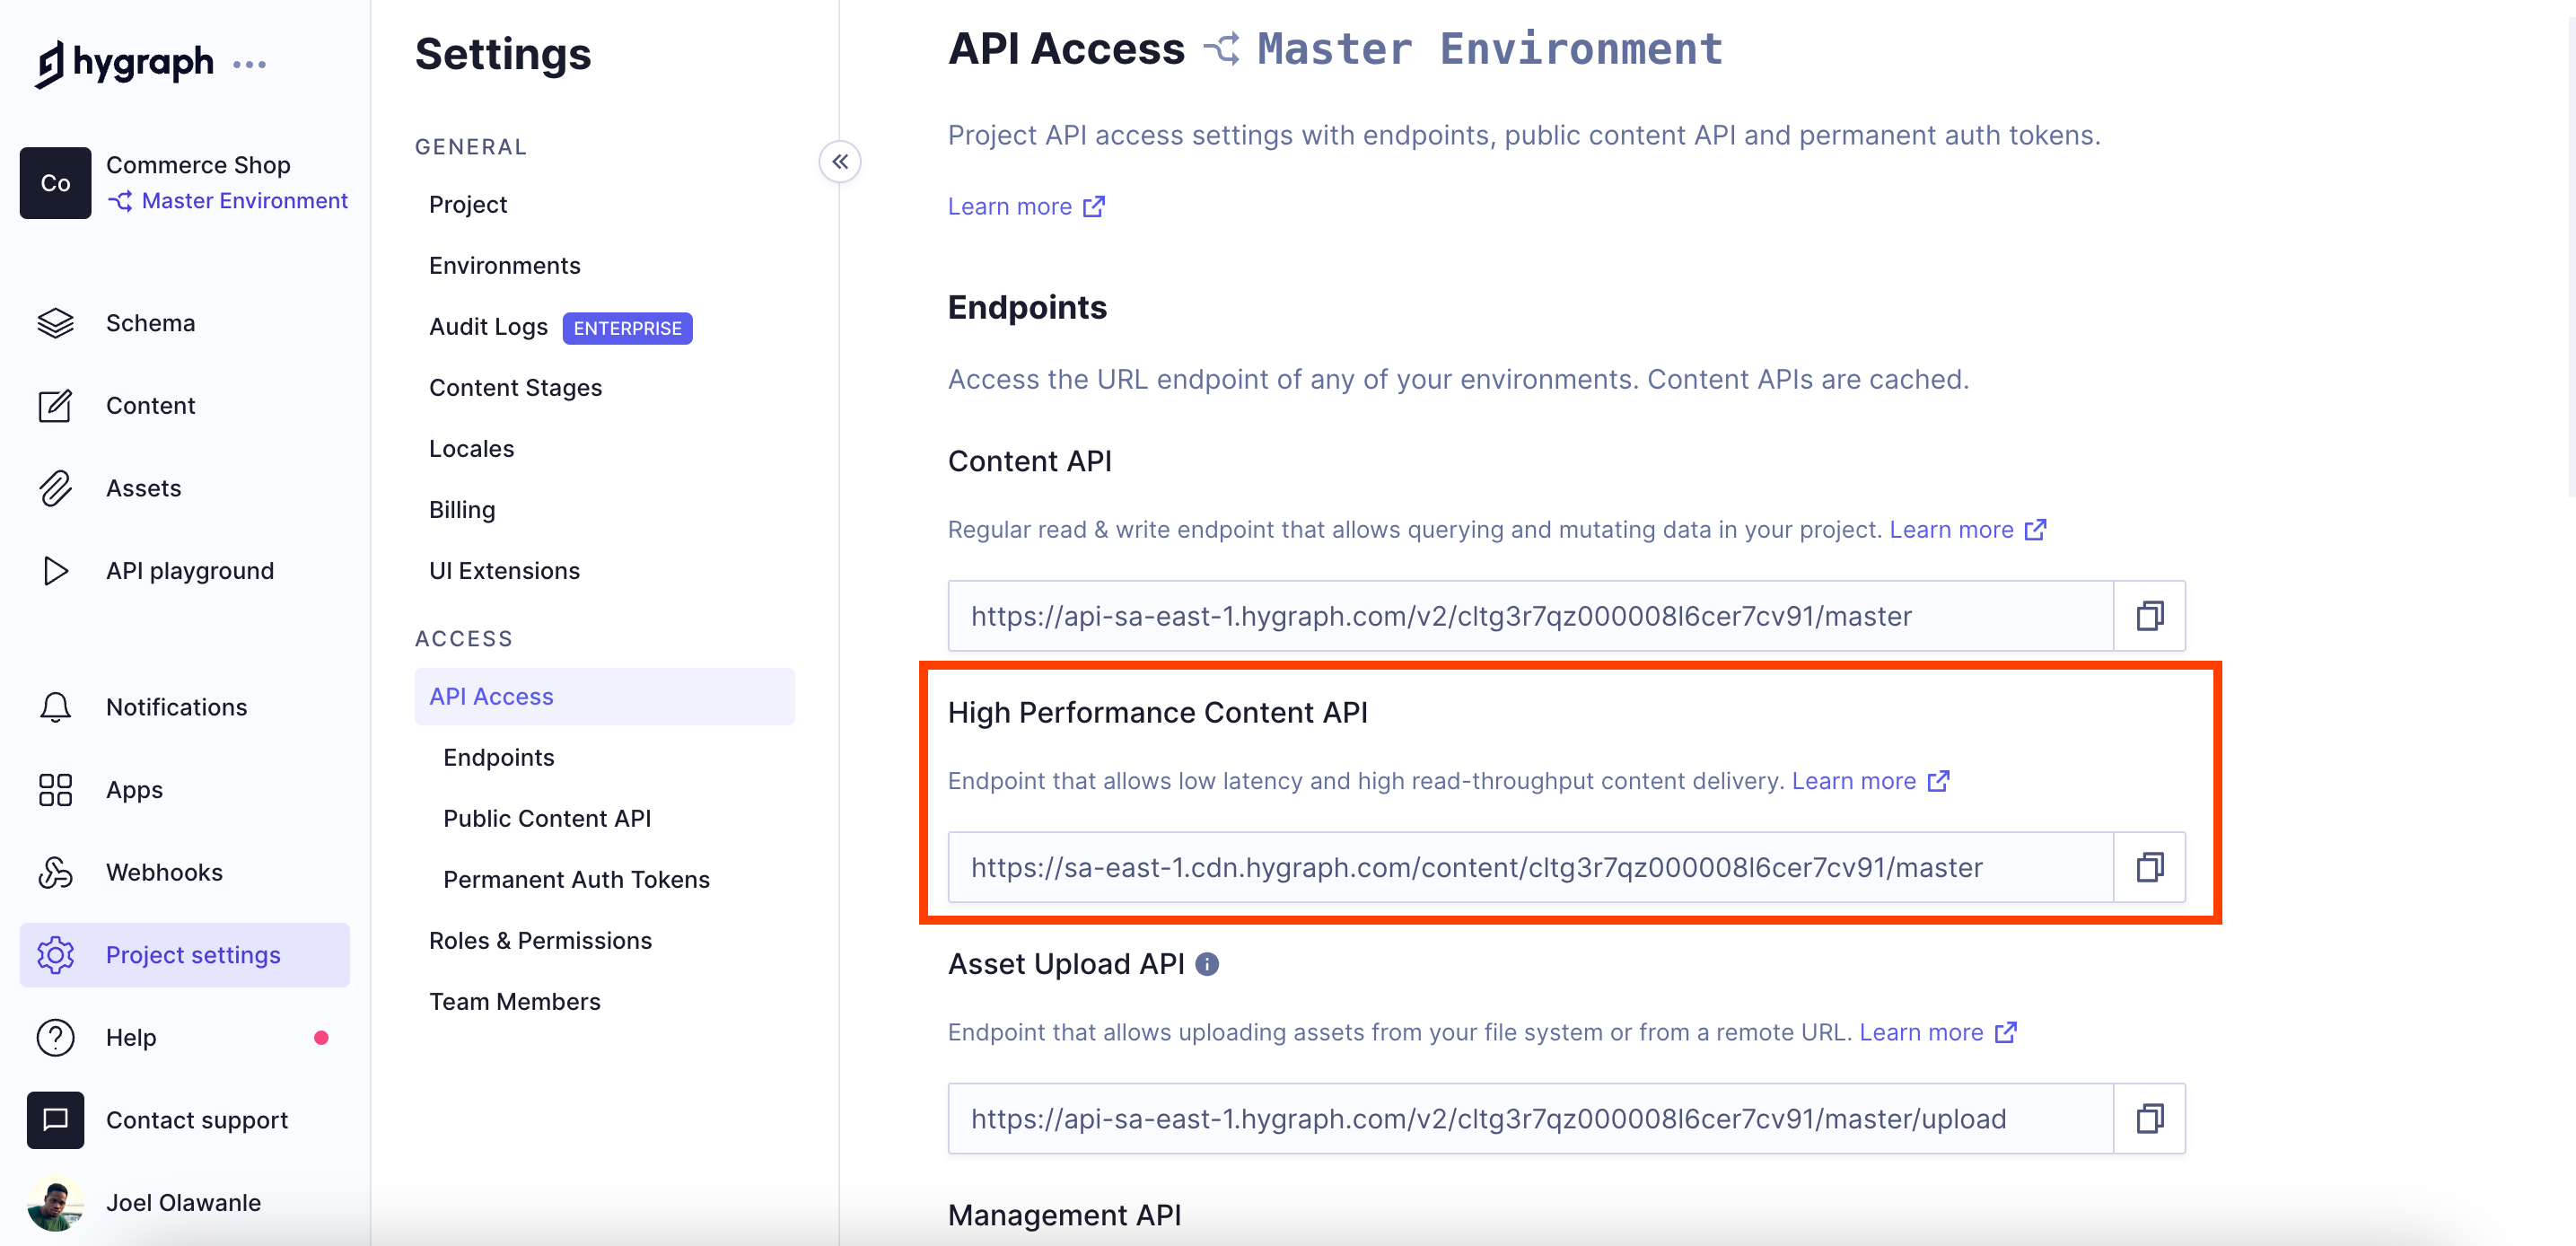
Finally, you must retrieve the content API endpoint to fetch this data remotely from any application. Navigate to your Project Settings > API Access and copy the High-Performance Content API URL shown in the image below.
Keep this URL in a safe space for now; in the next section, we will dive into fetching data in our Remix application.
Recommended reading
#Fetching Hygraph content in Remix
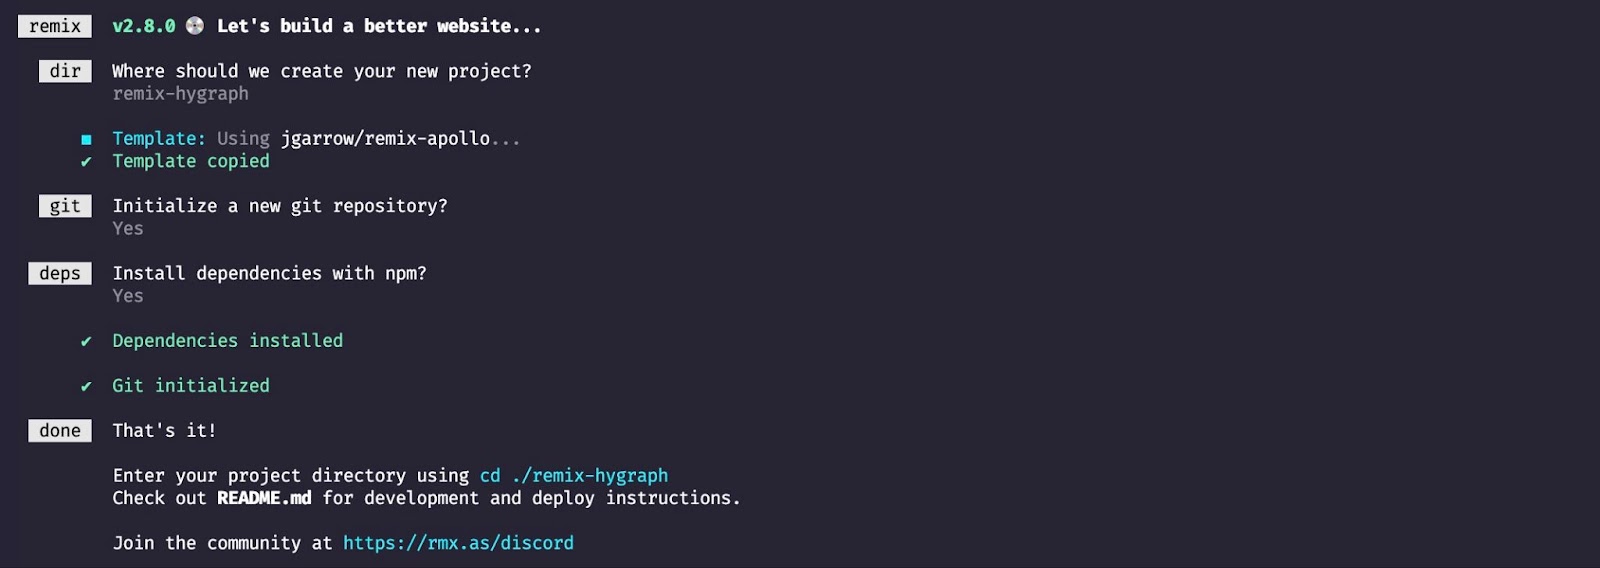
Let’s create a new Remix application with the remix-apollo template by running the following command:
npx create-remix@latest --template jgarrow/remix-apollo
This template is a basic setup for an apollo-graphql and Remix project and already includes all the necessary setup you need to get GraphQL working.
Running this command will ask if you want to initialize a new Git repository for your project, as well as if you want to install dependencies with npm. Select the Git option as preferred, and choose “yes” for the second option to continue.
Now, you’ll need to update your GraphQL API endpoint. Open app/entry.client.tsx and update the ApolloClient URI with the High Performace Content API you copied from your Hygraph dashboard earlier.
Open the app/entry.server.tsx and apply the exact change; everything should be smooth from here on.
Let’s try fetching our Hygraph and Platzi Fake Store products in our Remix app. Open the default app/route/index.tsx file and replace its content with the code below.
import { gql, useQuery } from "@apollo/client";const PRODUCTS_AND_FAKESTORE_QUERY = gql`query {products {idnamepricedescriptionimages {url}}fakeStore {idtitlepricedescriptionimages}}`;export default function Index() {const { loading, error, data } = useQuery(PRODUCTS_AND_FAKESTORE_QUERY);if (loading) return <p>Loading...</p>;if (error) return <p>Error: {error.message}</p>;return (<div className="container"><div><h2>Products</h2><div className="row">{data.products.map((product) => (<div className="col-md-3 mb-4" key={product.id}><div className="card" style={{ width: "18rem" }}><imgsrc={product.images[0].url}className="card-img-top"alt="..."/><div className="card-body"><h5 className="card-title">{product.name}</h5><p className="card-text">{product.description}</p><p>${product.price}</p></div></div></div>))}</div></div><hr /><div><h2>Fake Store Products</h2><div className="row">{data.fakeStore.map((fakeProduct) => (<div className="col-md-3 mb-4" key={fakeProduct.id}><div className="card" style={{ width: "18rem" }}><imgsrc={fakeProduct.images[0]}className="card-img-top"alt="..."/><div className="card-body"><h5 className="card-title">{fakeProduct.name}</h5><p className="card-text">{fakeProduct.description}</p><p>${fakeProduct.price}</p></div></div></div>))}</div></div></div>);}
In the code above, a new GraphQL query named PRODUCTS_AND_FAKESTORE_QUERY is defined that fetches data from products and fakeStore. Loading and error states are also handled to provide feedback to the user while data is being fetched.
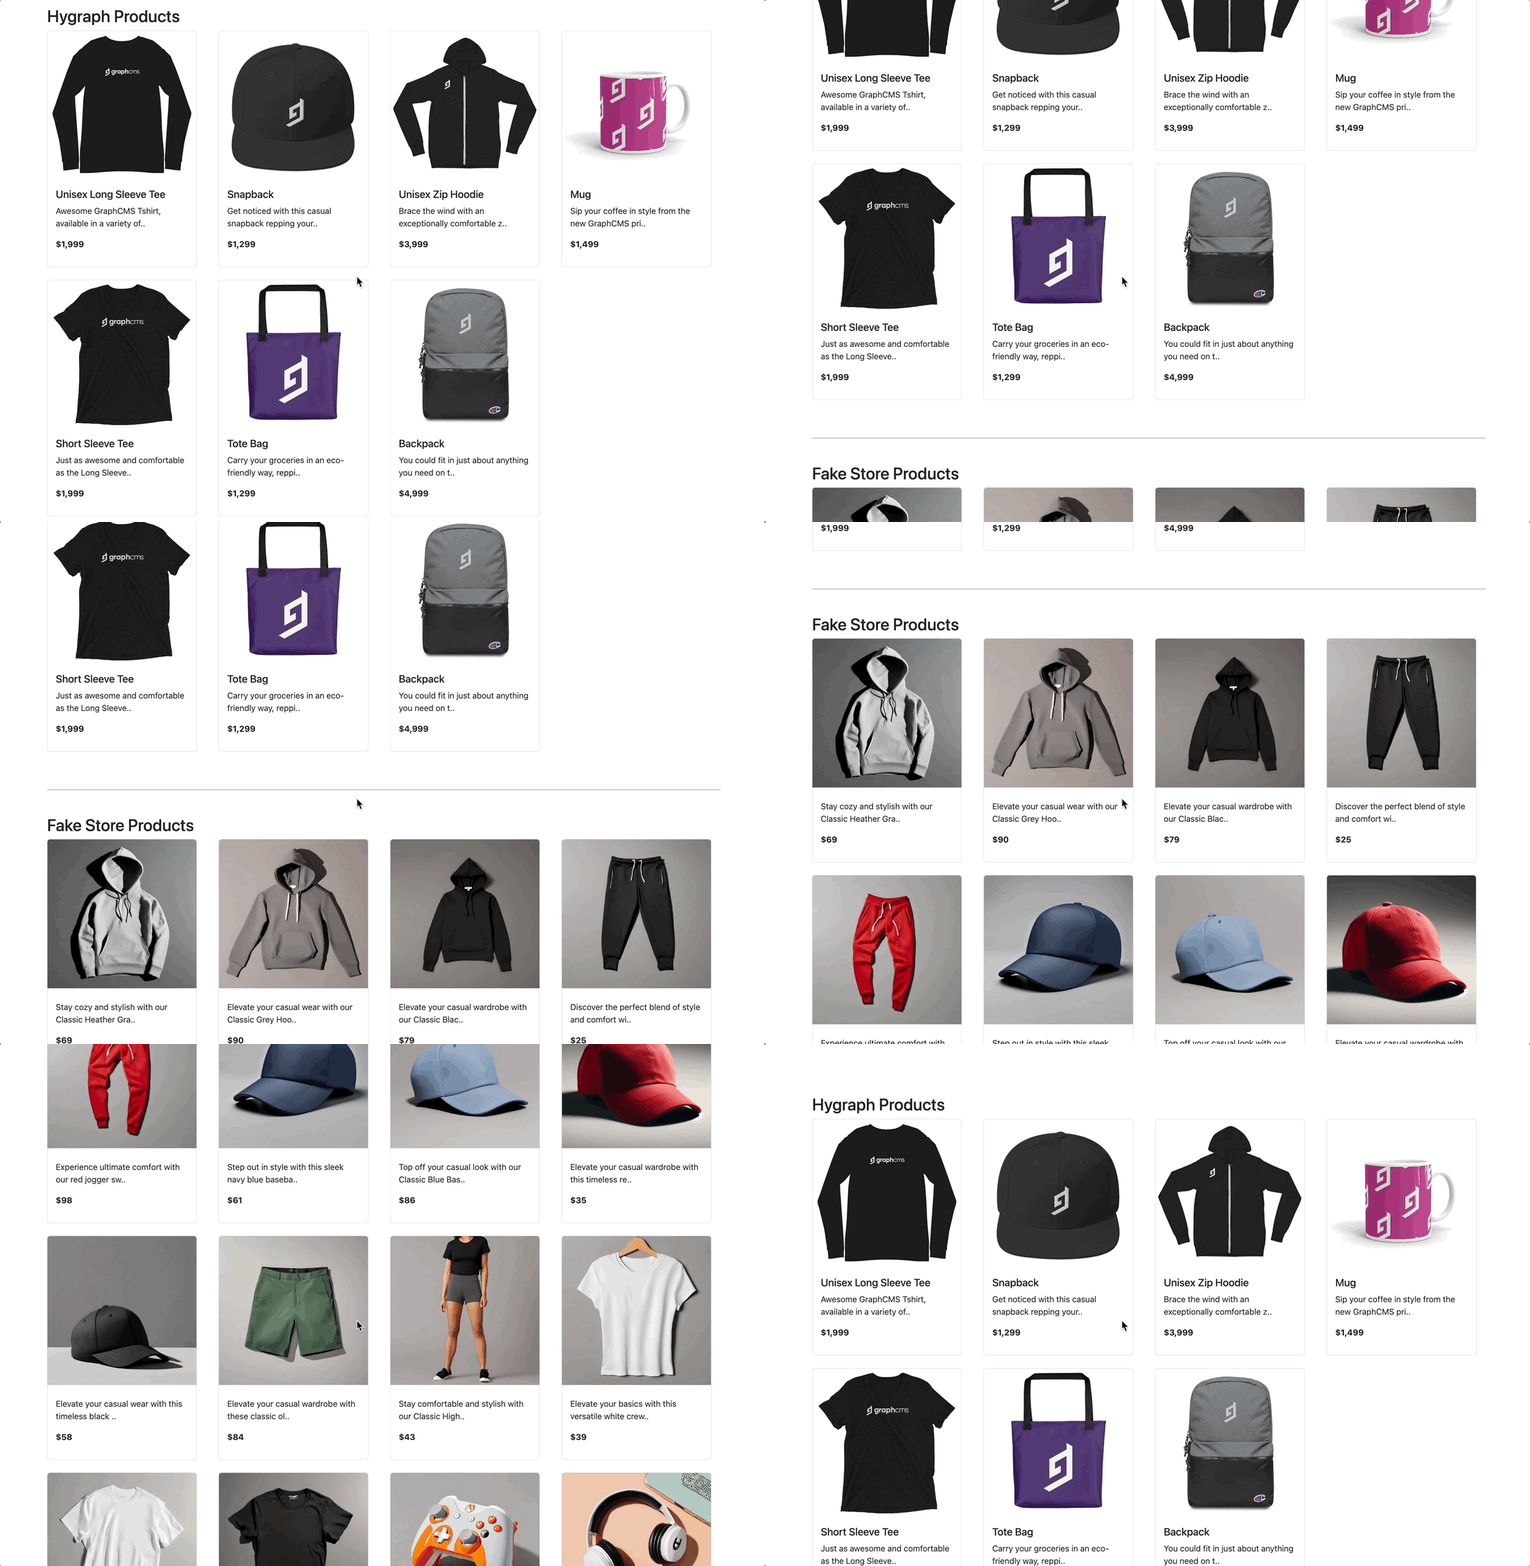
If the data is successfully fetched, then two sections are rendered: one for products and another for fakeStore data. Finally, map over the data arrays for each source and render individual product items, displaying their respective properties such as name, price, description, and images.
To start a local development environment and test the project, run the following command:
npm run dev
Visit the URL provided in your console, and you should see all the products configured in our Hygraph application in the browser.
You can access the complete code in this GitHub repository.
#Conclusion
In this article, we've explored the concept of content microservices, demonstrating how Hygraph and Remix can be used to create them.
Sign up today to unlock the full potential of content microservices with Hygraph's flexible, powerful platform — and the best part? It's free forever. You can also join our Slack community to stay abreast of the latest updates and engage with fellow developers.
Blog Author
