#Prerequisites
To follow along with this guide and code, you should have the following:
- Basic understanding of HTML, CSS, and JavaScript
- At least a little experience or knowledge of Next.js
- Node and npm or yarn installed on your local computer
#Leveraging next-intl for Next.js internationalization
Next.js offers robust support for internationalization through its built-in i18n routing. This feature is designed to work well with i18n libraries, among which next-intl stands out as it covers a range of functionalities, including interpolation, pluralization, and handling arrays.
It is fully compatible with the Pages Router of Next.js (up to version 12) and the App Router introduced in version 13, which includes support for React server components.
Getting started with next-intl
To integrate next-intl into your Next.js project, start by installing the library with the following command:
npm install next-intl
Once installed, next-intl integrates with the App Router using a [locale] dynamic segment.
#Setting up your Next.js project for internationalization
Organize your project directory by creating a [locale] directory within the /app folder and adding all files to the folder. For example, this is a simple Next.js application structure with three pages moved into the [locale] folder:
|-- /app|-- /[locale]|-- /about|-- page.js|-- /blog|-- /[postId]|-- page.js|-- page.js|-- /components|-- features.js|-- hero.js|-- navbar.js|-- layout.js|-- page.js
Next, proceed with the following configuration steps:
1) Localizing messages: Depending on your workflow preference, you can store messages locally or fetch them from a remote source, such as a translation management system.
At the root of your project, create a messages folder where you can create JSON files for each locale, such as messages/en.json:
{"Home": {"Hero": {"Title": "Next.js Internalization Demo","Subtitle": "This demo uses Next.js and the next-intl package to create a multi-language website. We later also explore how it works with Hygraph.","CallToAction": "Read about us"}}}
This file is organized with keys referencing each value, which simplifies locating, updating, and collaborating on content. For instance, all content related to the Home page is grouped under the Home object. Within this object, further categorization can be done for different sections, such as the Hero section and the Features section.
Also, create a messages/fr.json for the French version:
{"Home": {"Hero": {"Title": "Démonstration de l'internationalisation avec Next.js","Subtitle": "Cette démo utilise Next.js et le package next-intl pour créer un site web multilingue. Nous explorons également son fonctionnement avec Hygraph.","CallToAction": "Lisez à propos de nous"}}}
Always ensure the keys are the same across all files, as that is what will be used to render the text.
2) Configuring Next.js: Set up a plugin to alias your i18n configuration to Server Components by updating your next.config.mjs if you're utilizing ECMAScript modules:
import createNextIntlPlugin from 'next-intl/plugin';const withNextIntl = createNextIntlPlugin();/** @type {import('next').NextConfig} */const nextConfig = {};export default withNextIntl(nextConfig);
3) Defining locale-specific configurations: next-intl allows for a per-request configuration setup. In src/i18n.js, specify messages and other options based on the user's locale:
For this project, only English and French will be used. You can add more locales.
import { notFound } from 'next/navigation';import { getRequestConfig } from 'next-intl/server';// Can be imported from a shared configconst locales = ['en', 'fr'];export default getRequestConfig(async ({ locale }) => {// Validate that the incoming `locale` parameter is validif (!locales.includes(locale)) notFound();return {messages: (await import(`../messages/${locale}.json`)).default,};});
4) Implementing middleware for locale matching: Use middleware in src/middleware.js to match the request's locale and manage redirects and rewrites:
import createMiddleware from 'next-intl/middleware';export default createMiddleware({// A list of all locales that are supportedlocales: ['en', 'fr'],// Used when no locale matchesdefaultLocale: 'en',});export const config = {// Match only internationalized pathnamesmatcher: ['/', '/(fr|en)/:path*'],};
5) Setting the document language: In app/[locale]/layout.tsx, utilize the matched locale to set the document language:
export default function RootLayout({ children, params: { locale } }) {return (<html lang={locale}><body className={inter.className}><div className="max-w-6xl mx-auto"><Navbar />{children}</div></body></html>);}
With all these done, you can now incorporate translations within your page components or elsewhere in your project.
#Translating plain text
Having set up next-intl in your Next.js project, activating internationalization involves using the t() method, a function provided by next-intl for fetching translated strings. This method is accessed through the useTranslations hook, which you can import directly from the next-intl library.
To illustrate, let's integrate translation capabilities into the hero component of the sample application, typically located at components/hero.js:
import { useTranslations } from 'next-intl';const Hero = () => {const t = useTranslations('Home.Hero');return (<div className="w-3/4 mx-auto py-32 text-center"><h1 className="text-6xl font-bold">{t('Title')}</h1><p className="pt-8 text-xl">{t('Subtitle')}</p><ahref="/about"className="px-4 py-4 mt-6 bg-blue-500 text-white rounded inline-block">{t('CallToAction')}</a></div>);};export default Hero;
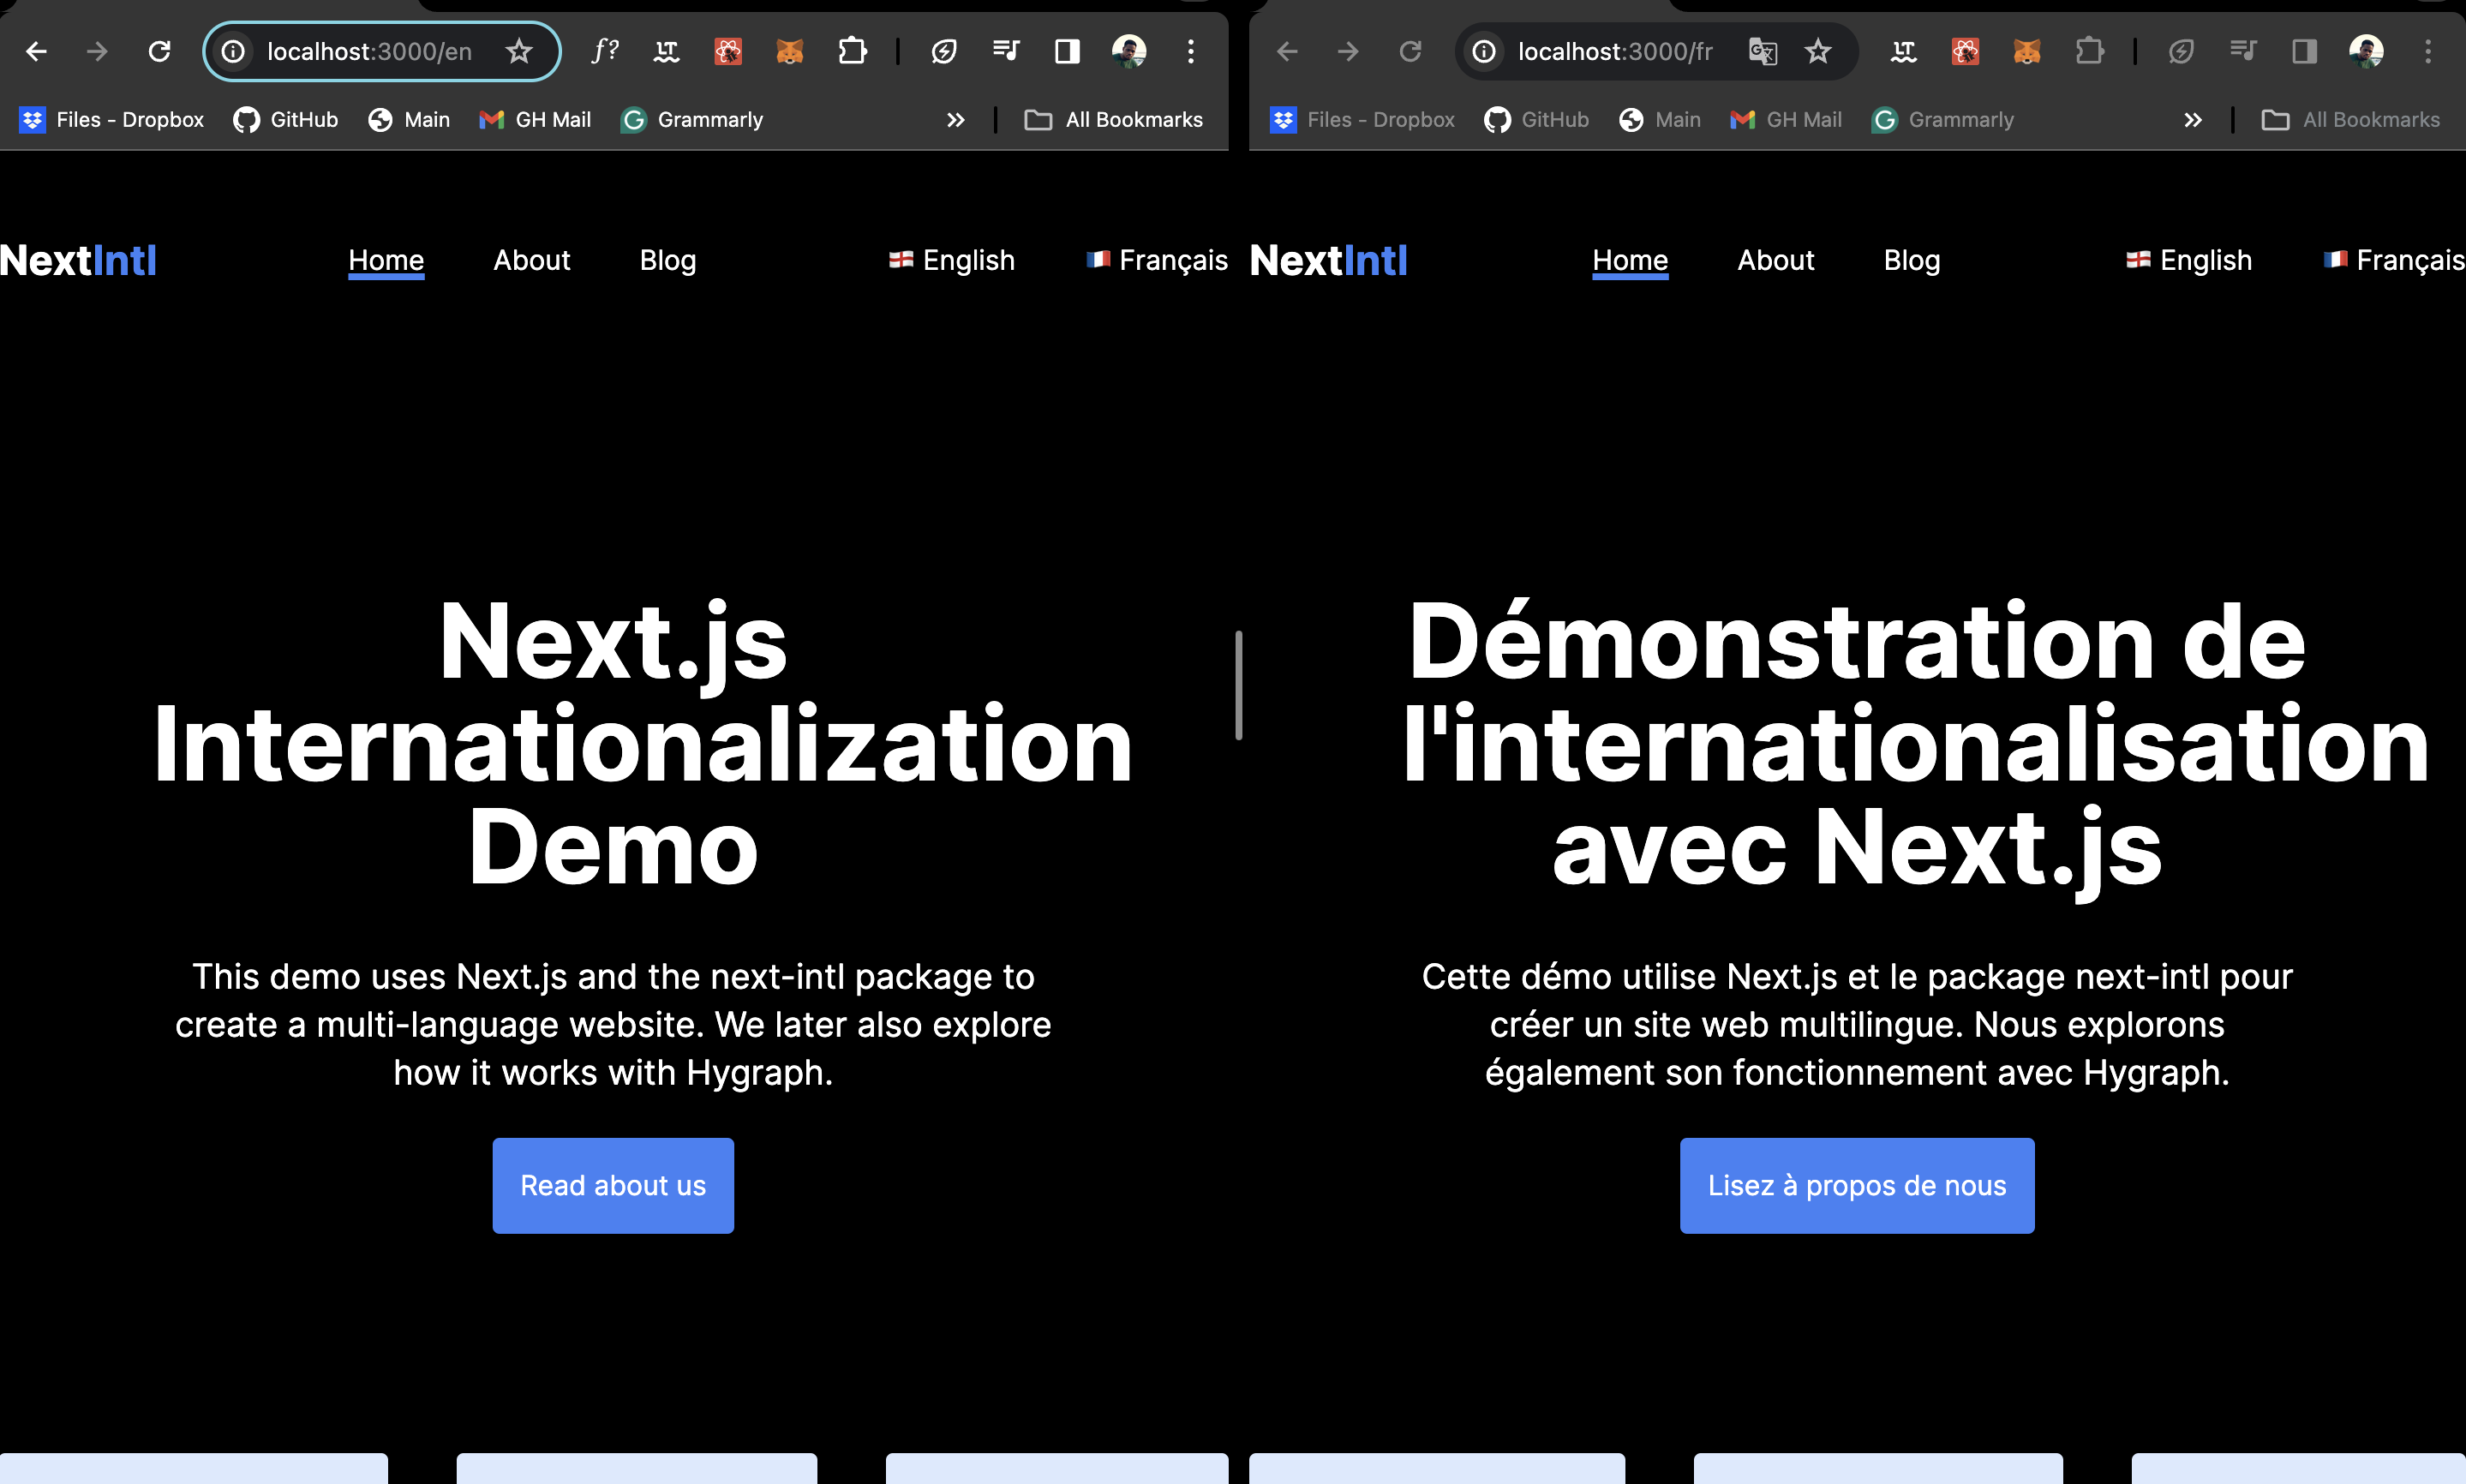
This approach utilizes a key to retrieve the corresponding value. For example, navigating to http://localhost:3000/en displays the English version of the Hero section, while http://localhost:3000/fr shows its French counterpart.
#Interpolation and pluralization
Interpolation is a technique for inserting dynamic values into predefined text. It's beneficial for creating adaptable messages that may vary based on user input or other variables. A common use case is greeting users by name:
"message": "Hello {name}!"
By replacing {name} with a dynamic value, the message becomes personalized:
t('message', {name: 'Jane'});
Resulting in:
"Hello Jane!"
Cardinal pluralization This addresses the need to format messages differently based on numerical values, especially to distinguish between singular and plural forms. A classic example involves indicating the number of followers:
"message": "You have {count, plural, =0 {no followers yet} =1 {one follower} other {# followers}}."
This setup allows for different messages based on the value of count. For instance:
- If
countis 0, the message is: "You have no followers yet." - If
countis 1, the message is: "You have one follower." - For any other number, say 3580, the message is: "You have 3,580 followers."
The **#** symbol is used to represent the actual number, formatted appropriately.
Ordinal pluralization Ordinal pluralization is similar to cardinal pluralization but is used for ordering rather than quantity. It helps in formatting messages that relate to ranks or positions.
"message": "It's your {year, selectordinal, one {#st} two {#nd} few {#rd} other {#th}} birthday!"
This message would allow for a correct ordinal suffix to be applied based on the year value:
- 1st, 2nd, 3rd (special cases for
one,two, andfewin English) - 4th, 5th, ... 21st, 22nd, ... (using
otherfor all other numbers) ## Date/time translations
next-intl offers a comprehensive solution to the complex challenge of internationalizing date and time formats, accommodating the diverse preferences found across global locales. Since date formats can vary widely from region to region, adopting a flexible approach to date and time representation in international applications is crucial.
The next-intl library leverages the ICU (International Components for Unicode) syntax to simplify incorporating dates and times within localization files. This syntax allows for directly embedding dynamic date formats into your messages, utilizing placeholders for dates, thus streamlining the internationalization process.
Here's an example in an English localization file (en.json), demonstrating the use of a placeholder for the current date in a short format:
// en.json{"todayDate": "Today's date is {currentDate, date, short}."}
next-intl supports predefined date formats such as short, full, long, and medium. It also allows defining custom date formats using “date skeletons". For instance, to display a date in a specific custom format, you could specify it in your localization file like so:
// en.json{"todayDate": "Today's date is {currentDate, date, ::yyyyMd}."}
The :: prefix signifies the use of a custom skeleton format, granting developers precise control over how dates are presented. The next-intl documentation offers a detailed guide on the available formats and skeletons.
To integrate a date within a Next.js page or component, the t() function is utilized:
<p>{t('todayDate', { currentDate: new Date() })}</p>
By supplying the current date to this method, next-intl dynamically renders the date in the format appropriate to the user's locale. For example, an English locale might display as "Today's date is 2/25/24," whereas in a French locale, it would appear as "La date d'aujourd'hui est 25/02/24."
Furthermore, next-intl facilitates custom date formats within messages, allowing developers to define formatters based on DateTimeFormat options. These custom formatters can be named and utilized throughout your application:
<p>{t('todayDate',{ currentDate: new Date() },{dateTime: {short: {day: 'numeric',month: 'short',year: 'numeric',},},})}</p>
#Switching languages with App Router using next-intl
next-intl provides drop-in replacements for common Next.js navigation APIs that automatically handle the user locale behind the scenes. There are two strategies to achieving this, but the straightforward method is using shared pathnames.
With this strategy, the pathnames of your app are identical for all locales. This is the simplest case, because the routes you define in Next.js will map directly to the pathnames a user can request.
To create navigation APIs for this strategy, use the createSharedPathnamesNavigation function. Create a navigation.js in your src folder and add the following:
import { createSharedPathnamesNavigation } from 'next-intl/navigation';export const locales = ['en', 'es', 'fr'];export const localePrefix = 'always'; // Defaultexport const { Link, redirect, usePathname, useRouter } =createSharedPathnamesNavigation({ locales, localePrefix });
This setup specifies your locales and a locale prefix, which should match the configuration passed to your middleware for consistency.
Adjust your middleware file accordingly to ensure alignment with the navigation setup:
import createMiddleware from 'next-intl/middleware';import { locales, localePrefix } from './navigation';export default createMiddleware({// A list of all locales that are supportedlocales,localePrefix,// Used when no locale matchesdefaultLocale: 'en',});export const config = {// Match only internationalized pathnamesmatcher: ['/', '/(fr|es|en)/:path*'],};
With this configuration, you gain access to routing components and methods like Link and usePathname, enabling intuitive navigation within your Next.js project.
Next, you can incorporate language switch functionality in your Navbar or any page you wish by attaching the pathname to the href property and a locale. For example, here is a navbar.js component:
'use client';import { Link } from '@/navigation';import { usePathname } from '@/navigation';const NavLinks = [{ id: 1, name: 'Home', path: '/' },{ id: 1, name: 'About', path: '/about' },{ id: 2, name: 'Blog', path: '/blog' },];const Navbar = () => {const pathname = usePathname();const isActive = (path) => path === pathname;return (<nav className="w-full flex justify-between items-center h-32"><div className="logo"><Link href="/"><p className="text-2xl font-bold">Next<span className="text-blue-500">Intl</span></p></Link></div><ul className="flex space-x-10">{NavLinks.map((link) => {return (<li key={link.id}><Linkhref={link.path}className={isActive(link.path)? 'underline decoration-blue-500 decoration-4': ''}>{link.name}</Link></li>);})}</ul><div className="flex space-x-10"><Link href={pathname} locale="en">🏴 English</Link><Link href={pathname} locale="fr">🇫🇷 Français</Link></div></nav>);};export default Navbar;
Link and usePathname are imported from the naviagtion.js file in the above code. Also, you can handle switching between different languages by attaching the pathname to the href property and a locale.
#Using a CMS to manage locales
For this guide, let’s use an existing project, aiming to localize it and integrate its content with a Next.js application. Begin by duplicating a simple blog project in the Hygraph marketplace. This action will replicate the schema and all its content, a process that may take a few moments. Once completed, the next step involves localizing the fields.
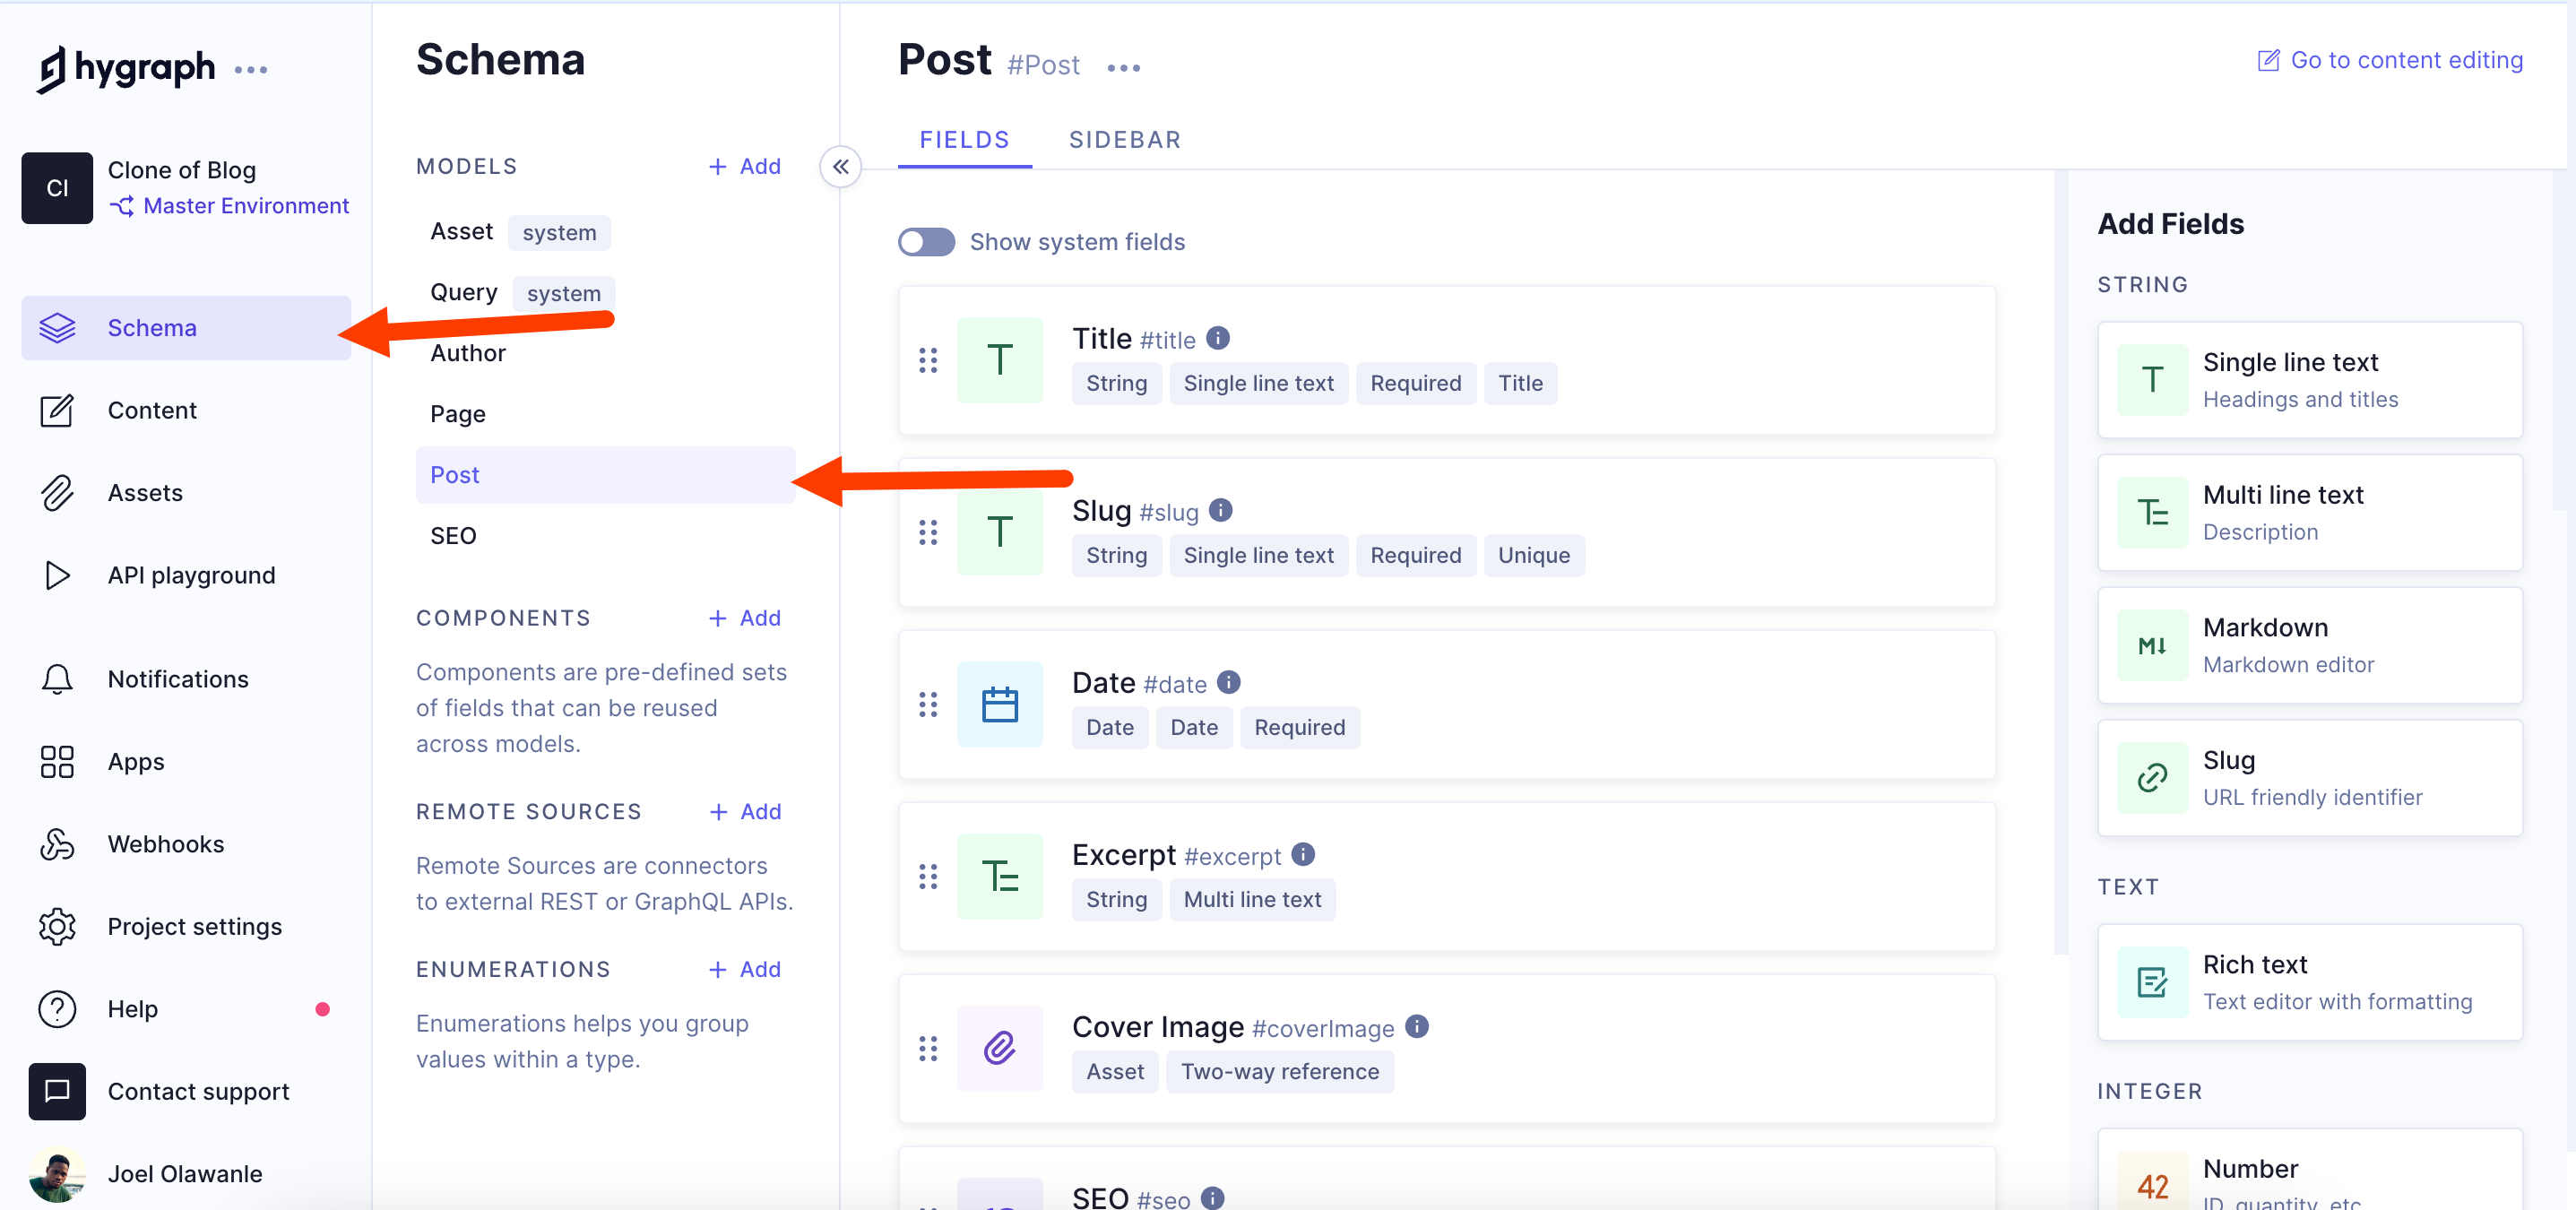
Navigate to the schema editor through the schema section. This interface allows adding, editing, or deleting fields and establishing model relationships. To localize a field, hover over it, select Edit field, check the Localize field option, and update. Repeat this process for all fields you wish to localize.
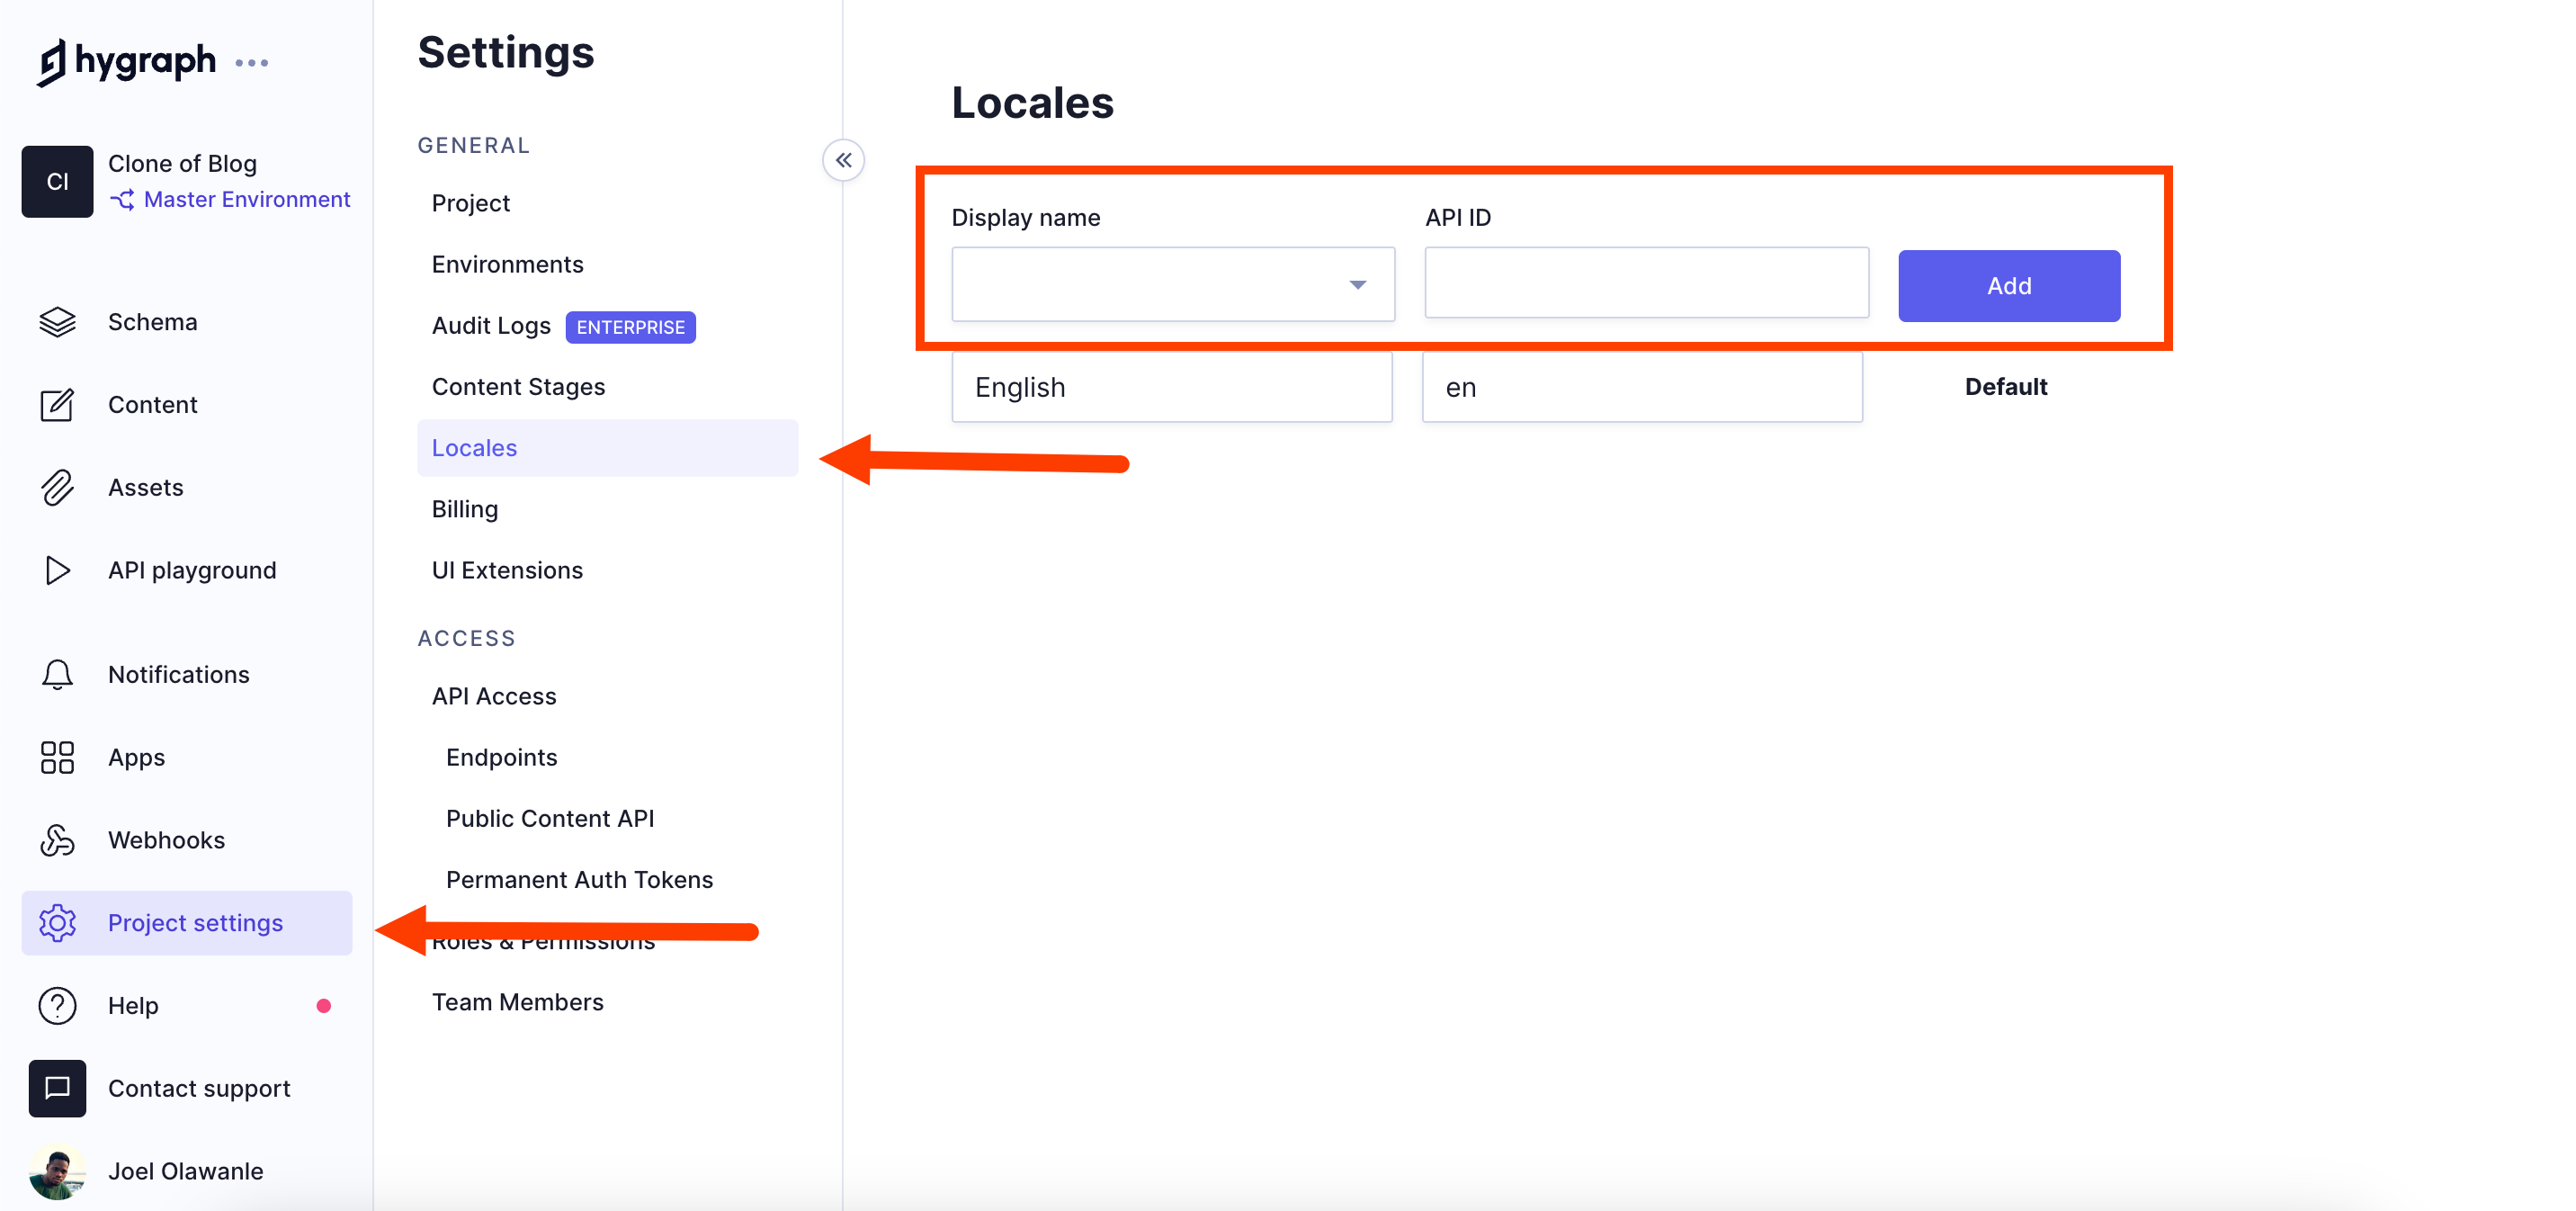
Subsequently, add the languages of your choice by accessing Project Settings > Locales.
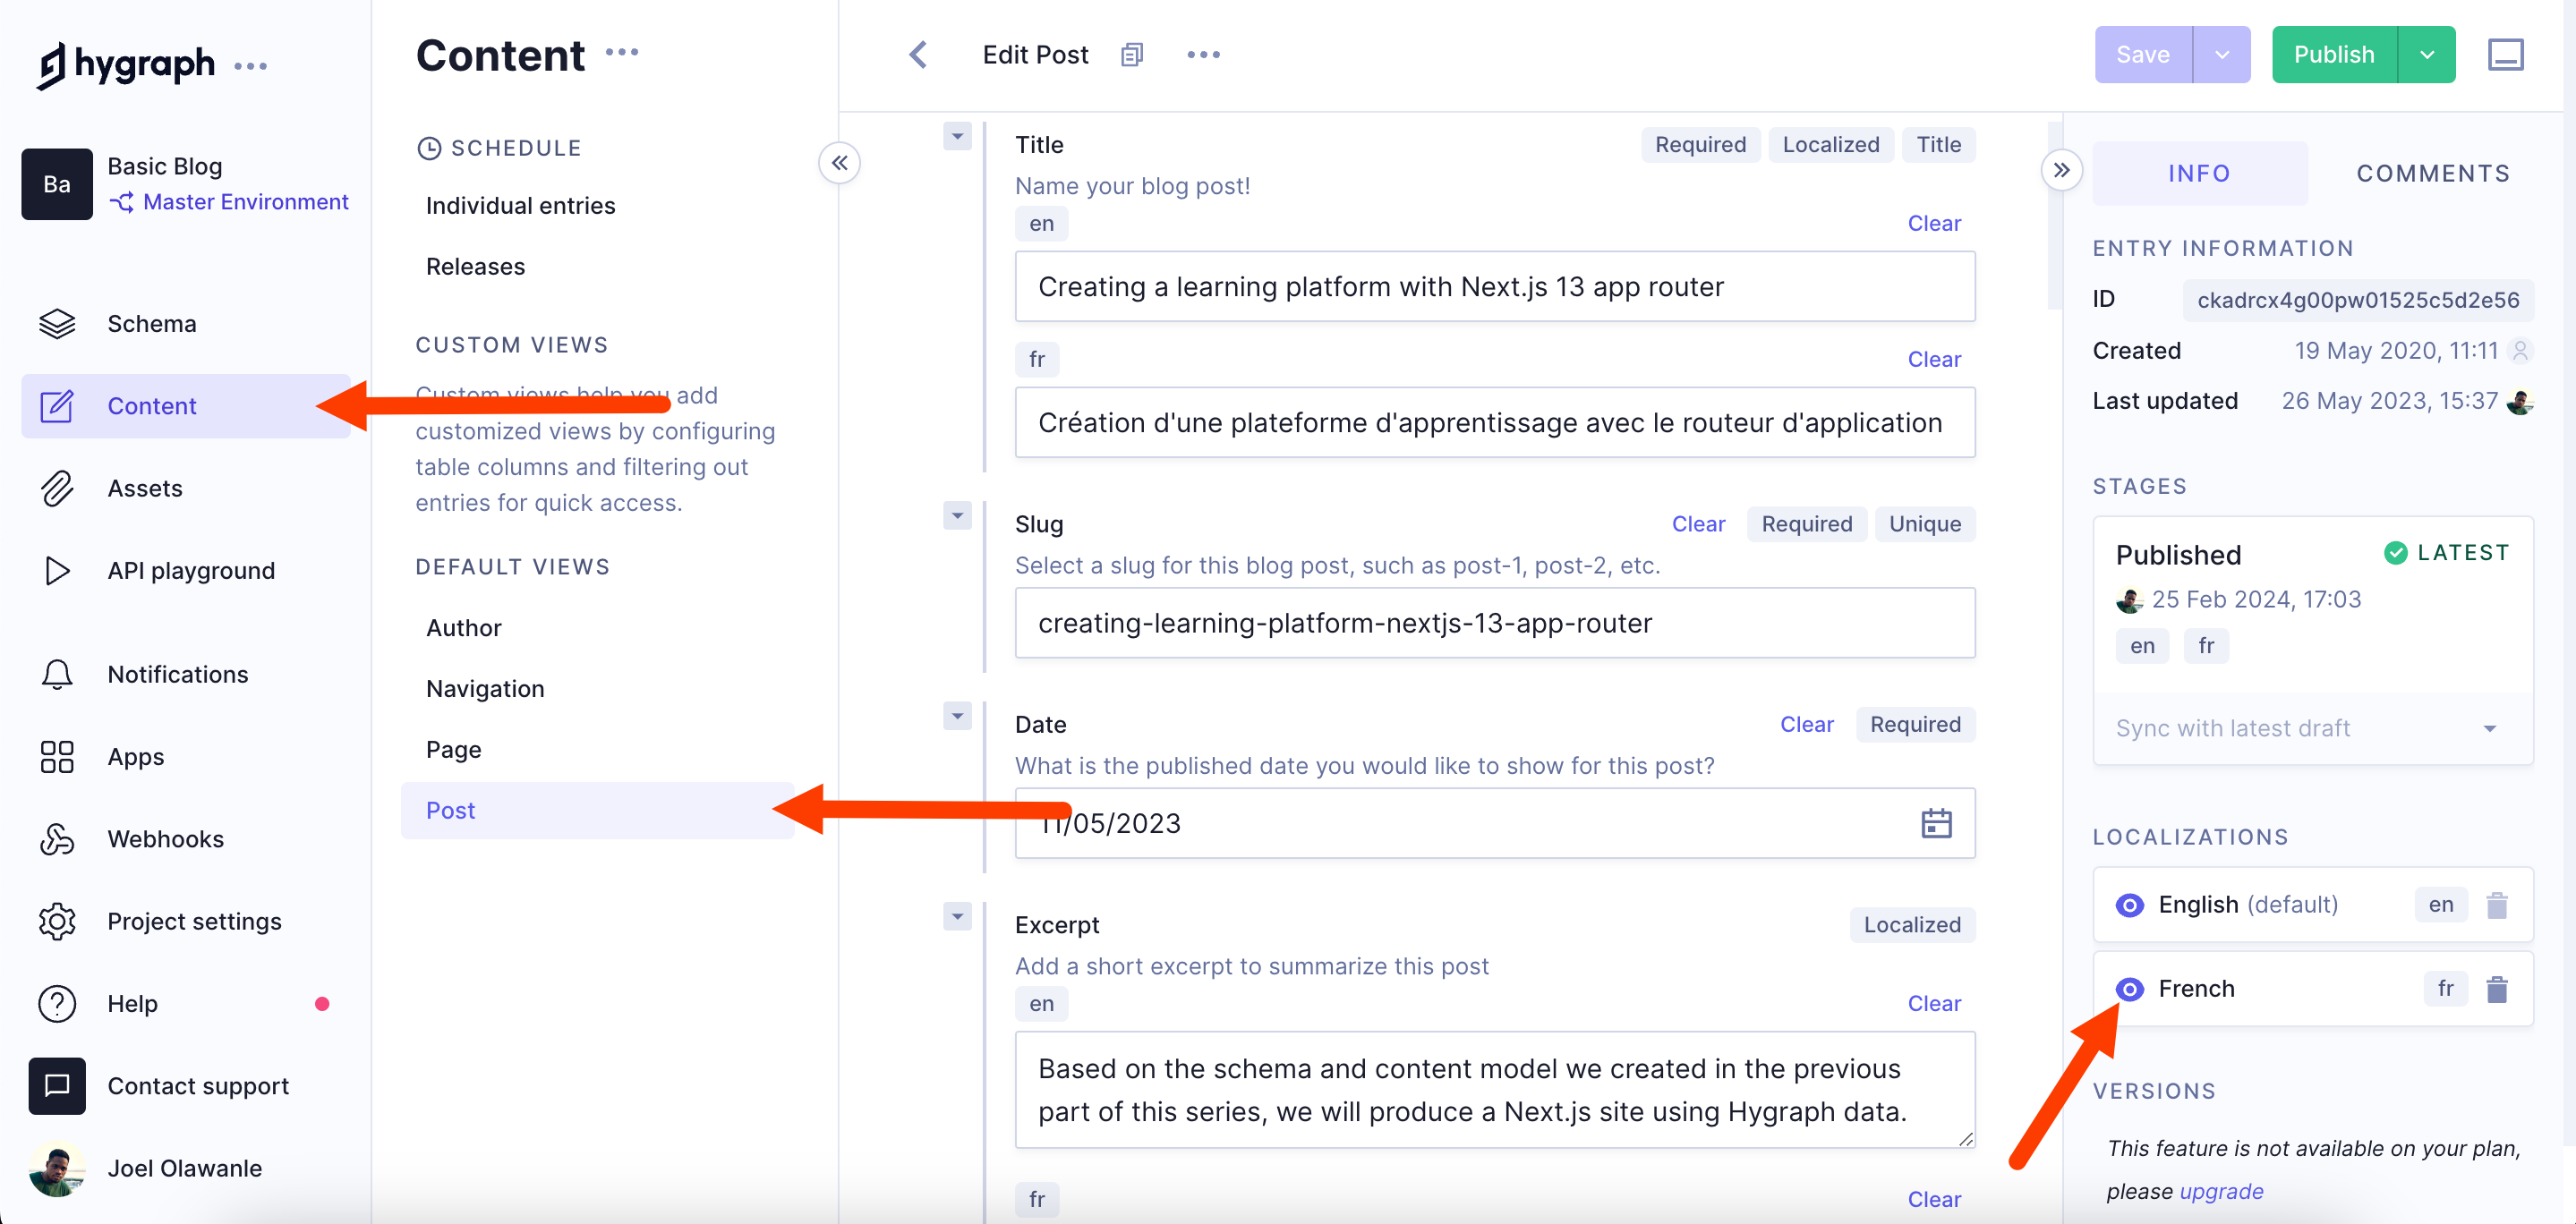
With languages configured, proceed to Content to update existing content with the localized versions. Enable the localization fields by clicking the eye icon next to the locale.
After publishing the posts, you are ready to consume them into your Next.js application.
#Integrating localized content into Next.js with GraphQL
In Next.js, you can query GraphQL content with the @apollo/client library. Install the library by running the following command in your project directory:
npm i @apollo/client
For this Next.js project, you configured internationalization routing with the next-intl library. Alternatively, you can configure internationalization without the next-intl library since Next.js has inbuilt internalization routing configurations.
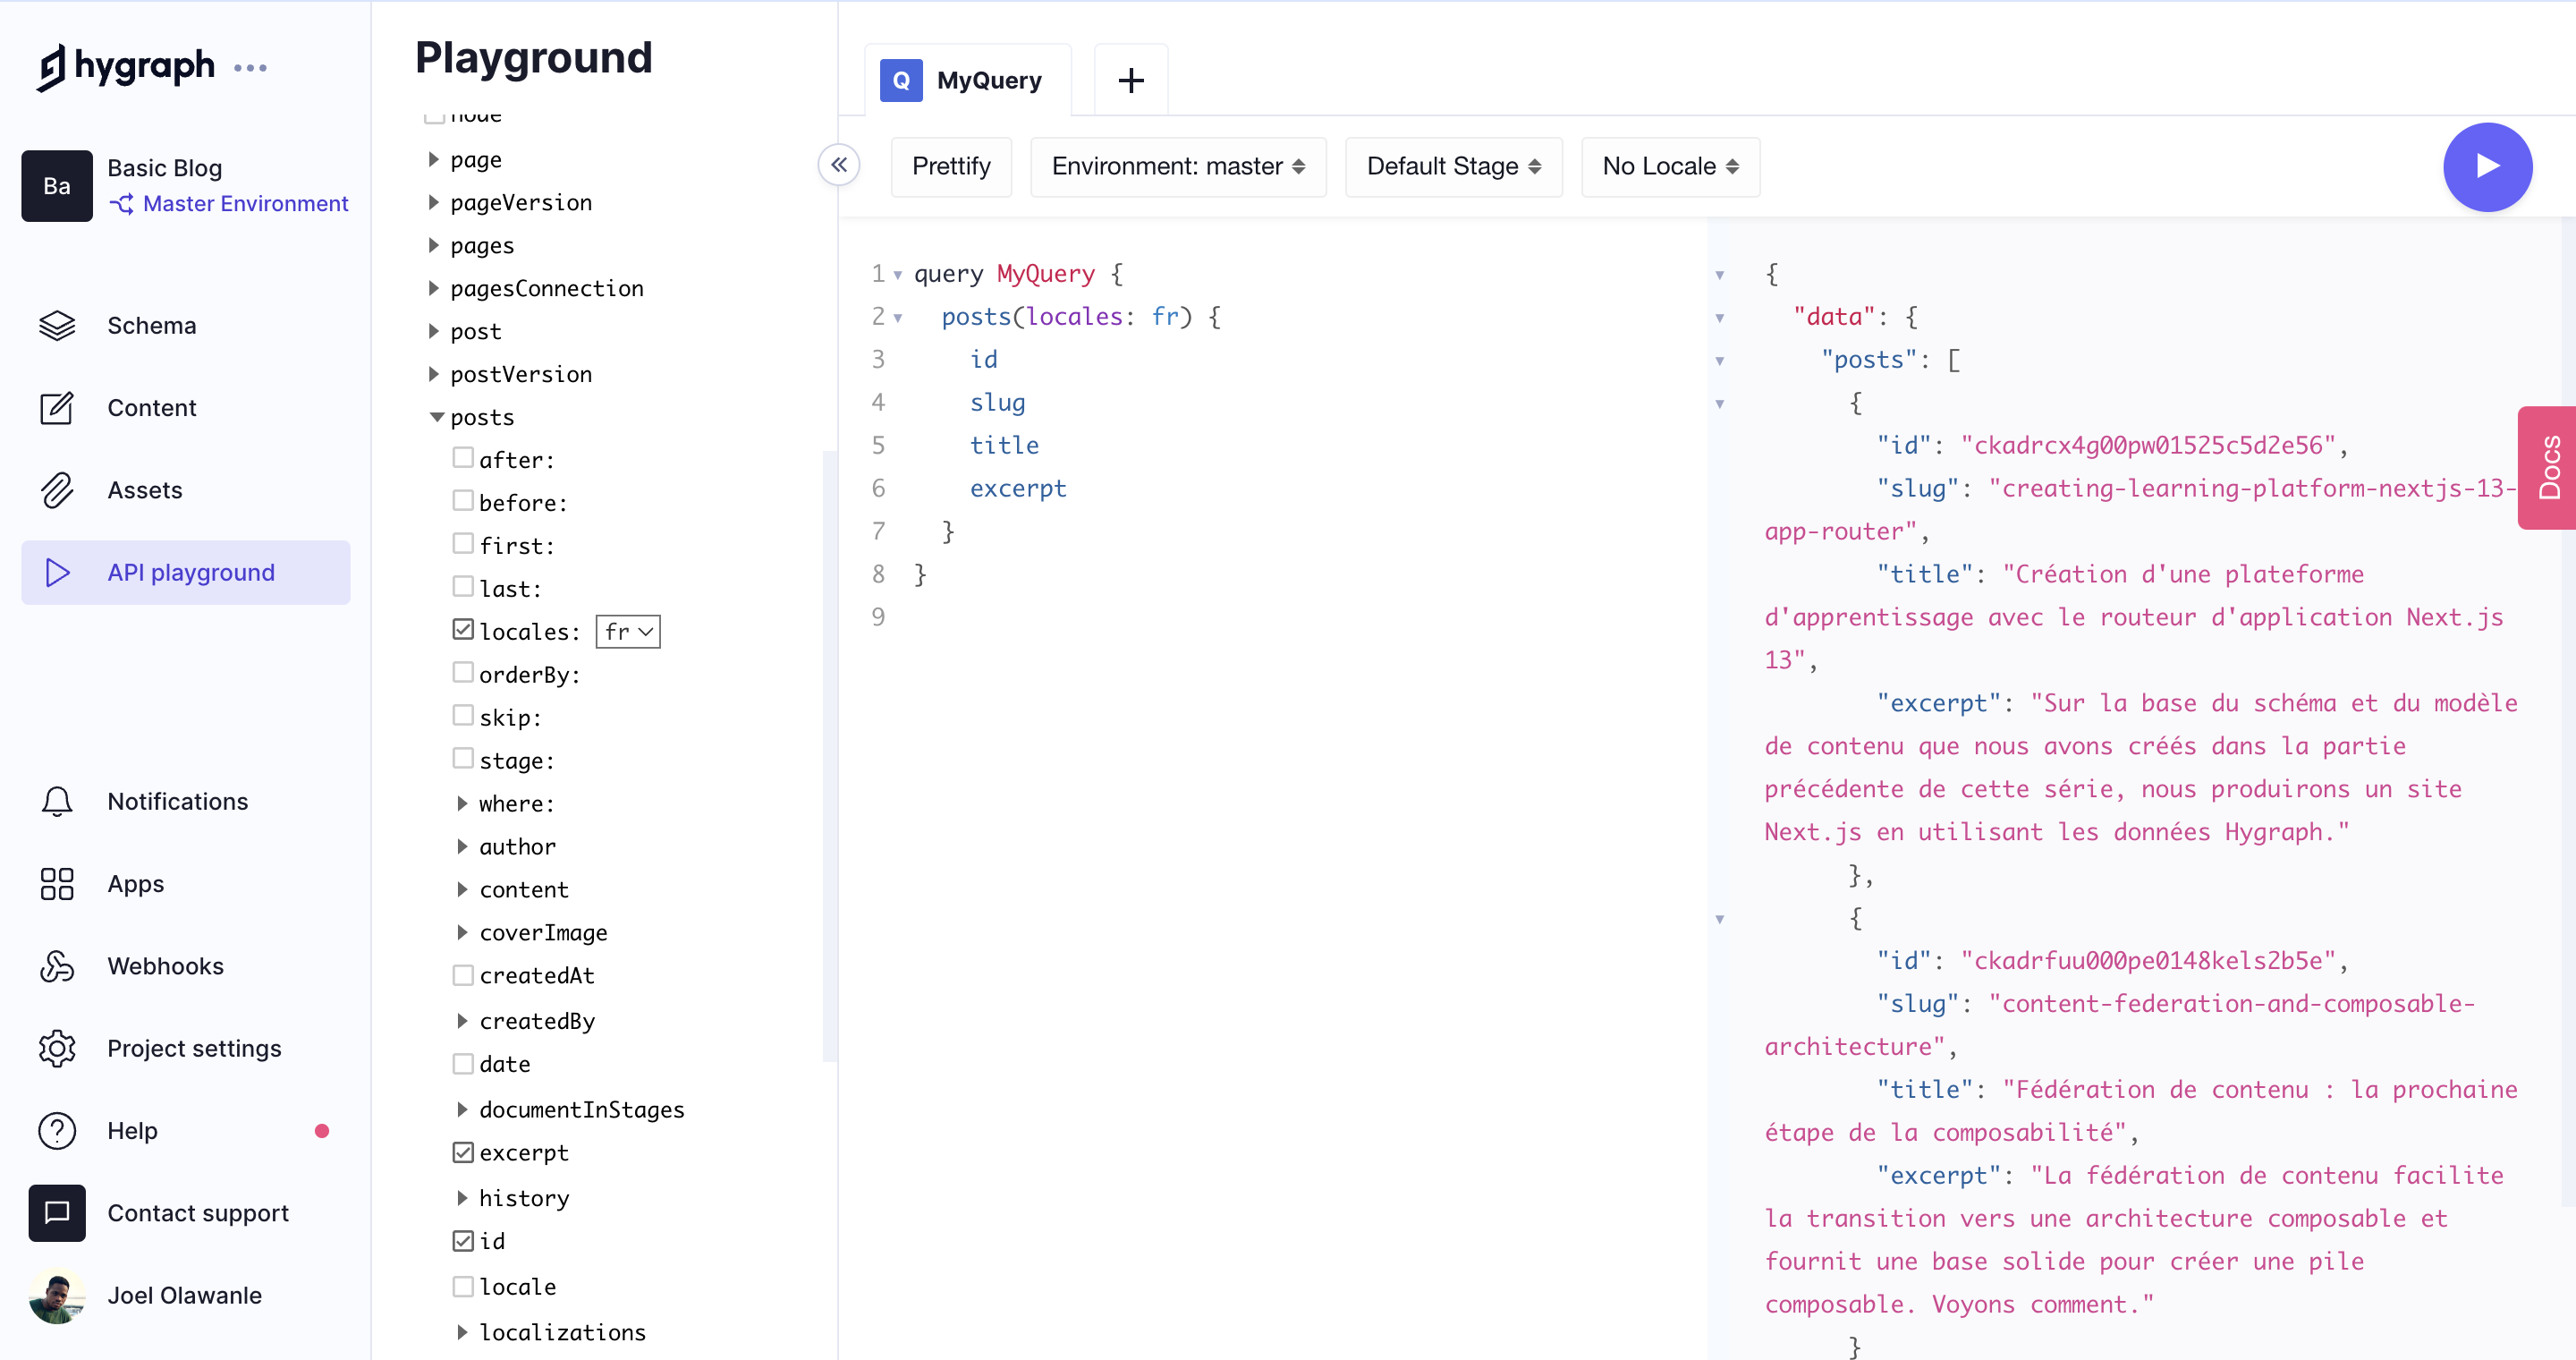
With the internalization routing already set up, you have access to the locales parameter, which would be used to query the content.
Hygraph has an API playground to create and test GraphQL queries.
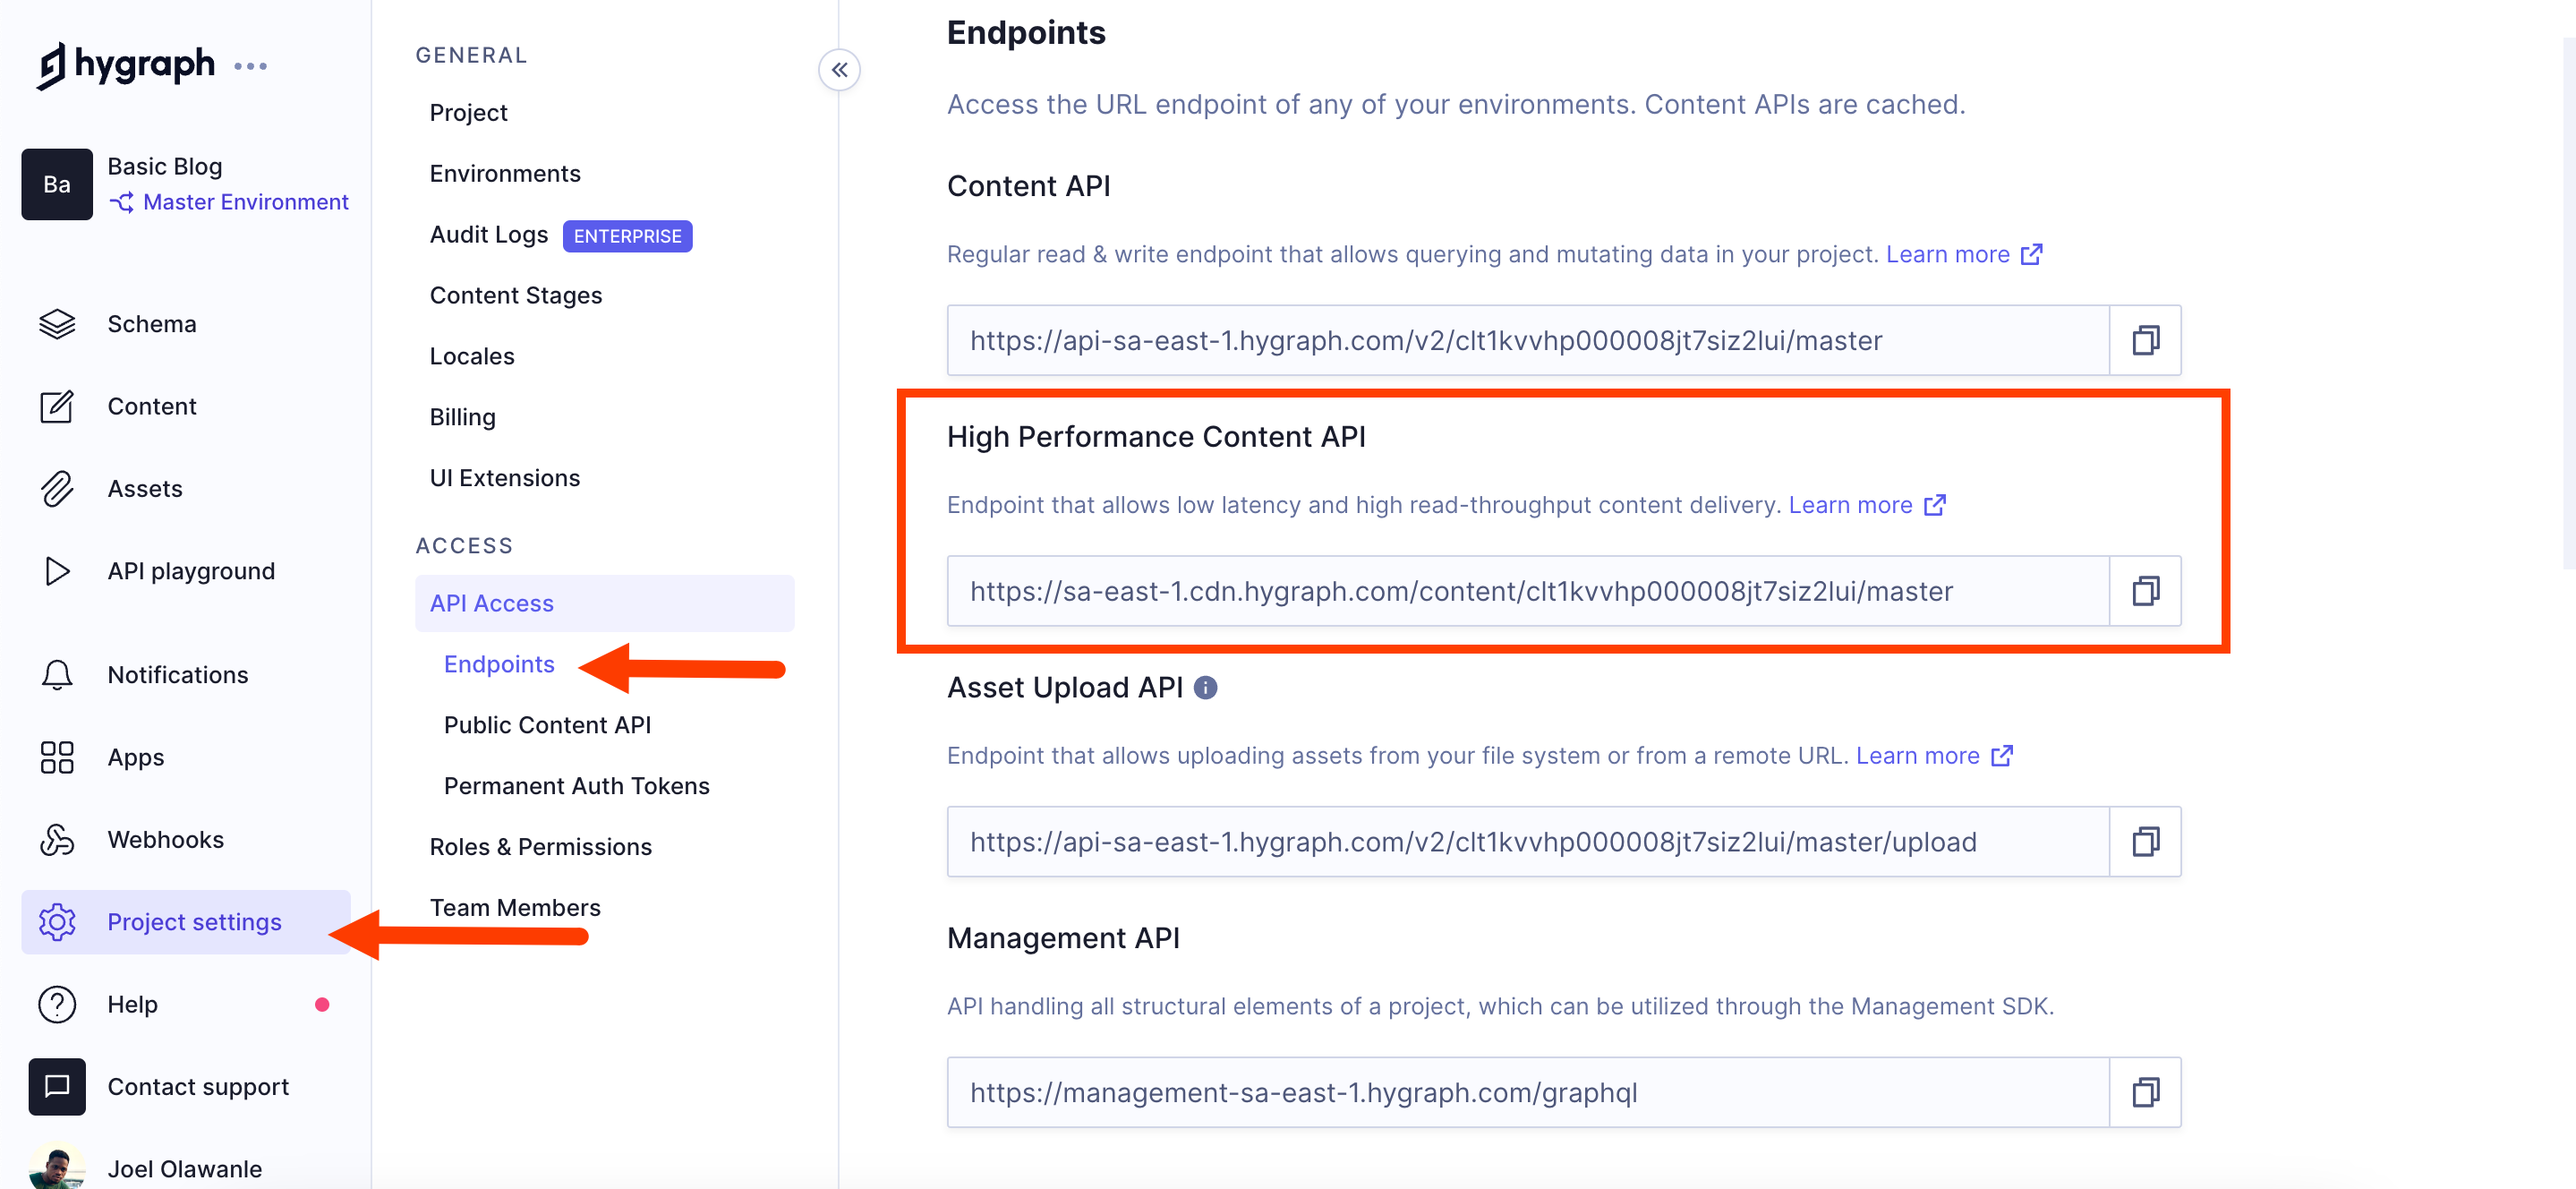
Once your queries are working, you can use them in the Next.js project. Before you make the request, retrieve the high performance content API, which gives you access to the Hygraph content. You can get this from the Project settings > Endpoints page.
Next, implement this in the Blog page of the sample application (blog/page.js). Here is an example where the list of all posts from the Hygraph project is fetched into Next.js:
import Link from 'next/link';import { ApolloClient, InMemoryCache, gql } from '@apollo/client';async function getPosts(locale) {const client = new ApolloClient({uri: 'https://sa-east-1.cdn.hygraph.com/content/clt1kvvhp000008jt7siz2lui/master',cache: new InMemoryCache(),});const data = await client.query({query: gql`query PostsQuery {posts(locales: [${locale}]) {idtitleslugexcerpt}}`,});return data.data.posts;}const page = async ({ params }) => {const { locale } = params;const posts = await getPosts(locale);return (<div className="py-10 w-3/4 mx-auto"><h2 className="text-3xl pb-10 font-bold">Blog</h2><div className="flex flex-col space-y-5 text-black">{posts &&posts.map((post) => (<Link href={`/${locale}/blog/${post.slug}`} key={post.id}><div className="bg-gray-300 p-6 rounded"><h3 className="text-xl font-bold mb-2">{post.title}</h3><p>{post.excerpt}</p></div></Link>))}</div></div>);};export default page;
In the code above, the getPosts function is defined to fetch posts from Hygraph for a specific locale. This function utilizes the ApolloClient from @apollo/client, configured with Hygraph's API endpoint and an in-memory cache for efficient data management. The GraphQL query within this function requests posts for the specified locale, retrieving their id, title, slug, and excerpt.
The query is dynamically constructed to include the locale parameter, allowing for retrieving localized content based on the user's language preference. This is crucial for delivering a localized user experience, as content is fetched and displayed according to the user's selected language.
Fetching dynamic posts
Similarly, dynamic posts can be fetched and displayed on individual blog pages (blog/[slug]/page.js) using a comparable approach:
import Image from 'next/image';import { ApolloClient, InMemoryCache, gql } from '@apollo/client';async function getPost(locale, slug) {const client = new ApolloClient({uri: 'https://sa-east-1.cdn.hygraph.com/content/clt1kvvhp000008jt7siz2lui/master',cache: new InMemoryCache(),});const { data } = await client.query({query: gql`query PostQuery {post(where: { slug: "${slug}" }locales: [${locale}]) {idslugtitlecontent {html}coverImage {url}}}`,});return data.post;}const page = async ({ params }) => {const { locale, slug } = params;const post = await getPost(locale, slug);return (<div className="py-10 w-3/4 mx-auto"><h2 className="text-3xl pb-10 font-bold">{post.title}</h2><div><div className=""><Imagesrc="/about.jpeg"width={1200}height={200}style={{objectFit: 'cover',height: '300px',width: '100%',}}sizes="(max-width: 768px) 100vw, 33vw"alt="Picture of the author"className="rounded"/></div><div className="pt-10"><divdangerouslySetInnerHTML={{__html: post.content.html,}}/></div></div></div>);};export default page;
You can find the complete code on GitHub.
#[Optional] Extending Hygraph with a Translation Management System
If your company is using a translation management system, Hygraph offers out-of-the-box integrations with 4 TMSs:
- Smartling: Setup guide for Smartling
- Lokalise: Setup guide for Lokalise
- EasyTranslate: Setup guide for EasyTranslate
- Crowdin: Setup guide for Crowdin
#Conclusion
This guide has walked you through leveraging the next-intl library and Hygraph with Next.js for effective internationalization and localization of a web application.
Following these steps ensures your application reaches a wider audience and provides a more inclusive and user-friendly experience across diverse languages and cultures.
Blog Author
