How to register an app
When you decide to build an app for Hygraph, you must register it on the platform. Apps declare basic information like Name, Description, Avatar URL, API ID and Setup URL. API IDs are unique across all applications. Setup URLs indicate Hygraph where to fetch the content that will display to users that go through your app's setup flow.
Bear in mind that apps will not work on your local environment because our SDK only runs inside our platform.
To register your application, you first need to navigate to User settings > Your apps, then click on the + Add new app button. This will lead you to the App registration form.
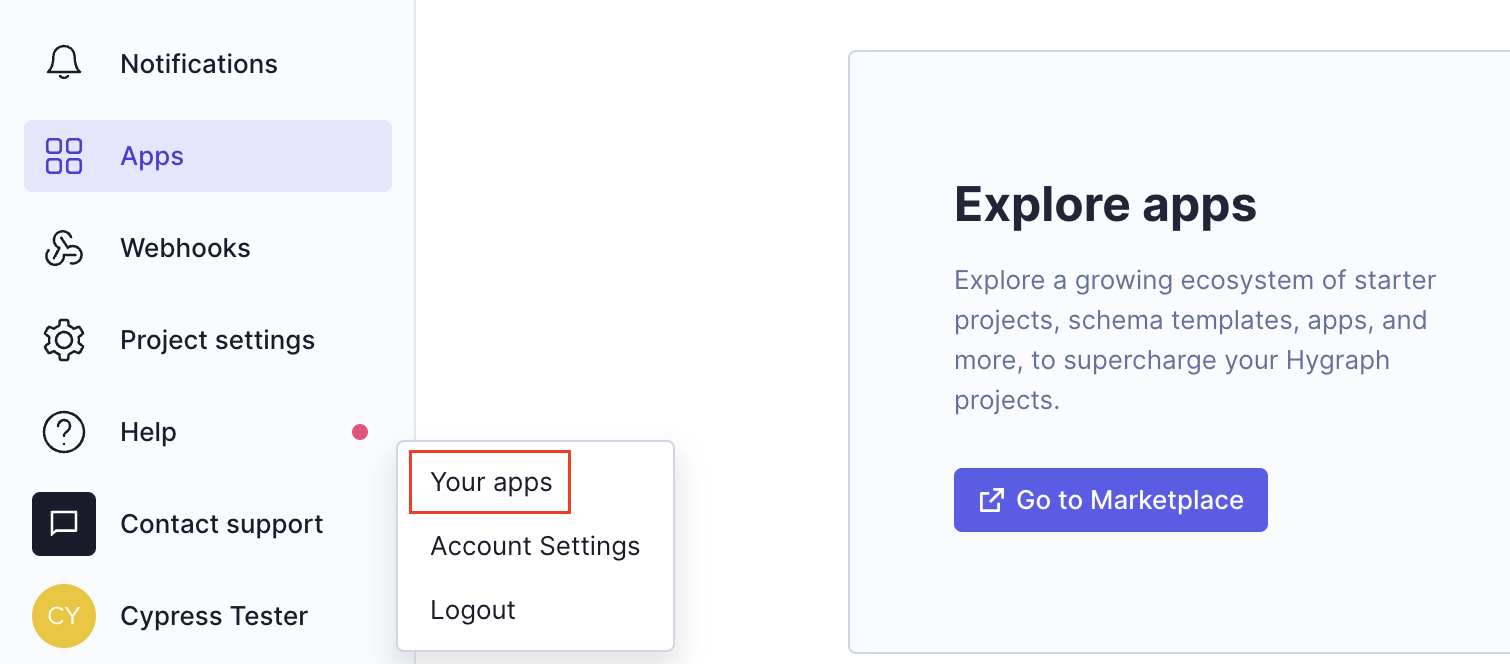 Your apps
The registration form is divided into four tabs:
You will be able to save your app by clicking on the Register app button, as long as the required fields have been completed.
When you create your own app, please only click on Register app the end of the process as some information - such as permissions - can't be edited after the initial save.
#General
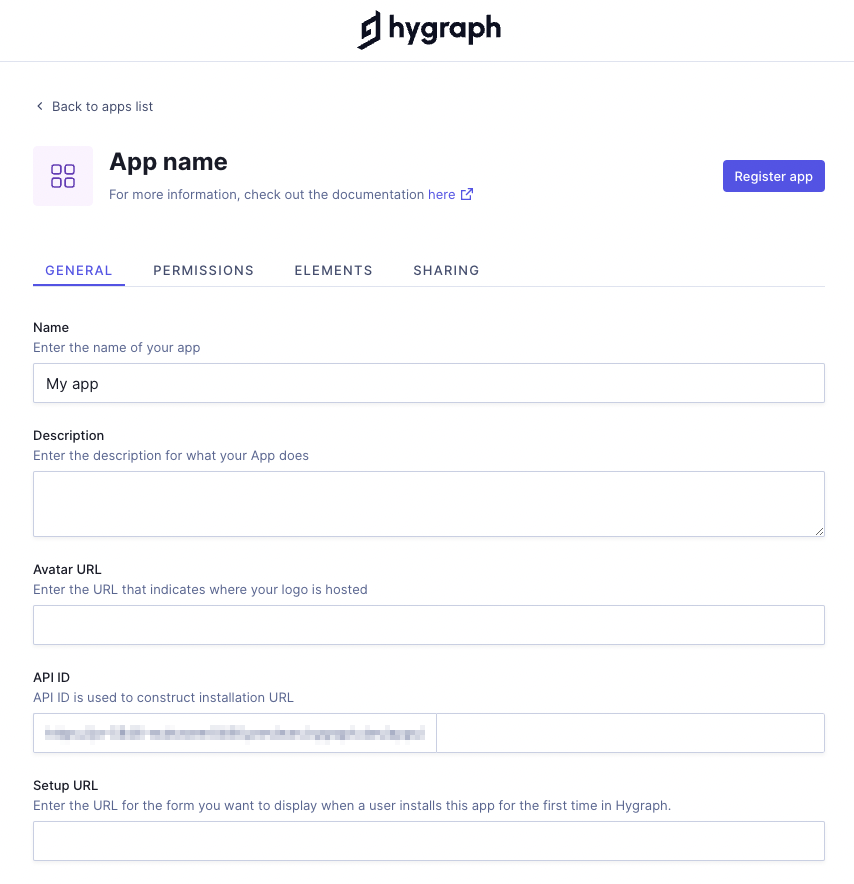 App registration - General
- Name: Mandatory field. This is the name of your app.
- Description: Optional field. Here you can provide a description for what your app does.
- Avatar URL: Mandatory field. The avatar URL is the logo that will display next to your app's name, so you'll complete this field with a URL that indicates where your logo is hosted.
- API ID: Mandatory field. This is where you write your API ID. The form will let you know if the name is taken. This field only allows alphanumeric characters, underscores and hyphens, and you must start with a lowercase letter. Please note that this field becomes read-only once the app is created.
- Setup URL: Mandatory field. The setup URL is the form that displays when you install an app for the first time in Hygraph. The form will require some information from the user depending on the characteristics of the app.
Once you've completed all mandatory information, you can move onto the next tab.
#Permissions
This section shows the access details of your app.
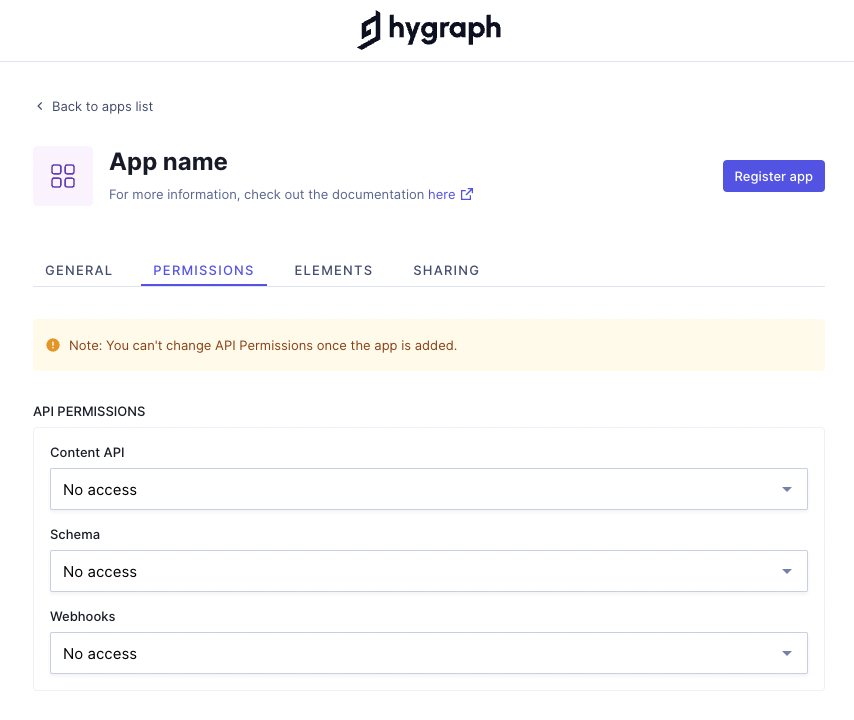 App registration - Permissions
-
API Permissions: Use these dropdown menus to select permissions for
Content API,Schema, andWebhooks.- Content API: Grants the app permissions regarding the content. For example, a localization app would need
readpermissions to access the content to be submitted, then alsowritepermissions to allow the content to be translated. - Schema: Grants the app permissions regarding the schema of your project. For example, an app that sets up models in your schema which will be ready to be used after the app installation, would need
read / writepermissions here. - Webhooks: Grants the app permissions regarding your project's webhooks. For example, a newsletter app which sets up a webhook during installation that can later be triggered upon certain action, would require
read / writepermissions here.
Setting up your app permissions incorrectly might cause the app not to work when installed.
API Permissions are only editable when first creating the app. Once the app has been saved for the first time, they can't be changed.
- Content API: Grants the app permissions regarding the content. For example, a localization app would need
-
Client ID: Unique identifier of your app that is used for authentication and authorization. Your
Client IDwill only display after the app has been saved for the first time. -
Client Secret: Used with the Client ID to resolve and grant access to your app. Your
Client Secretwill only display after the app has been saved for the first time.
The Client ID and Client secret are the credentials that allow apps to perform actions on behalf of the user.
#Elements
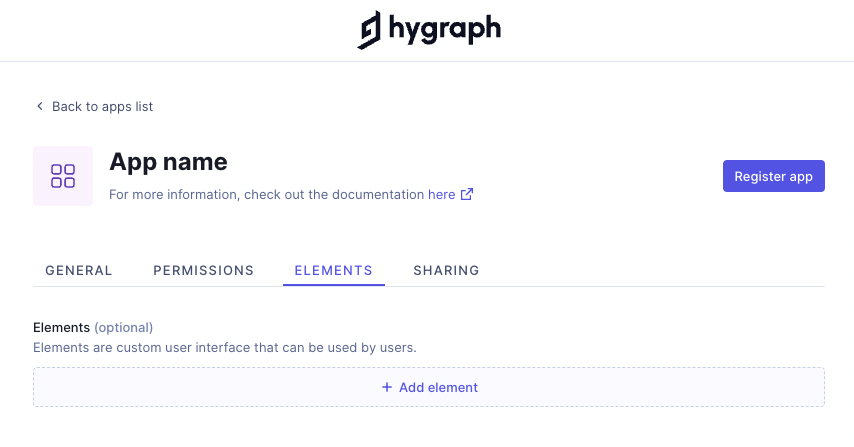 App registration - Elements
-
Elements: The Elements section will require different data depending on the element type you select. To start adding elements, click on
+ Add element:-
Name: This is where you write the name of your element.
-
API ID: This is where you write your element's API ID.
-
Type: when you create an app, you can have field elements, sidebar elements, or pages.
field: Field elements are custom fields that you can add to a model's fields schema.formSidebar: Sidebar elements are custom widgets that you can add to a model's sidebar schema.page: Page adds a section for the app under App views in the Content editor.
-
Features: This dropdown only displays when
fieldis selected as type, and allows you to select features for saidfield. One or more features can be selected using the dropdown:FieldRenderer: If the feature contains this, it can be rendered for fields.ListRenderer: If the feature contains this, it can be rendered for LIST fields. Click here to learn more about how it works.TableRenderer: If the feature contains this, it can be rendered for Table Cell. Click here to learn more about how it works.
-
Field type: This dropdown only displays when
fieldis selected as type . It allows you to select how the data will be stored, by selecting one of the standard field types from the dropdown menu. -
URL: Indicates where this element is located in the project, its dedicated URL.
-
Description: It's the description that will appear under your field name in the Add Field / Sidebar Widgets section of the Schema.
-
Config: When you create elements you can have custom settings. This field is completed using a
JSONobject, which is used to declare extra fields the user wants to render in the field or sidebar form.Click here for detailed information on field configuration.
Click here for detailed information on sidebar configuration.
-
#Sharing
App sharing enables other users to install your app.
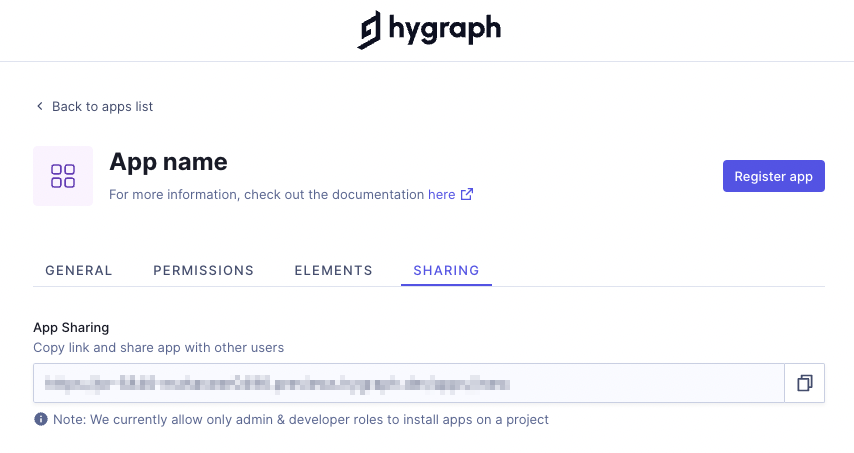 App registration - Sharing
After creating an app and saving it for the first time, this section will show the App Sharing read-only field, which contains the URL that you can copy to then share your app.
Alternatively - after the initial save of your app - you can share it by navigating to User Settings > Your Apps, locating the card of the app you wish to share, and selecting the Share app option that you'll find in the context menu.
#Installation
After you've successfully created an app, you will need to install it in order to be able to use it. This guide contains step-by-step information on how to do this.
#Resources
- App Framework: Overview to our App Framework, which extends Hygraph capabilities, offering the possibility of creating your own custom apps and sharing them with other users.
- Migrate to apps: A guide on migrating from UIX to app.
- Using app tokens: Document on how to generate an app token for your app during installation.
- Install an app: Step by step guide on how to install an app in your Hygraph project.
- Delete an app: Documentation for developers on how to delete an app you have created.
- First steps: This is our App Framework tutorial, a comprehensive step-by-step guide on how to develop an app with custom field and sidebar elements.
- Next.js starter: Document that guides you through the process of developing an app with a custom field using our
Next.jsstarter. - API Reference: Our App Framework API Reference.