Connect your Hygraph project to Plasmic
Plasmic is visual no-code page builder and CMS for any website or codebase, which you can use your existing code components with.
#What you can do with the Hygraph-Plasmic integration
Integrate Hygraph with Plasmic to create websites using a no-code visual page builder where the content is populated by Hygraph.
This allows non-technical, non-developer users to build pages, without the need to rely on developer teams.
#Prerequisites to use this integration
- You must have a Hygraph account. If you don't have one, you can create one here.
- You must have a Hygraph project with at least one model.
- You must have a Plasmic account. If you don't have one yet, you can get one here.
- You must have a Plasmic project with a workspace set up. The Plasmic no-code quickstart contains detailed information on how to do this.
#Connect your projects
#Step 1: Add a PAT to your Hygraph project
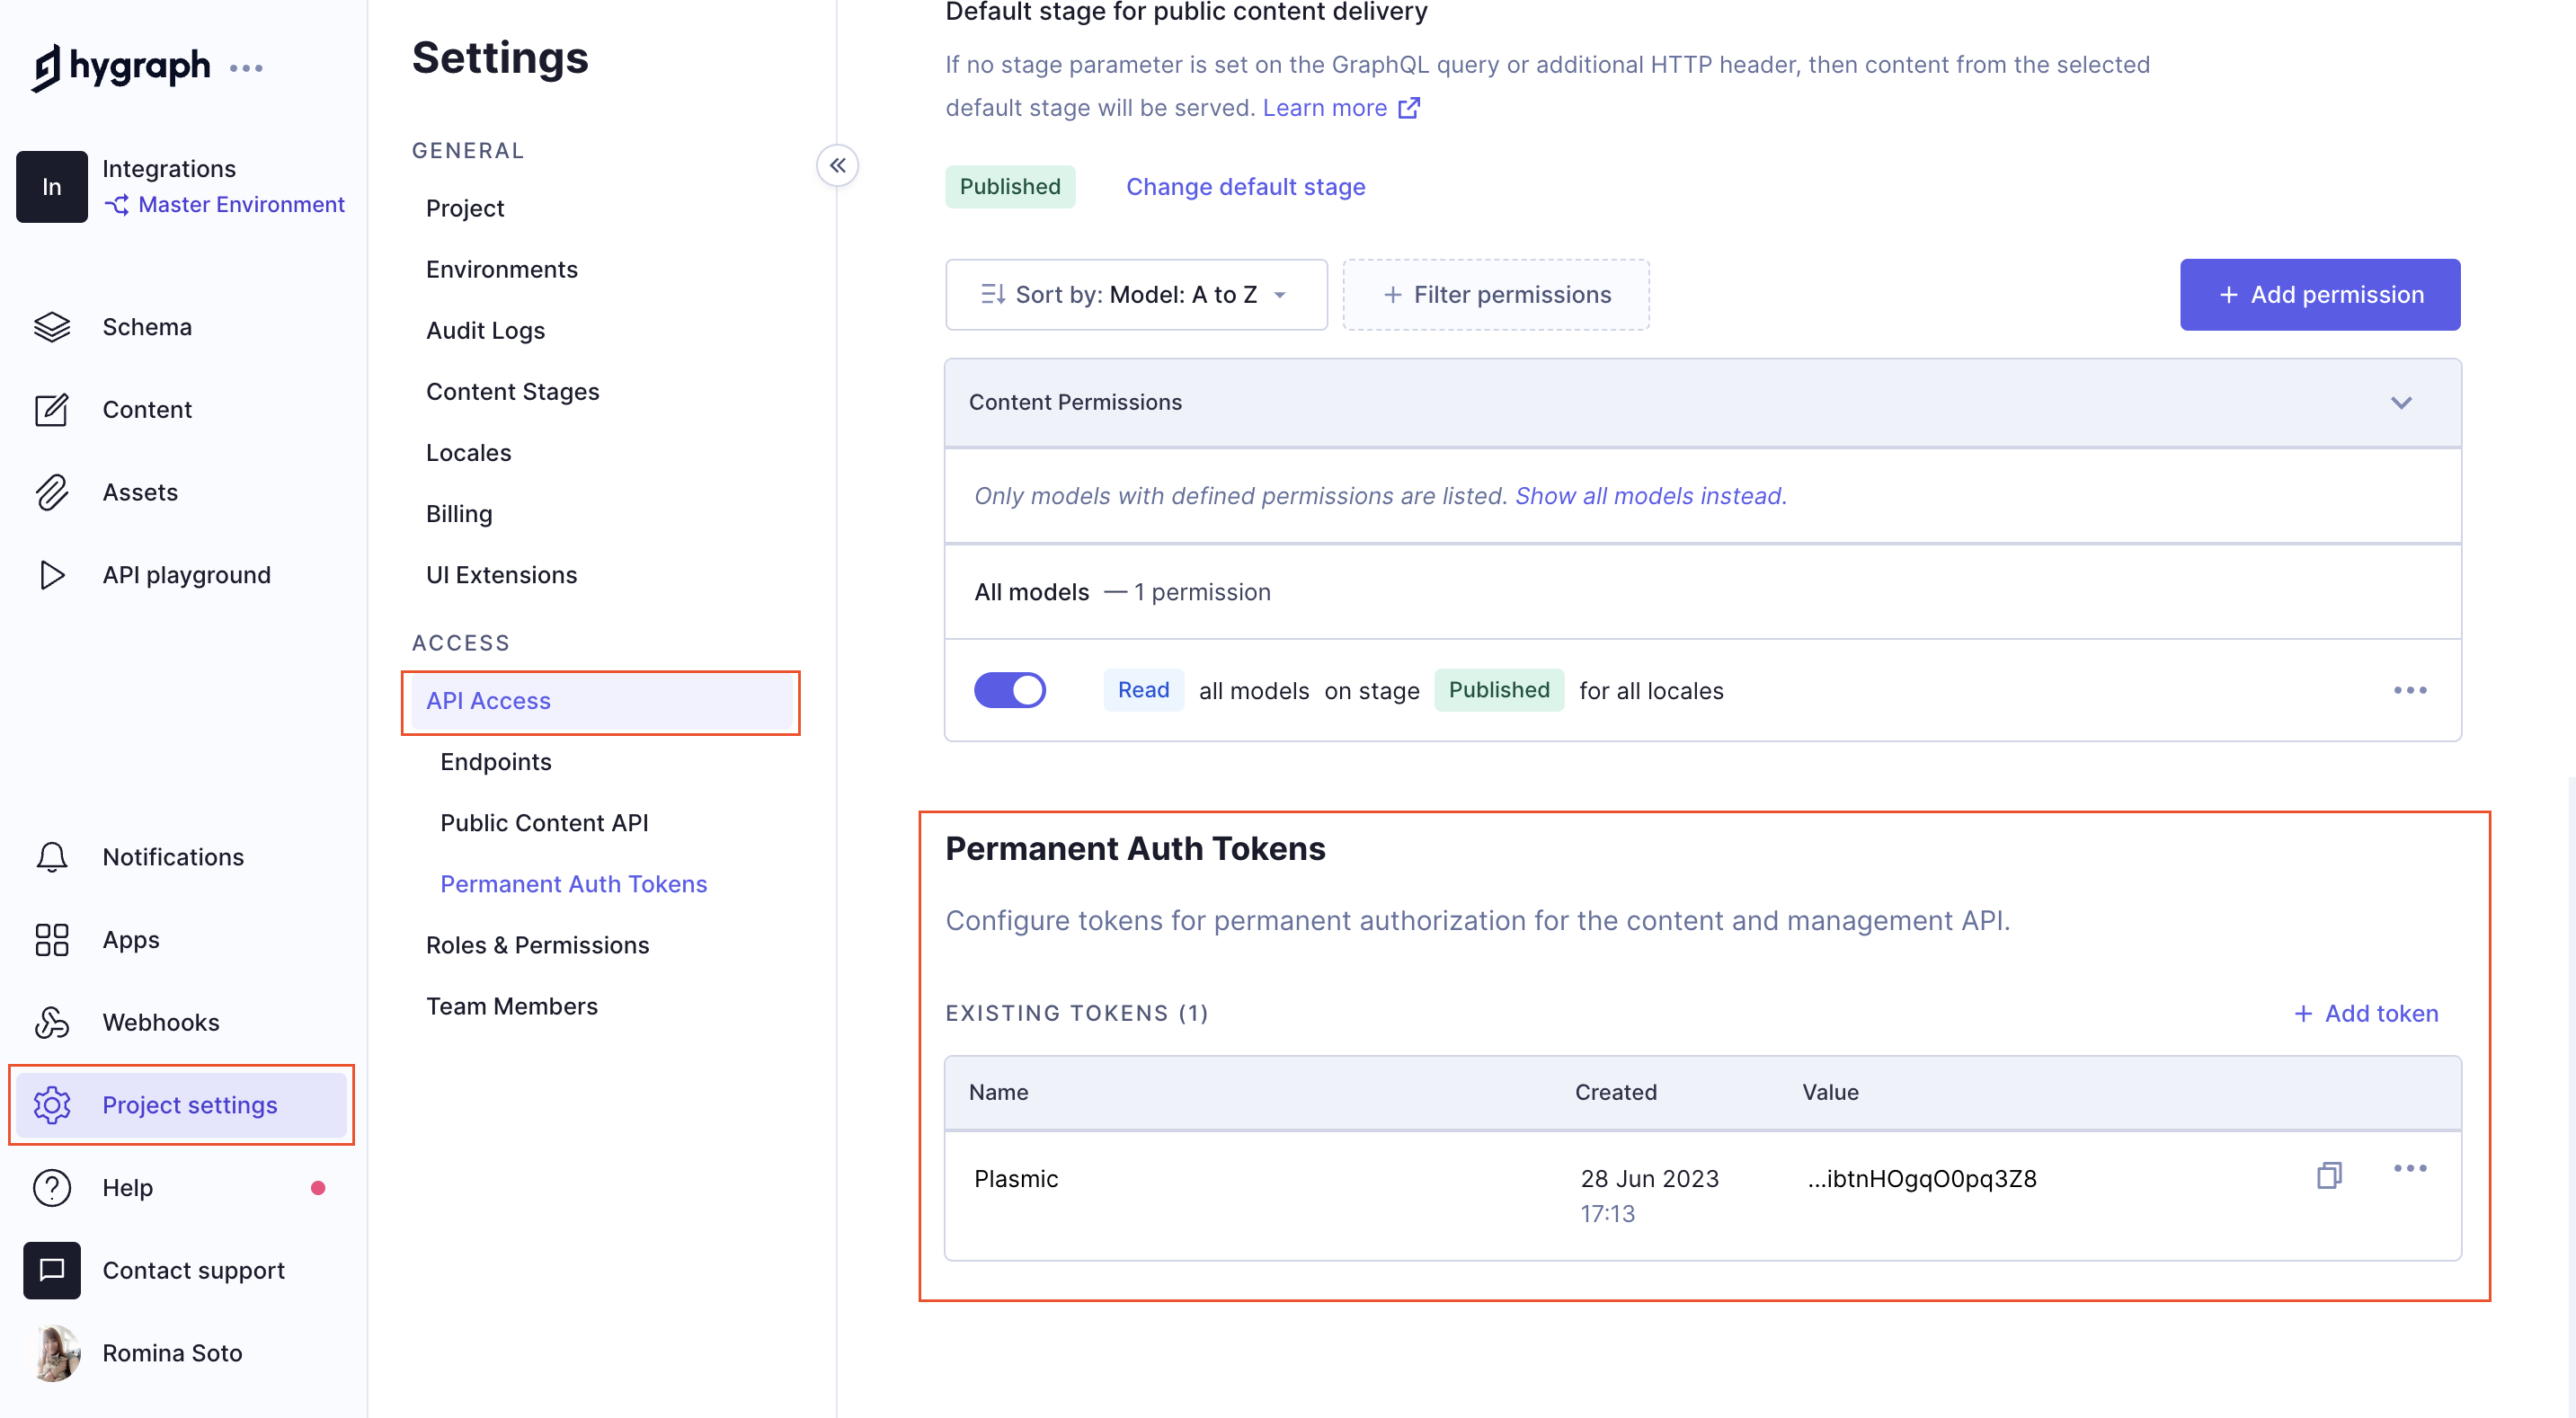 Add a PAT to your Hygraph project
- In your Hygraph project, go to
Settings > Access > API access > Permanent Auth Token. - In the Permanent Auth Token section, click on
+Add tokento add a new token. Type in aToken namefor it and, optionally, add aDescription. Use the radio buttons to select aDefault stage for content delivery. - Click on
Add & configure permissions. - Look for the token you've just added in the Permanent Auth Tokens list. Click on the three dots context menu, and select the
Editoption. - Initialize the default permissions for the Content API and the Management API by clicking on the purple
Initialize default permissionsbutton in each of the two sections.
Check out our document on permanent auth tokens to learn more about this.
#Step 2: Install Hygraph in your Plasmic project
- Click on the blue
+button located at the top left corner of your Plasmic project. - Look for
Hygraphusing the search field. - Click on the Hygraph package to install it.
- Click on
Go to settingson theProject Settingspopup that displays on the upper right corner of the screen to access the installed package, which contains theAPI URLand theAuth token.
If you miss the popup, you can find your Project Settings in the left side menu of your Plasmic project dashboard. You can see exactly where at the end of the previous video.
#Step 3: Connect your projects
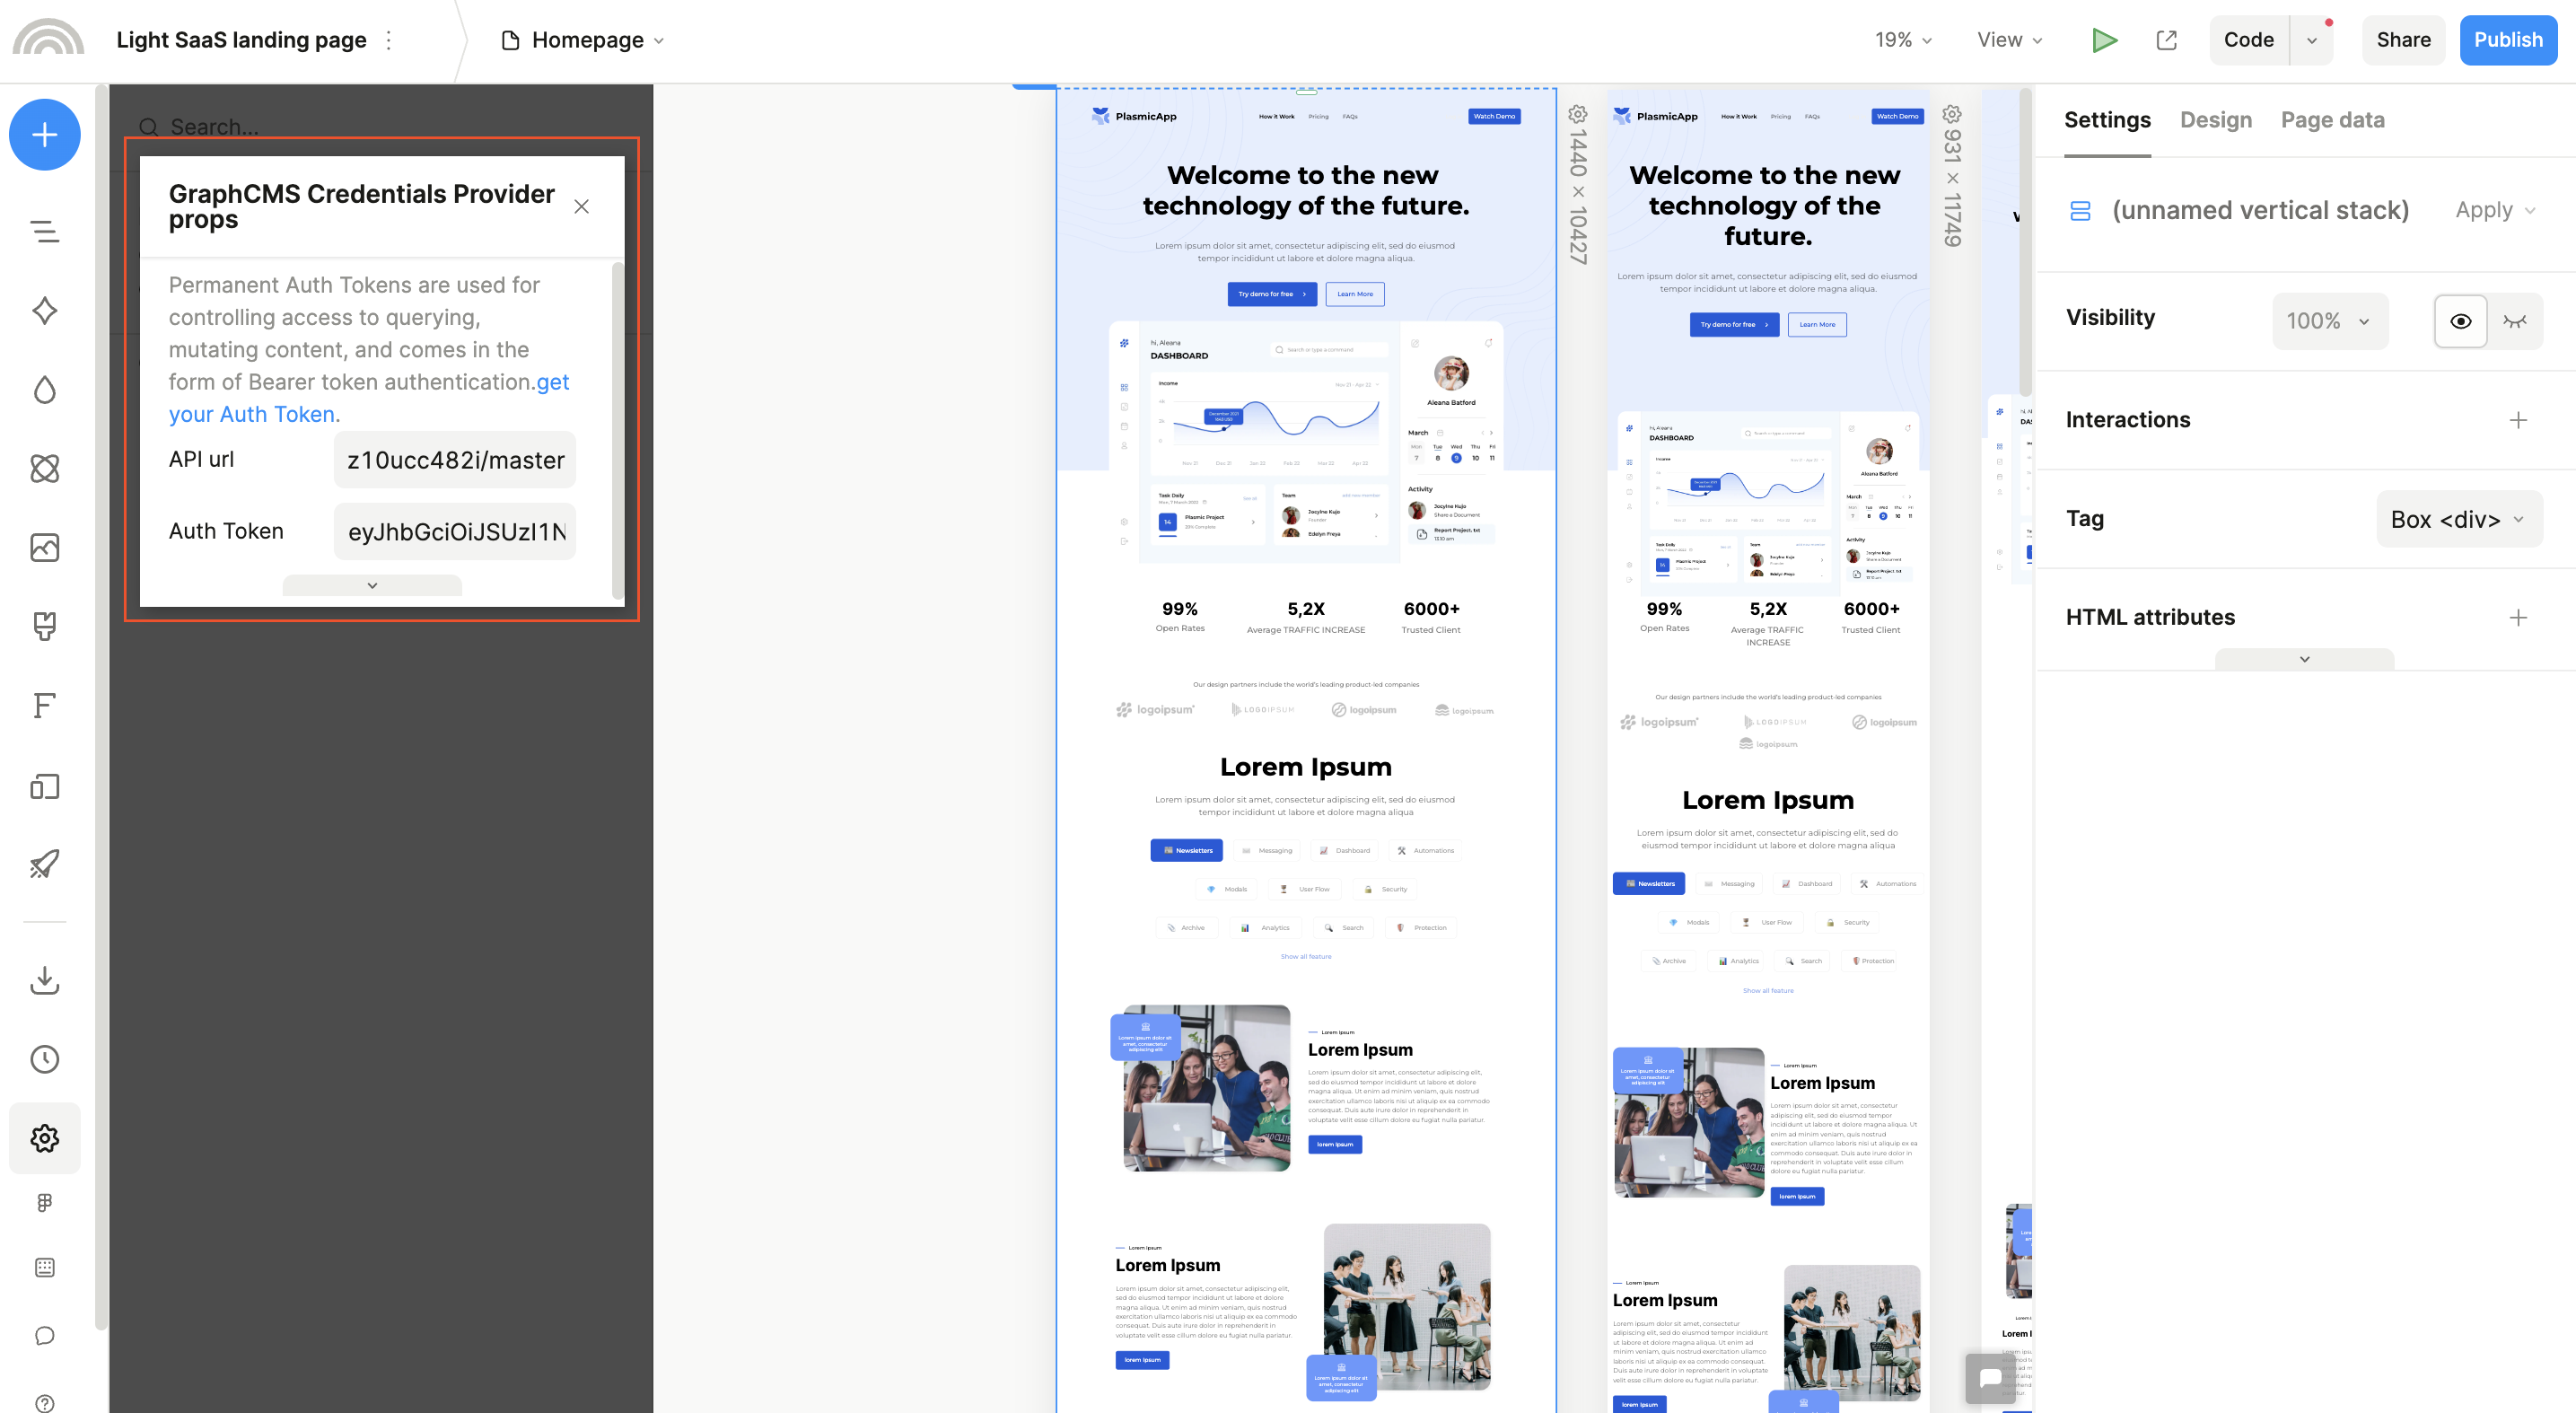 Add your Hygraph PAT and API IRL
- In your project settings, select
GraphCMS Credentials Provider.Our company has recently changed its name to Hygraph. Our name in Plasmic
will soon be updated, but for now please note that it shows our old name. - Replace the
API URLvalue in Plasmic with theContent APIendpoint from your Hygraph project. You will find it by navigating toSettings > Access > API access > Endpoints > Content APIin your Hygraph project. - Replace the
Auth Tokenvalue in Plasmic with the value for the PAT you created in Hygraph for Step 1 of this tutorial. To copy the value, go toSettings > Access > API access > Permanent Auth Tokenin your Hygraph project and click on the copy icon.
Your projects are now connected.
#Use Plasmic with Hygraph
Now that your projects are connected, you will need to add a Fetcher and then a Field inside it.
To add them:
- Click on the blue
+icon at the top left corner of the screen, and type "GraphCMS" in the search field. - Drag and drop the GraphCMS Fetcher element from the search results, into the place in your project where you want to have it.
- Set a query for the Fetcher element by clicking on
unsetnext toQueryon the right sidebar. - Type in your query in the playground, and run it to test that it works. Once you've tested it, click on
Save. - Click on the GraphCMS Fetcher element on the template to display its settings on the right sidebar.
- Click on
unsetnext toFieldto open the field selection screen. - A popup will show you all the fields that you set up in the query. Click on one to select it, then click on
Save.
The selected content should be fetched and displayed on your frontend preview.