Publish content
#Overview
When you create content, publishing it is crucial to make it visible and available to others. Only content that is published can be consumed by others.
Hygraph has two Content Stages, DRAFT and PUBLISHED - with PUBLISHED being the only stage where content is visible to others and ready to be consumed.
Once you've finished working on a content piece in the DRAFT stage, simply click Save & Publish or Publish to move it to the PUBLISHED stage.
Content entries often contain assets and references, so it's a good practice to make sure they are also PUBLISHED. This ensures everything loads properly.
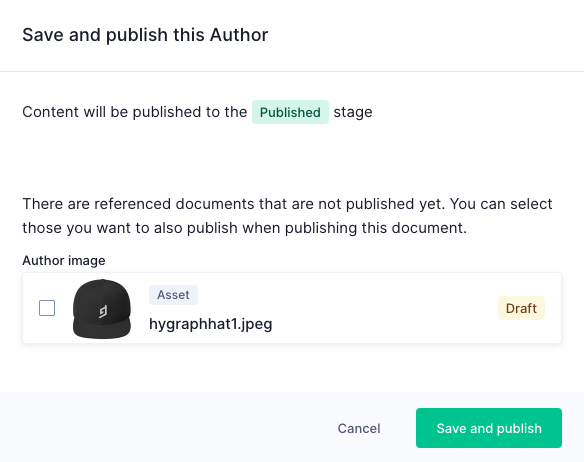 Publish related assets
If any assets or references are still in the DRAFT stage, you'll be prompted to publish them when you click Save & Publish. When content is PUBLISHED, the system creates a new version that shows how the content has evolved and when it was last updated.
#Publish a content entry
To publish an already created content entry:
- Navigate to the Content editor tab of your Hygraph project.
- Select the content model where the entry you want is.
- Click on the pencil icon of the content entry you want, to enter the content-editing mode.
- Click on the
Publishbutton on the upper right corner of the screen to publish.
Please note that if you make any changes to the content entry, the Publish button will say Save & Publish instead.
#Bulk publishing
You can select several content pieces from the content table and publish them at the same time.
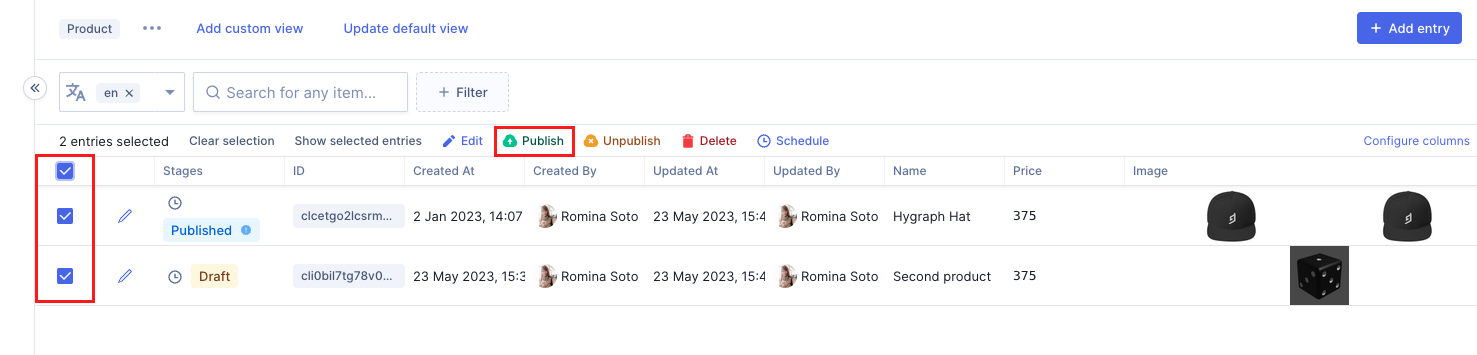 Bulk publishing
- Click on the content editor tab of the app.
- Locate the view where the content is, and click on it.
- Use the checkboxes to select the content entries you want to bulk publish.
- Click on the
Publishoption at the top of the table. - A confirmation screen will display. Click on
Publishagain to finalize the process.
#Scheduled publishing
 Scheduled publishing
Hygraph gives you the possibility to schedule the publishing and unpublishing of content pieces.
When editing a content entry, instead of publishing right away, you can choose the option Schedule Item for publishing at a later day and time:
- Inside a content entry, click on the arrow icon on the
Publishbutton to display the dropdown menu. Remember that if the content piece has never been saved before, the button saysSave & Publish. - Click on
Schedule entryto select a later date and time. If the content piece has never been saved before, the option you need to select isSave & schedule entry. - Select whether you want to schedule the entry individually, or if you want to add it to an existing release, then click
Continue.
The next screen depends on what you selected on step 3:
#Schedule entry only
On this screen you must provide the scheduling information:
Action: You can schedule content to be published or unpublished. Click on the radio buttons to select one of these options.Date&Time: Use the calendar picker to select a date and a time for the scheduled action.Time zone: Use the dropdown menu to select a time zone.- Optional: If there are any unpublished assets or references linked to the entry you are scheduling, you can schedule those as well. After clicking on
Continuein the previous screen, a new screen will display where you can select the items. Use the checkboxes to select the items you want to schedule.
Finally, click on Schedule entry. A success message will display on the lower right corner of the screen to confirm that you are done.
#Add entry to a release
If your project has scheduled releases configured, you can simply add your content entry to it:
- Select a schedule from the dropdown menu, then click on
Continue. - Use the radio buttons to select the action:
PUBLISHorUNPUBLISH. - Optional: If there are any unpublished assets or references linked to the entry you are scheduling, you can schedule those as well. After clicking on
Continuein the previous screen, a new screen will display where you can select the items. Use the checkboxes to select the items you want to schedule. - Click on
Add to releaseto finalize the process.
If you select this option and your project has no schedules configured, the system will let you know that you need to add one first.
#Bulk scheduling
You can select several content pieces from the content table and schedule them for publishing at the same time.
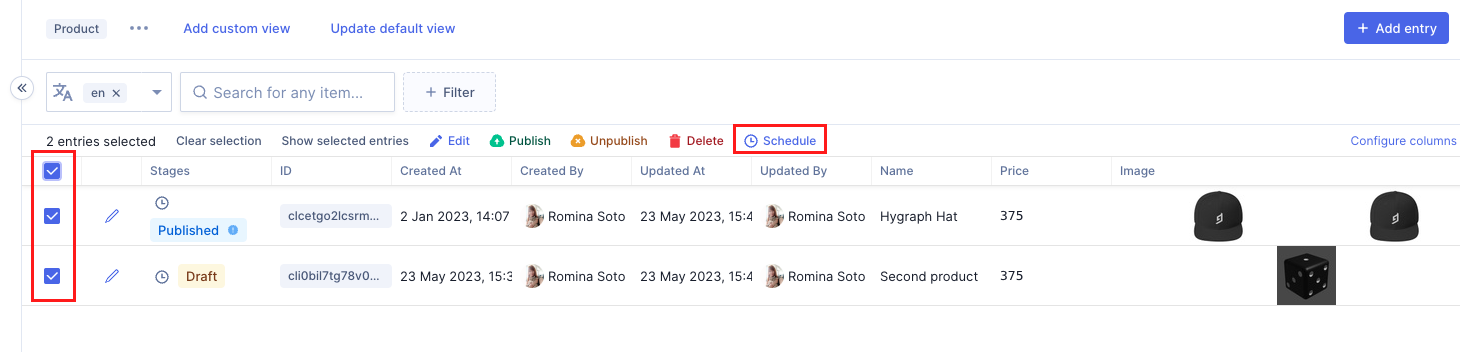 Bulk scheduling
- Click on the content editor tab of the app.
- Locate the view where the content is, and click on it.
- Use the checkboxes to select the content entries you want to bulk schedule.
- Click on the
Scheduleoption at the top of the table. - If you want to schedule the entries without adding them to a release, follow this workflow. If you want to add the entries to a release, follow this workflow.
#Unpublish content
You can use this workflow to unpublish one or more content entries.
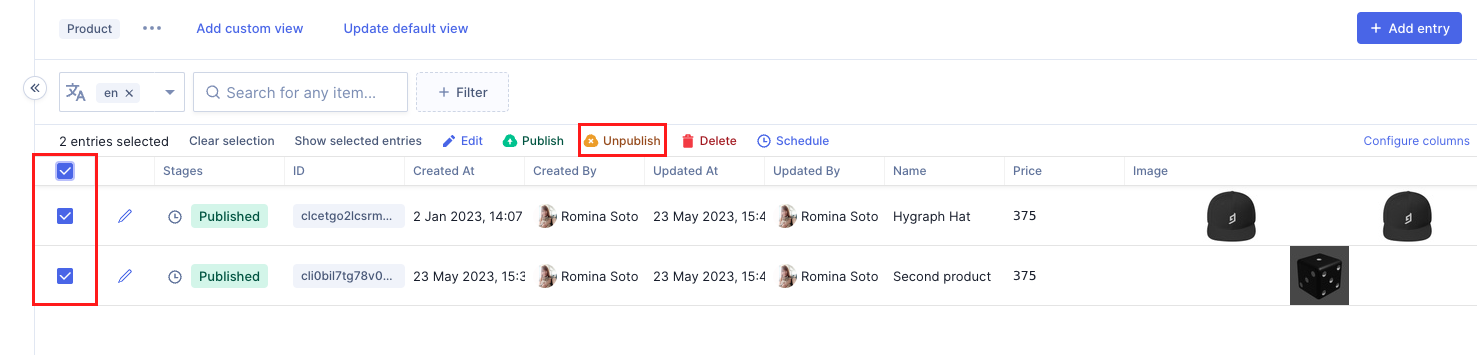 Unpublish content
- Click on the content editor tab of the app.
- Locate the view where the content is, and click on it.
- Use the checkboxes to select one or more content entries to unpublish.
- Click on the
Unpublishoption at the top of the table. - A confirmation screen will display. Click on
Unpublishagain to finalize the process. The content entries will go back to theDRAFTstage. Check out our document on content stages to learn more about the meaning of stages.