Content stages
#Default stages
Hygraph has two default stages, DRAFT and PUBLISHED. DRAFT allows people to add and edit content without affecting published content. When the content is ready to be pushed, it is added to the PUBLISHED stage.
Some projects may have custom content stages depending on plan and configuration.
You can see the stage of a content entry on Stages column of the form in the content editor:
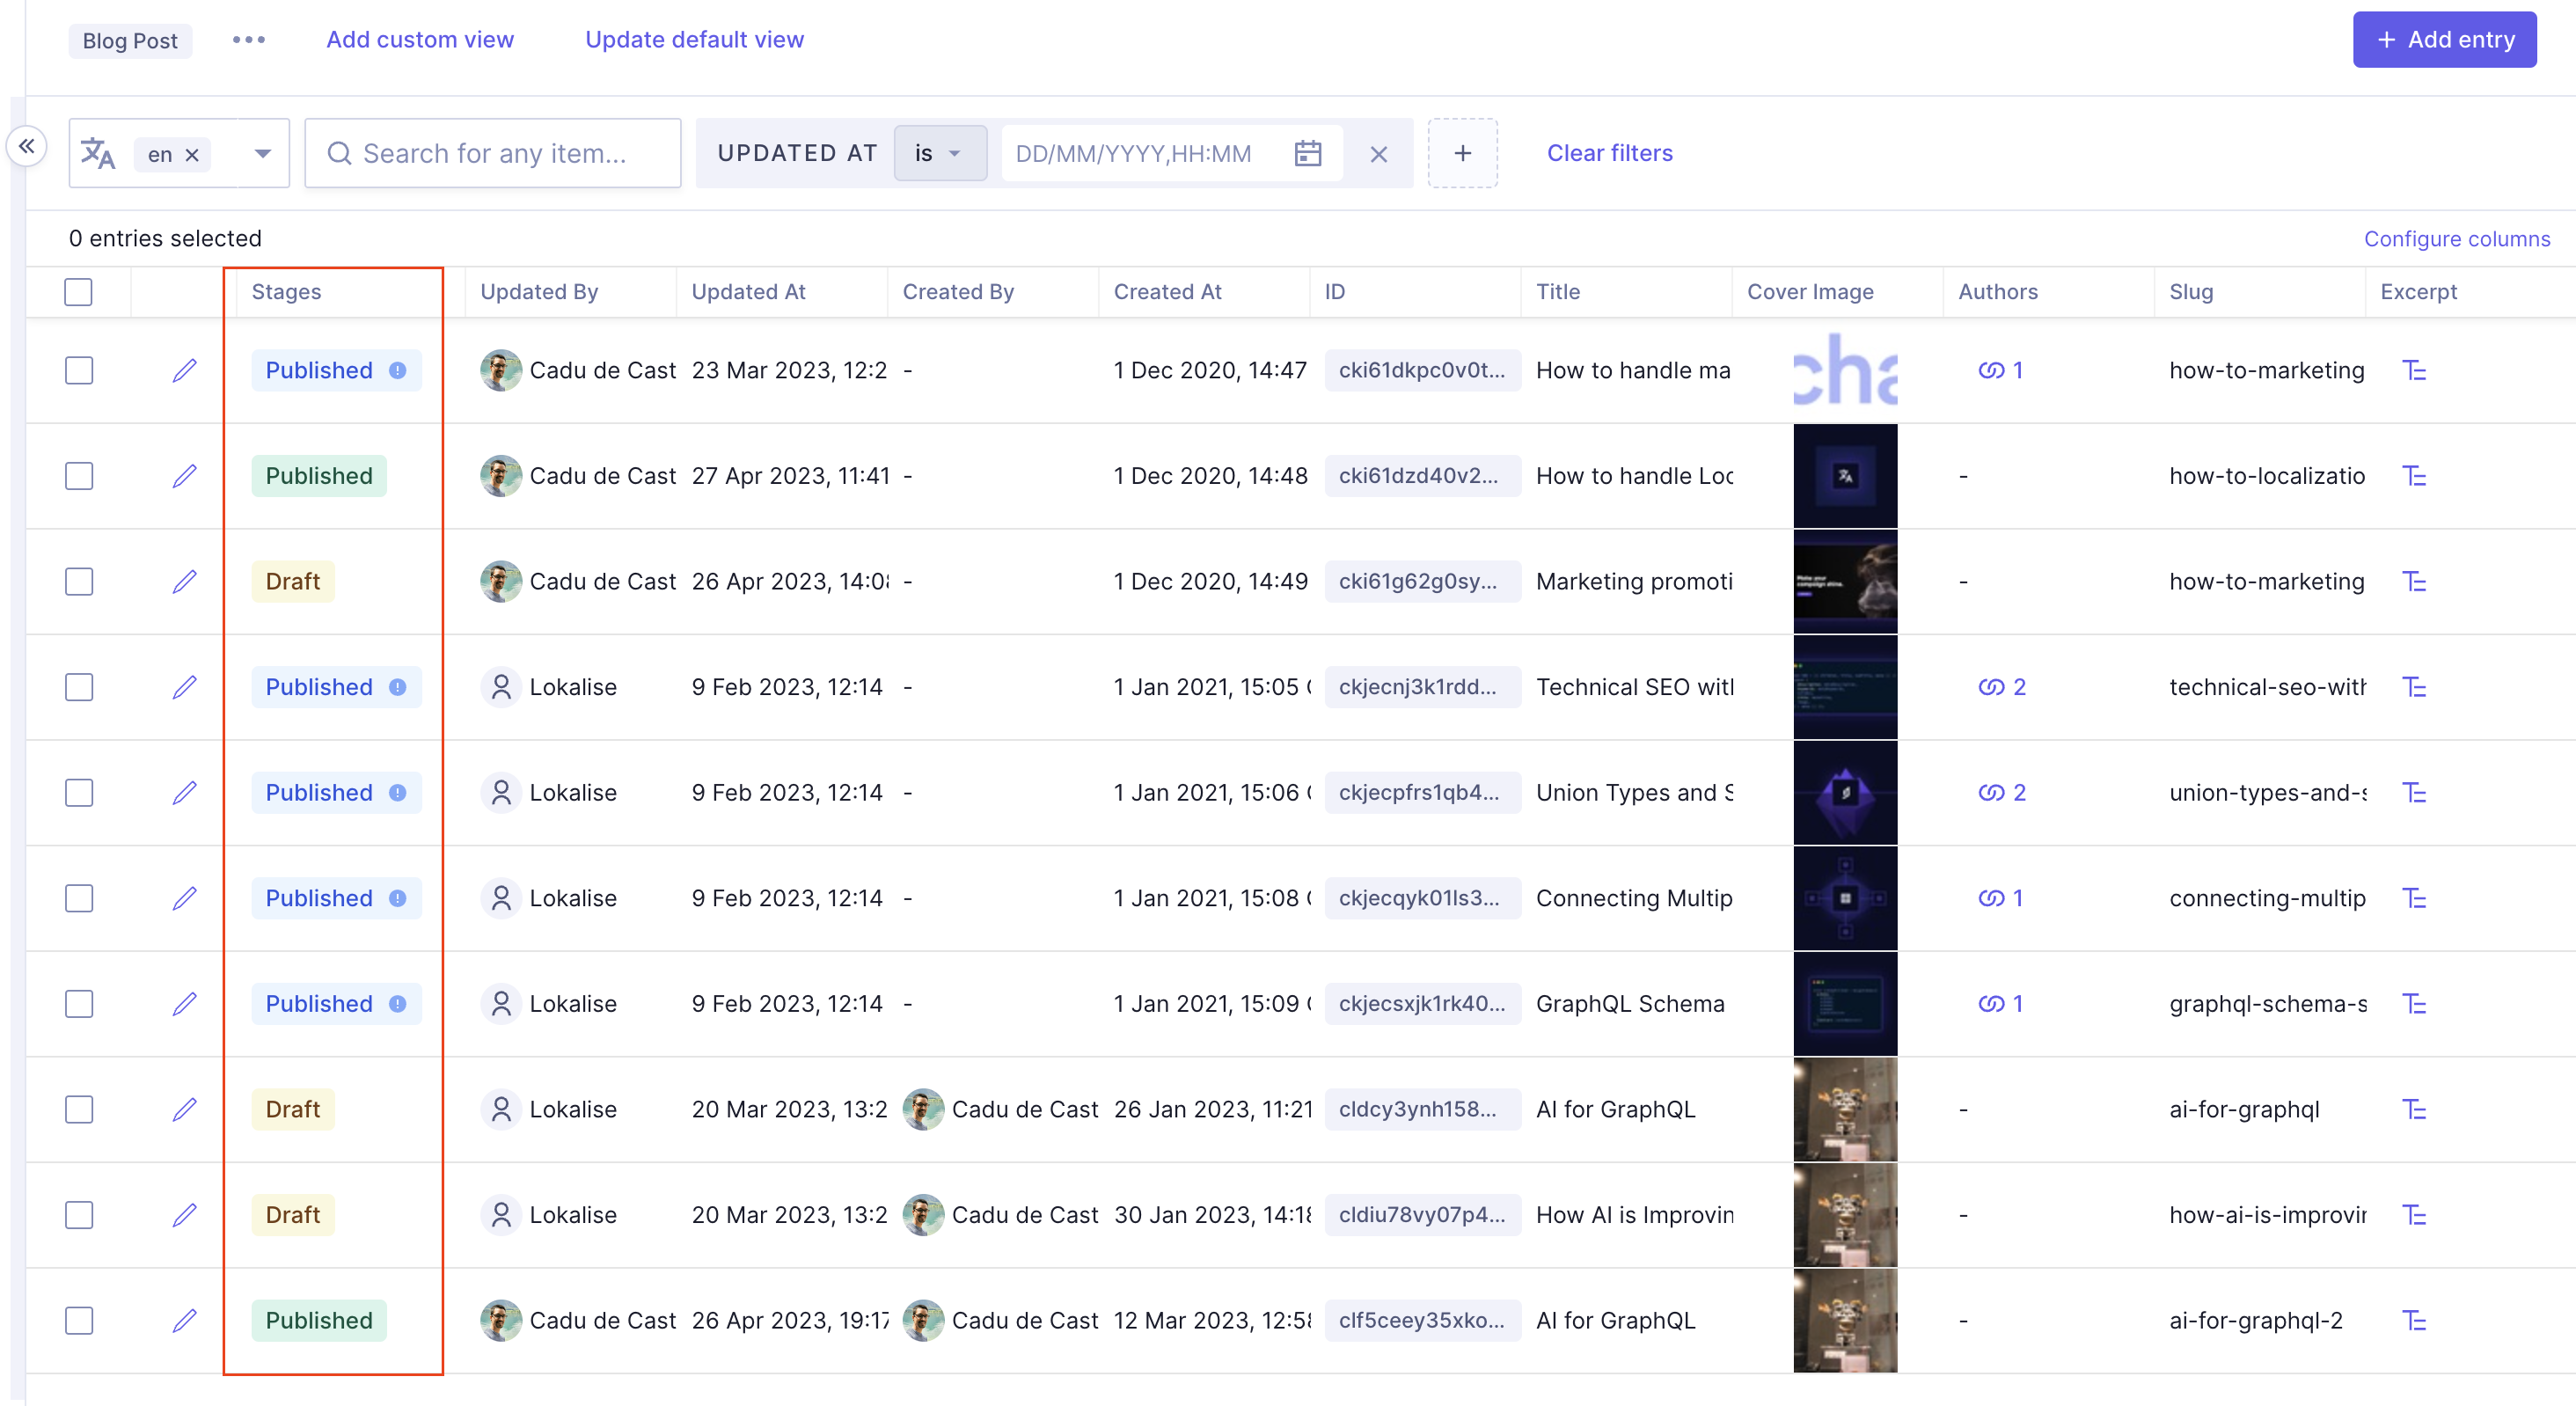 Content stages
Note that the PUBLISHED stage tag is sometimes green and sometimes blue.
Greenmeans that the contents of the entry are the same as the contents currently published.Bluemeans that the published content is outdated, that is, that the contents of the entry are a newer version than what is currently published.
Clicking on Publish will update the version currently live so that the contents are the same as the entry.
 Publish button
Note that if you make any changes to the content entry, this button will say Save & Publish instead.
Check out our Update content document to learn more.
#Content staging
Content staging is a useful tool that allows Editors to compare versions of content in different stages. Remember that content might be in the blue PUBLISHED stage, meaning it is outdated - the version online is different from the version in your content editor.
To compare versions:
- Navigate to the entry you want to compare in the content editor, and access its contents by clicking on the pencil icon.
- Find the
Stagessection on the sidebar. - Click on the dropdown menu to display the options, and click on
Compare with current draft.
You will get a side by side view of both entries. The live (currently published) version displays on the right of the screen, while your DRAFT or outdated version displays on the left.
This feature can be particularly helpful when using Custom Roles to create more sophisticated workflows for the team.
For example, if a team member should only be able to create DRAFT content but not move it directly to the PUBLISHED stage, this is possible with Custom Roles.
#Revert changes
 Revert changes
When Editors want to quickly revert changes so their DRAFT or outdated content is the same as what is currenlty live in the PUBLISHED stage, they can compare the two content stages and choose which fields to revert, like so:
- In the comparison view that you accessed in the previous section, find the field that you want to revert changes for.
- Click on the
Restore published valuearrow icon next to the field. This will make it so yourDRAFTor outdated content has the same value as what is currently published. Do this for all the fields that have values you want to revert. - Click on
SaveorSave & Published, depending on what you need to do.
This saves content teams time and energy by ensuring they don't need to do double the work when trying to roll back changes.