3.2 Add components to your models
#Overview
In this lesson you'll learn how to add the components we just created to the models in your schema, using basic and modular component fields.
#Adding the components to our models
In this step of the tutorial, we'll combine the models we created at the start with the components we created in the last lesson.
#Product
In this step, we'll add our Product Variant & Related product components to our Product model.
Let's start with Product Variant: We'll select the Product model on the Schema and add a Basic component field to it from the right sidebar.
We'll use the following information:
| Field | Input |
|---|---|
| Display Name | Product Variant |
| API ID | ProductVariant |
| Select component | Select Product Variant from the dropdown |
Click Add to save your component.
We just created a basic component field that will allow us to select a product type with its own set of fields to complete every time we create a product entry.
For our related products section, we'll add a Basic component field from the right sidebar using this information:
| Field | Input |
|---|---|
| Display Name | Related products |
| API ID | relatedProducts |
| Description | Add related products |
| Select component | Select Related products from the dropdown |
Click Add to save your component.
We just created a basic component field containing the Related products component we configured before.
Your Product model should look like this:
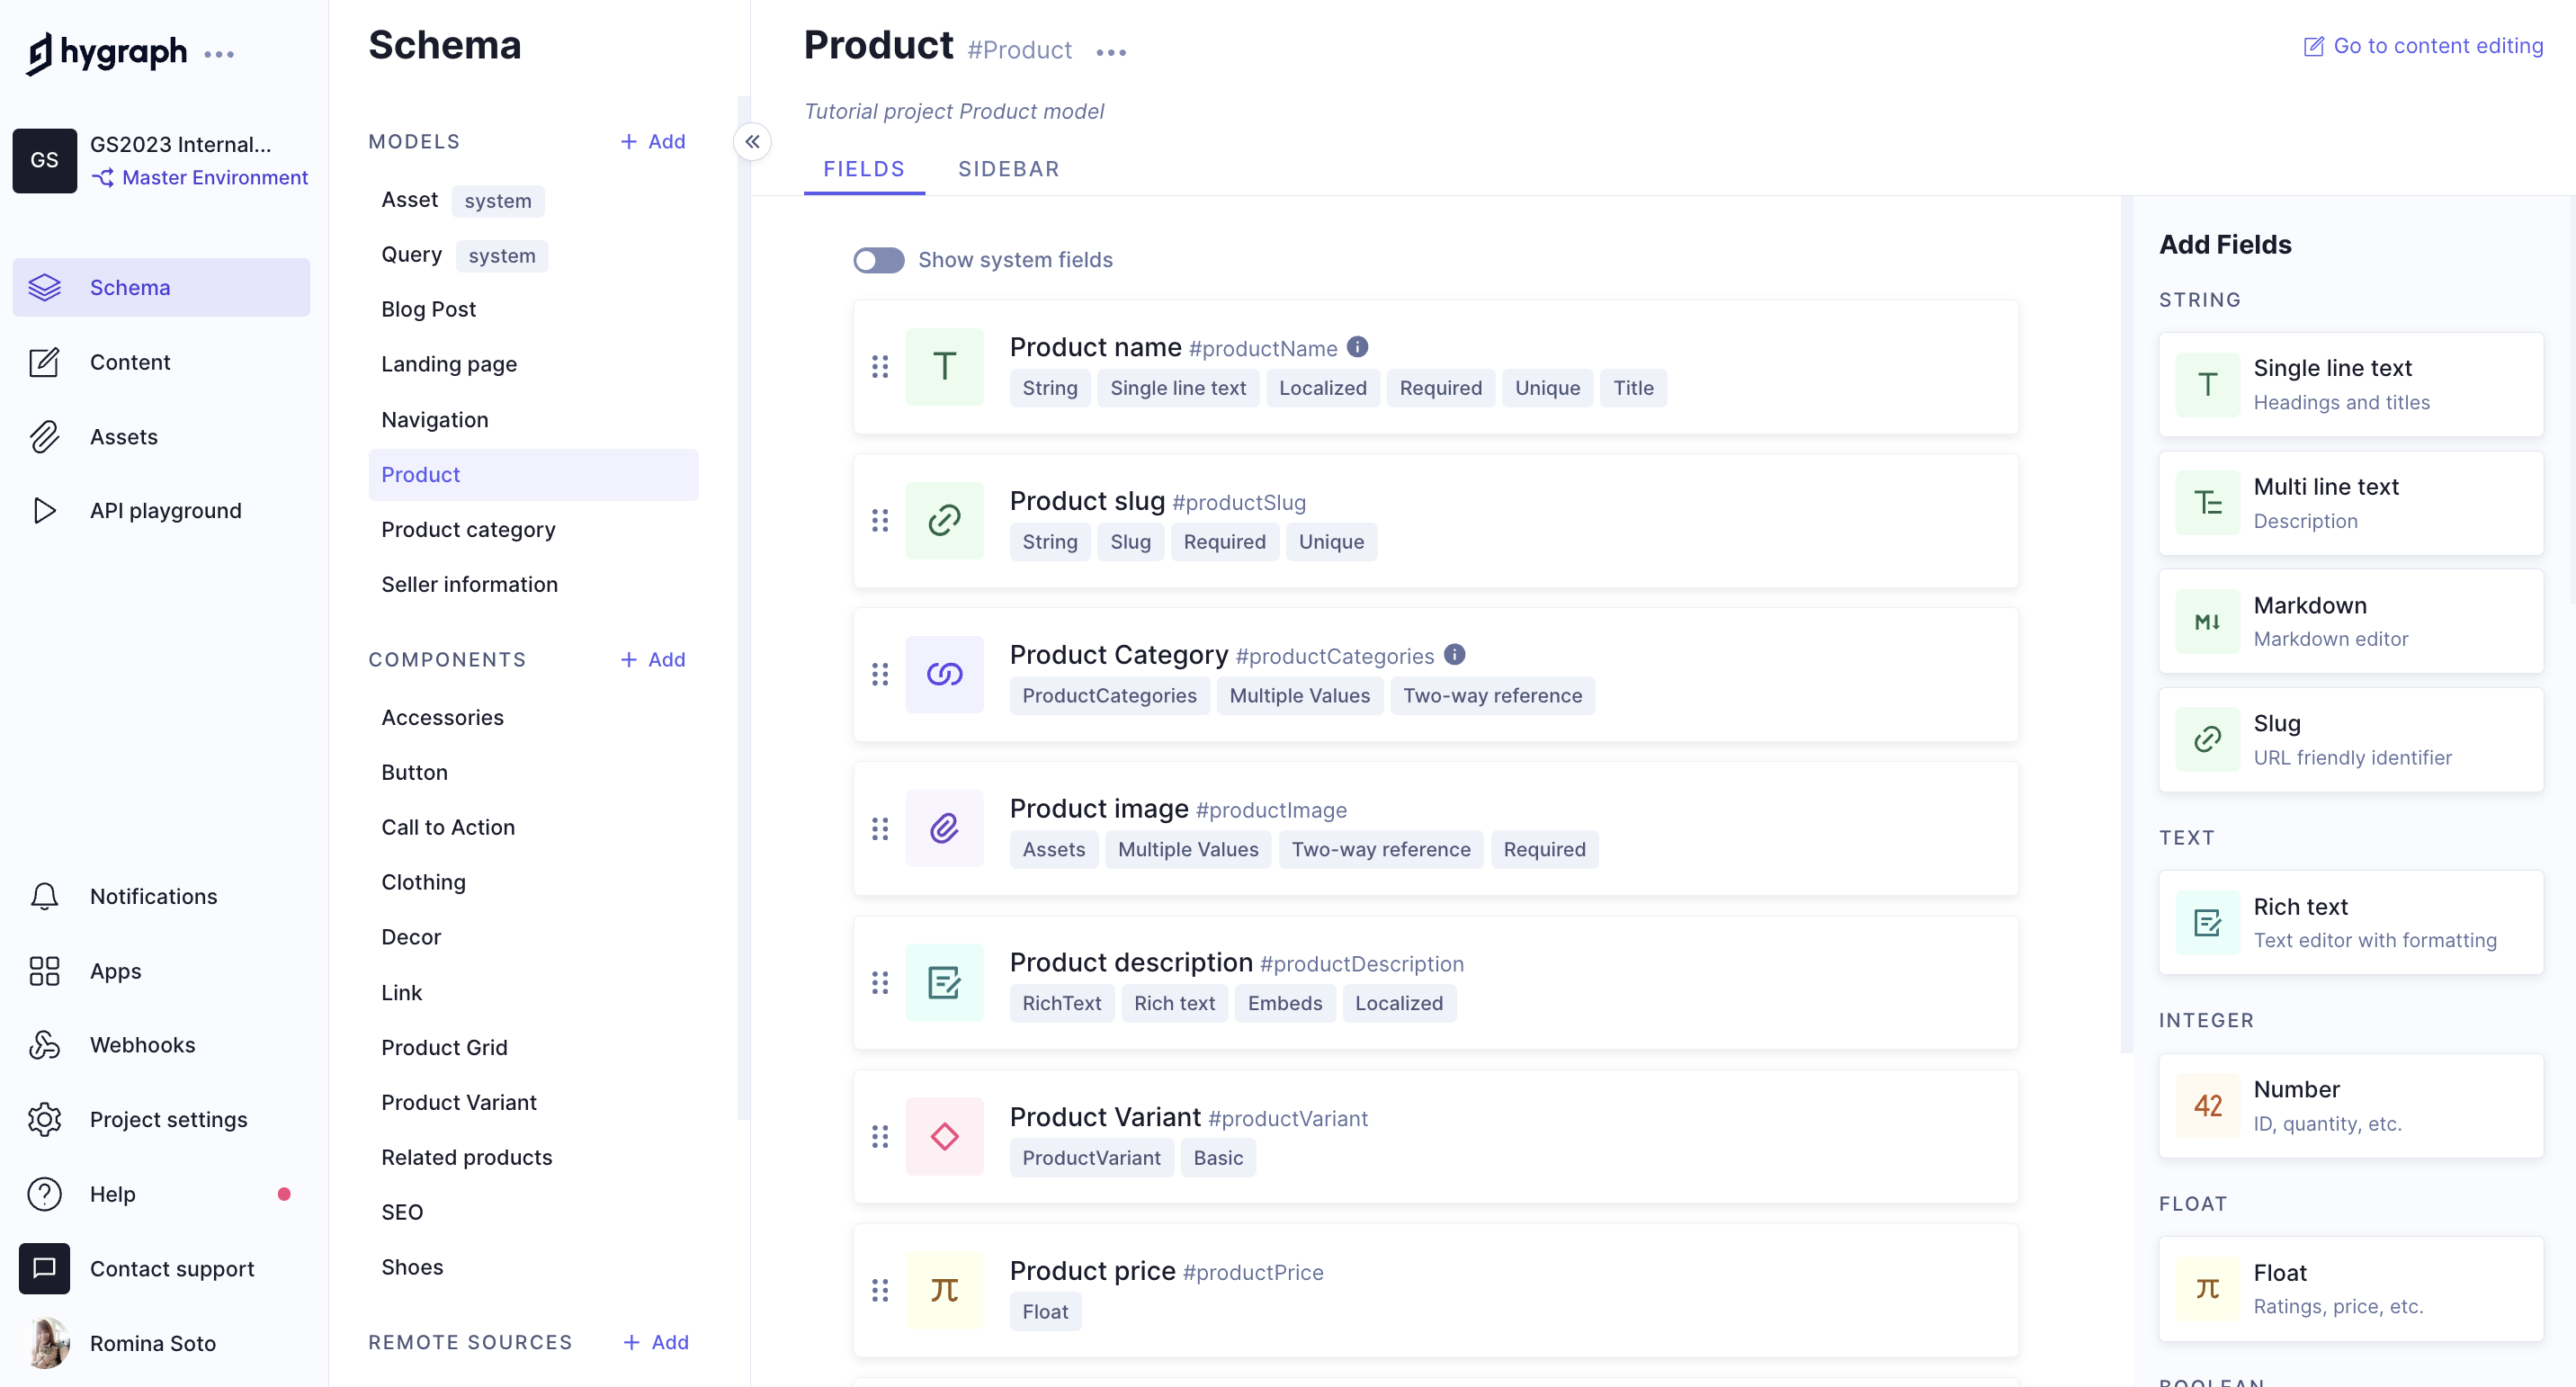 Finished Product model with fields
#Landing page
We're going to add a modular component to our Landing page, which we will later use to add CTA and Product grid as sections. Adding this as a modular component that allows multiple values will give us more flexibility in the future.
We'll select the Landing Page model on the Schema and add a Modular component field to it following the same steps as when we added a modular component in a previous lesson.
We'll use the following information:
| Field | Input |
|---|---|
| Display Name | Stripes |
| API ID | stripes |
| Description | Sections |
| Field options | Select the Allow multiple values checkbox |
| Select allowed components | Select Call to Action & Product Grid from the dropdown |
Click Add to save your component.
Your Landing page model should look like this:
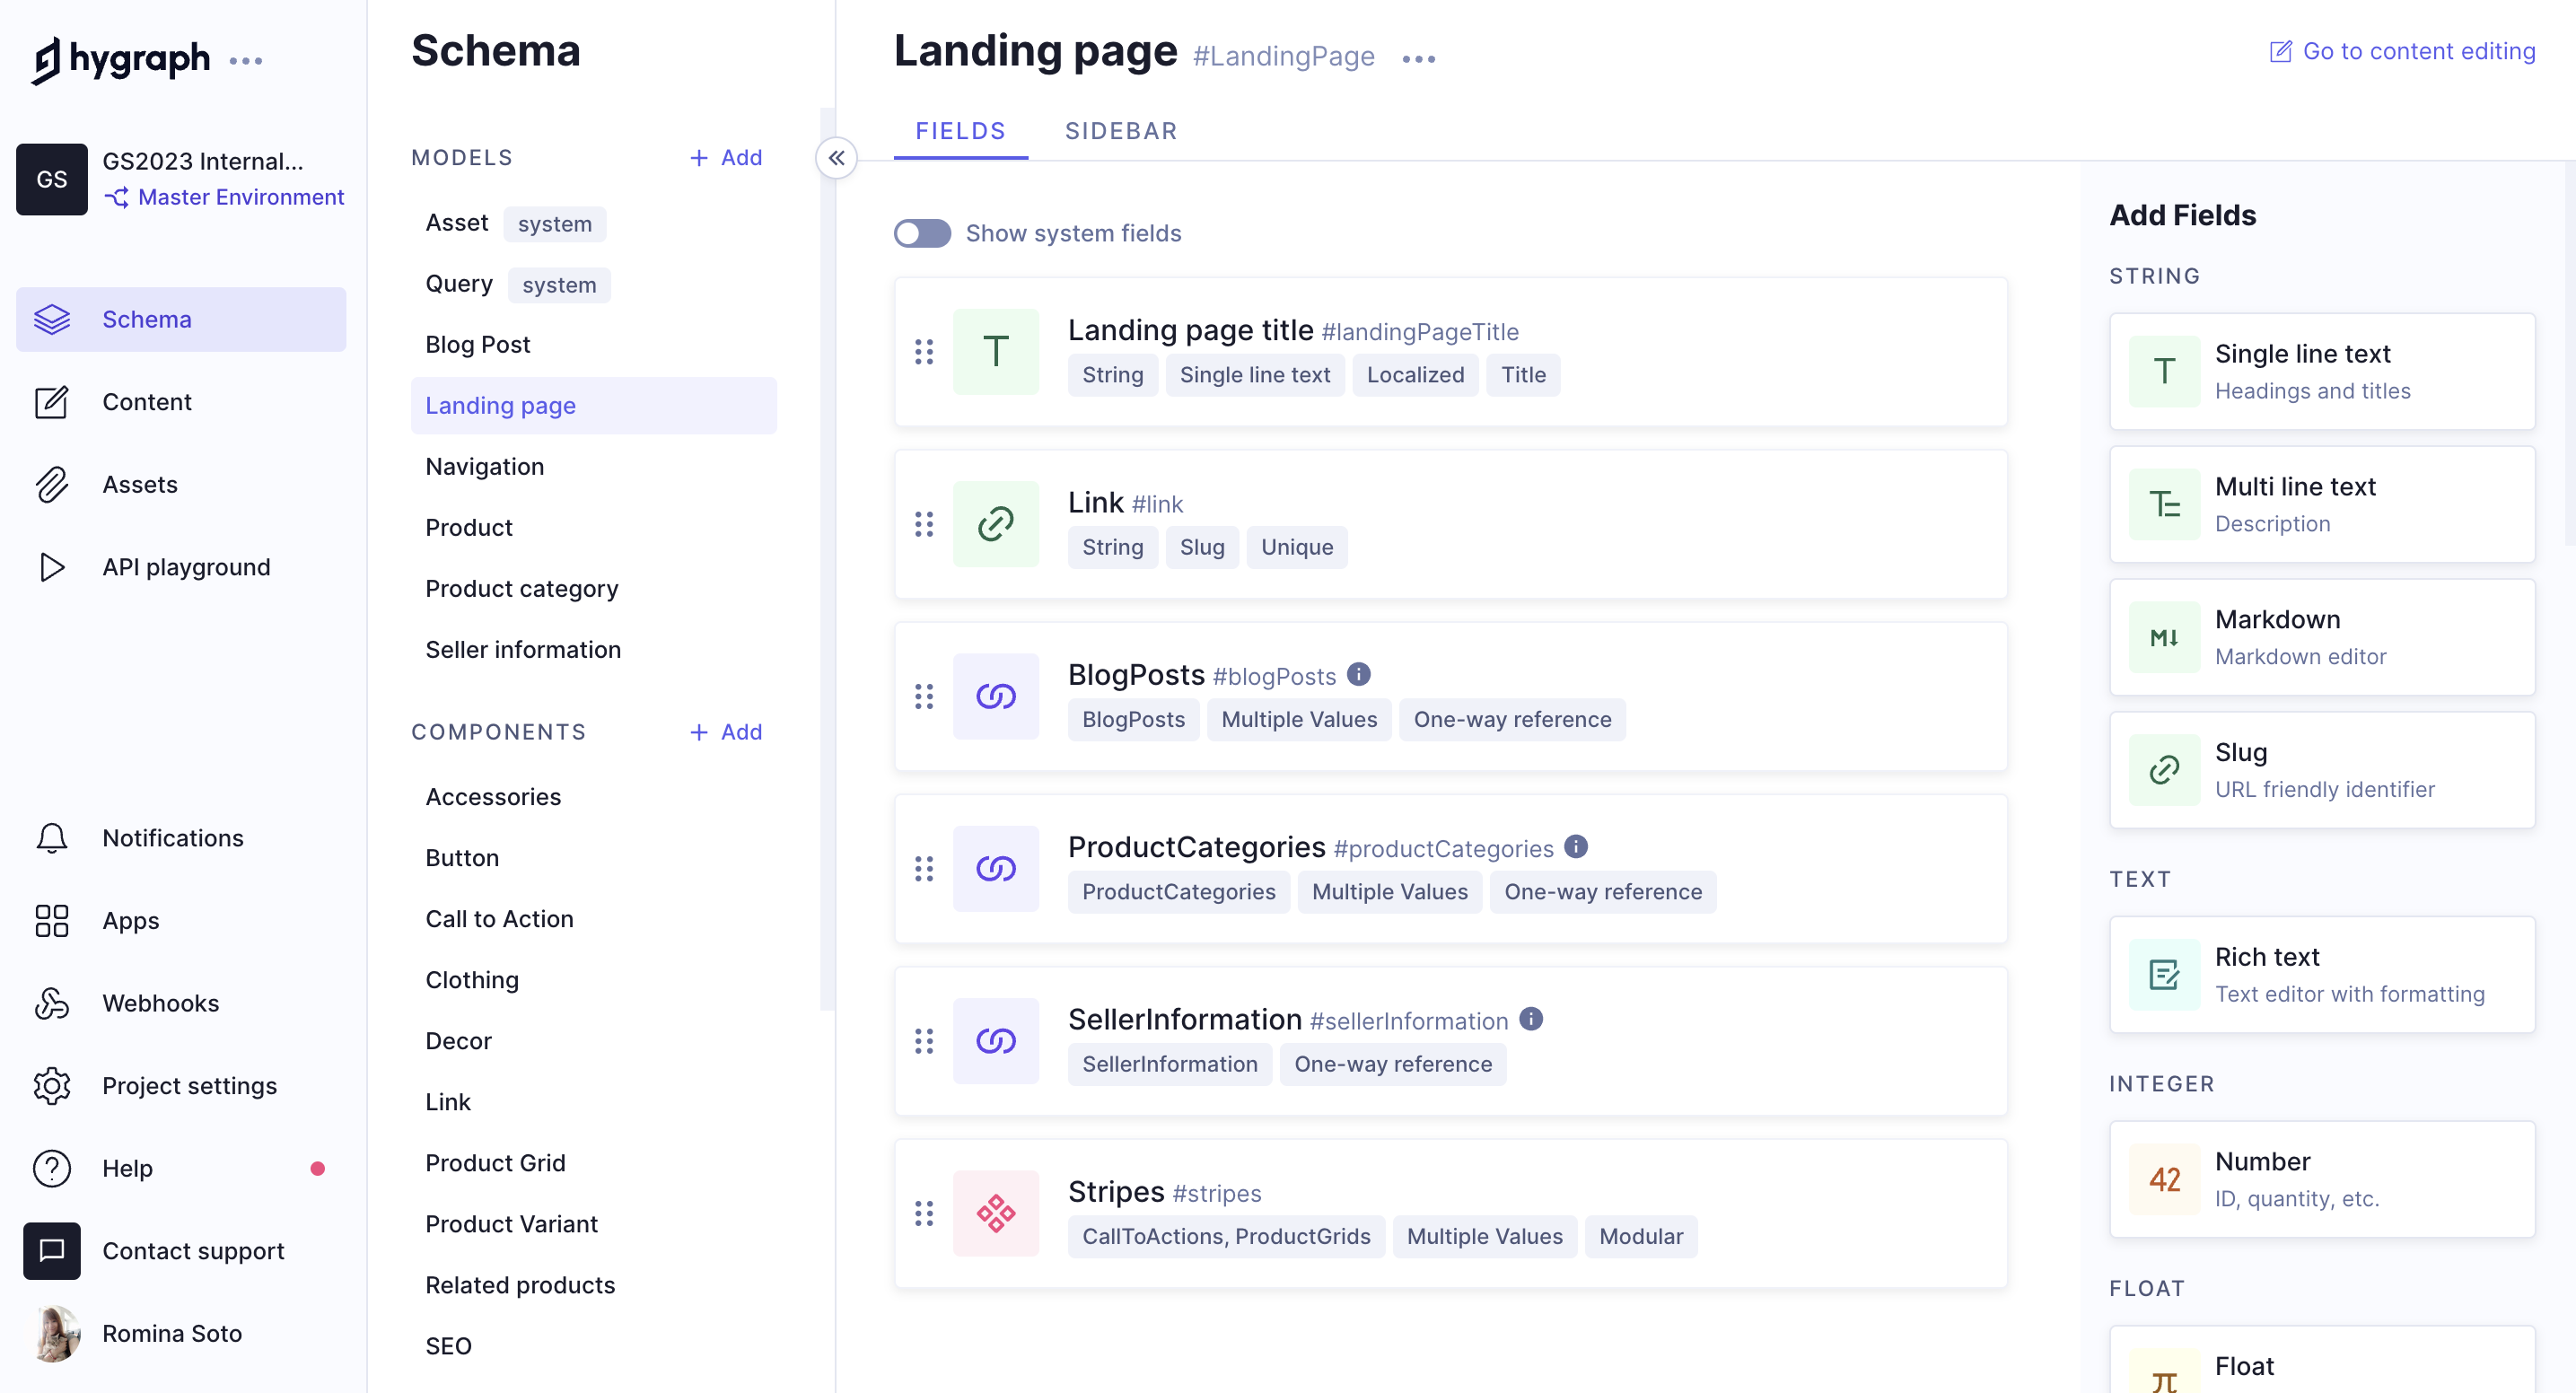 Finished Landing Page model with fields
#Included in the project
#SEO
This component, which came included in our project from the start, is used for search engine optimization. While in the previous lesson we got into the fields that make up this component and mentioned we won't use it during content creation, we will add it to the models that would benefit from having it in a real e-commerce:
- Product
- Landing page
- Blog post
In each of these models, we will add the SEO component as a Basic component field using the following information:
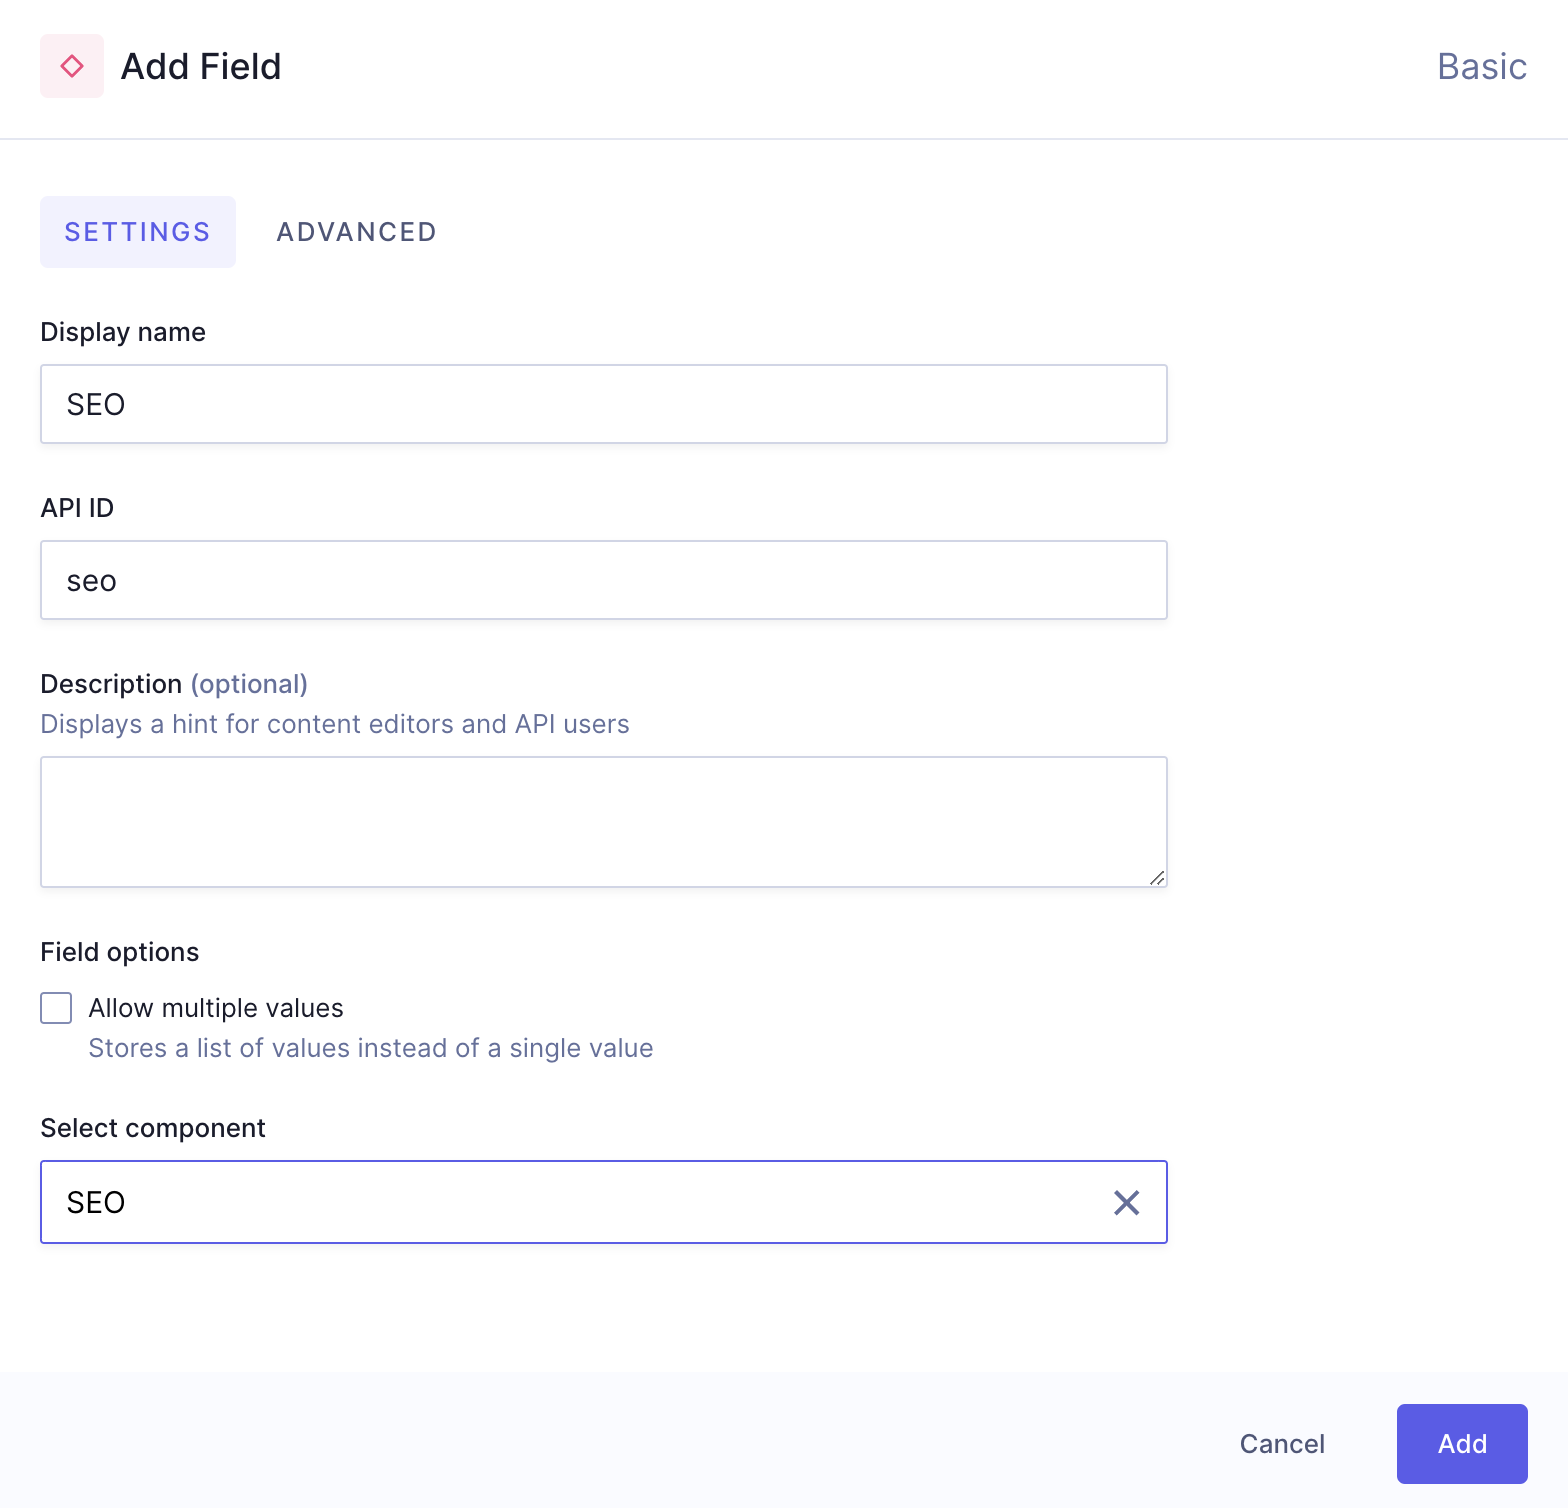 Complete basic component
| Field | Input |
|---|---|
| Display Name | SEO |
| API ID | seo |
| Description | seo |
| Select component | Select SEO from the dropdown |
Click Add to save.
Consider having an SEO component in all relevant models of your future projects to promote discoverability by helping your pages rank higher in search engines.
#Navigation
In previous lessons, we looked into the Navigation model. This model was missing something: We need to be able to add links in order to create our e-commerce website navigation.
Later on, we created the Link component, where we added a reference that related it to the Blog post, Landing page, and Product models. This is the component we will now add to the Navigation model, so we can create the navigation links later.
Let's get into the Navigation model and add a Basic component field using the following information:
 Complete basic component
| Field | Input |
|---|---|
| Display Name | Nav Link |
| API ID | navLink |
| Description | Sections |
| Field options | Select the Allow multiple values checkbox. This will allow us to use it to create the navigation items for our e-commerce. |
| Select component | Select Link from the dropdown |
Click Add to save.
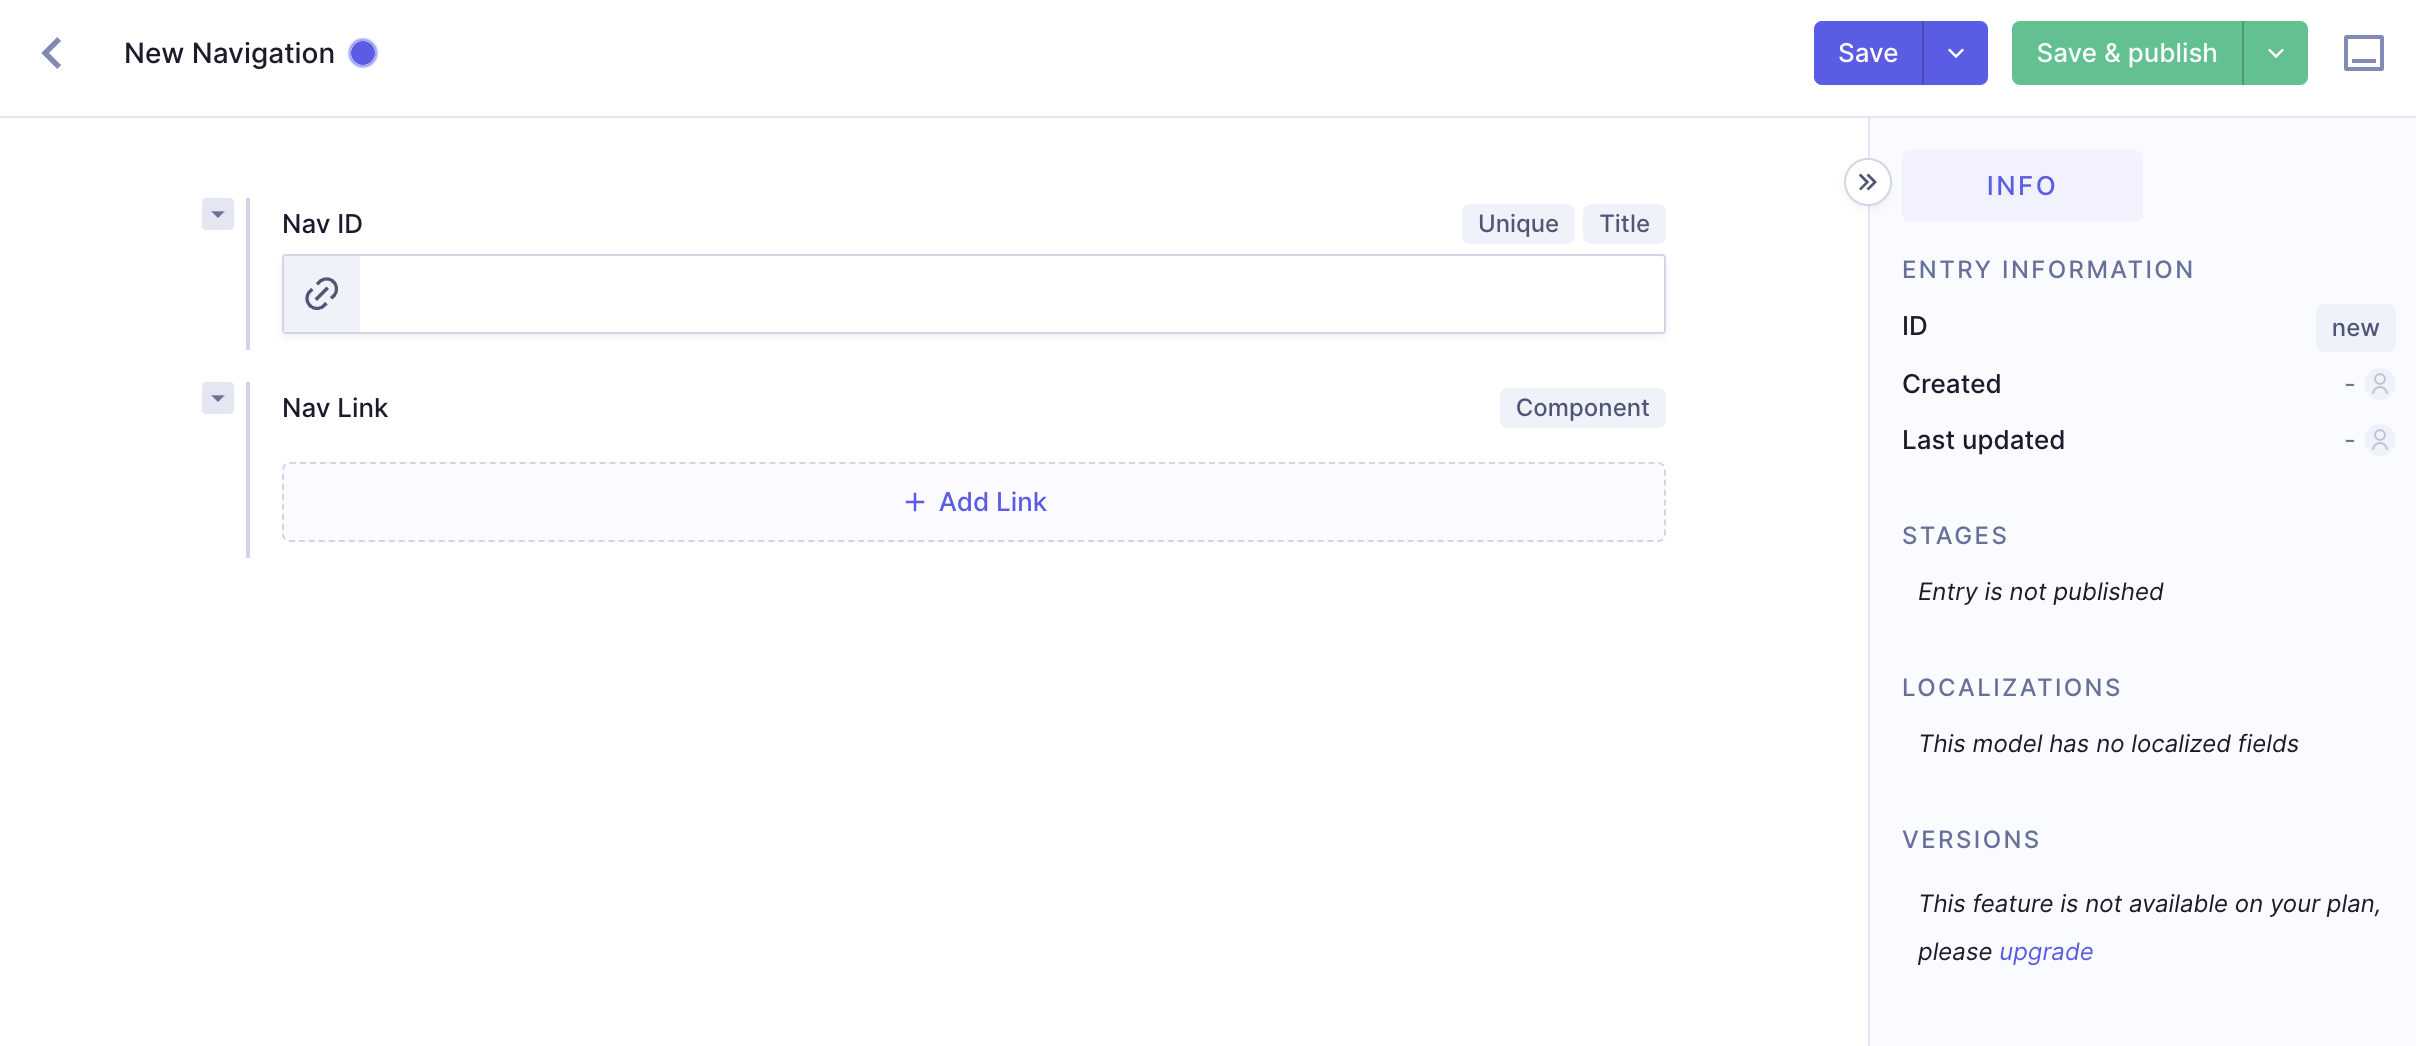
Now that our Navigation model is complete, it should look like this:
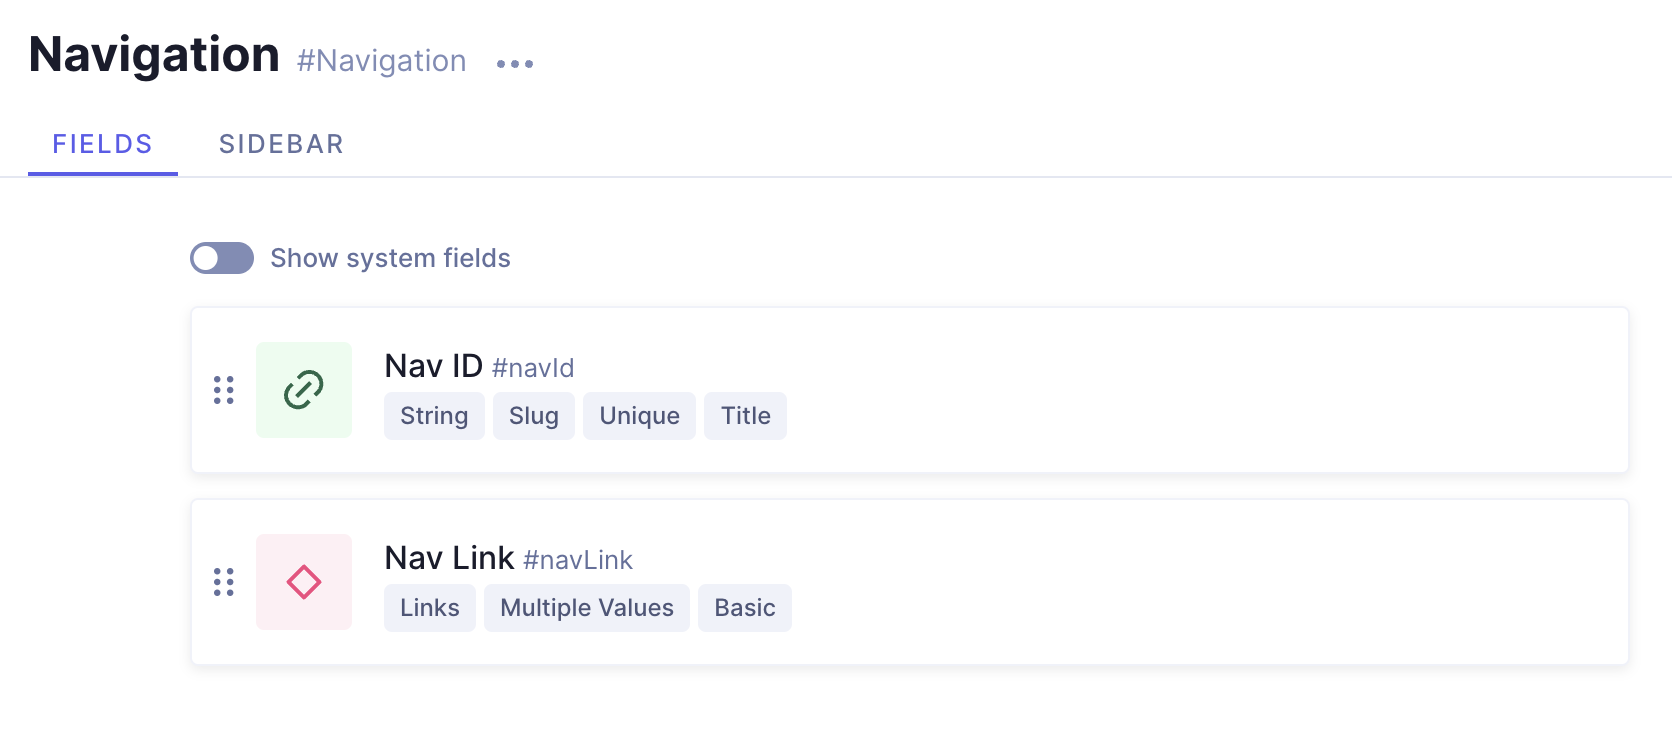 Finished Navigation model
If we go to the content editor, we can see that the Navigation model lets us add references from the models we configured in the Link component, and because we can add multiple values, we can simply add the component as many times as we need to build the list of links that we want our navigation to have.
 Navigation content entry creation
Once you've added all the components to your models, move on to our next lesson:
4.1 Remote Sources